

 Software Tutorial
Office Software
If You Don't Use Excel's Hidden Camera Tool, You're Missing a Trick
Software Tutorial
Office Software
If You Don't Use Excel's Hidden Camera Tool, You're Missing a Trick
If You Don't Use Excel's Hidden Camera Tool, You're Missing a Trick

Quick Links
- Why Use the Camera Tool?
- How to Use Excel's Camera Tool
- Read This Before You Start
Excel's Camera tool lets you take a snapshot of some data in Excel and paste it as an image. Unlike normal images, those you create using the Camera tool are dynamic, meaning they update to reflect any changes in the original data.
Why Use the Camera Tool?
There are many situations where using the Camera tool is a better option than simply copying and pasting the data.
First, let's say you have several tabs of data in your workbook, and you want to create a dashboard that pulls together the key bits of information. Duplicating this key data using the Camera tool means that you can resize and reformat the graphics so that they look impressive on your dashboard. What's more, since data duplicated with the Camera tool is linked to the original data, your dashboard will always be up-to-date with the latest statistics.

Your Excel Spreadsheet Needs a Dashboard: Here's How to Create One
Have your KPIs in one place.
2Second, if you're working with a large dataset and want to keep certain information in sight, creating an image version of that key data means you can easily drag and drop it to the area where you're working.
Finally, duplicating data using the copy-paste method can alter the layout of your worksheets. Instead, when you duplicate the data using the Camera tool, it sits on top of Excel's cells, meaning your spreadsheet's layout isn't affected.
How to Use Excel's Camera Tool
The first step you need to take is to add the Camera button to your Quick Access Toolbar (QAT), since the tool is not visible by default.

6 Quick Access Toolbar Must-Haves in Microsoft Excel
Perform your most valuable Excel commands with a single click.
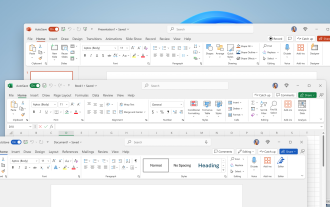
Click the down arrow on the right-hand side of any tab on the ribbon to see if your QAT is enabled. If you see the Hide Quick Access Toolbar option, the QAT is already activated. On the other hand, if you see the Show Quick Access Toolbar option, click it to activate your QAT.

Next, click the QAT down arrow and select "More Commands."

Now, select "All Commands" in the Choose Command From menu, and scroll to and select "Camera." Next, click "Add" to add it to your QAT. Then, click "OK."

You will now see the Camera icon in your QAT.

You're now ready to use the Camera tool to capture some data.
Let's say you want to duplicate data entered into a range of cells. To do this, select the relevant cells, and click the "Camera" icon you just added to your QAT. Excel will then surround your data with a dotted line to indicate that it has been added to the Camera tool's clipboard.
Consider removing the gridlines and filter buttons from your data before capturing it with the Camera tool. Hiding the gridlines will make the image appear tidier, and since the filter buttons won't be active in the pasted picture, there's no need for them to be present.

Then, go to the location where you want the data to be duplicated, such as a new tab in your workbook, and single-click to paste the copied data. Since Excel treats this as an image, you can use the handles to resize the graphic and the Picture Format tab on the ribbon to present the snapshot exactly as you want.

To capture something that is not attached to cells, like an Excel chart, select the cells behind and around the object before clicking the Camera icon. This will copy the selected cells and everything in front of them. Remember to remove the gridlines to improve the presentation of the data you're capturing.

Regardless of what you capture using Excel's camera tool, any changes you make to the original data will be reflected in the duplicated picture version.

5 Excel Quick Tips You Didn’t Know You Needed
They could transform how you organize and visualize your data.
2Read This Before You Start
Before you go ahead and make use of Excel's Camera tool, here are some additional points you should note:
- As well as using the Camera tool to duplicate data within the same workbook, you can also copy the data into a different workbook. Providing you've signed in to your Microsoft account and activated AutoSave, the duplicated image will remain linked to the original data, meaning any changes you make to the original version will be reflected in the copied version.
- After selecting your data and clicking the Camera icon, you can reproduce it in another program, like Word or Outlook, by pressing Ctrl V. Note, however, that the duplicated data will no longer be linked to the original data. Also, rather than being processed as an image, it will be pasted as editable data.
- If you envisage expanding the size of the pasted picture version of your data, before you select the data and click the Camera icon, zoom into your Excel sheet using the slider in the bottom-right corner of the Excel window, so that the data you're about to capture fills your screen. Taking this step will help you ensure your pasted image is high quality and not pixelated.
As you've seen in this guide, using Excel's Camera tool means you can see the same data in two places at the same time. Another way to work on two parts of an Excel file simultaneously is to use the New Window tool, which creates a duplicate of the same workbook.
The above is the detailed content of If You Don't Use Excel's Hidden Camera Tool, You're Missing a Trick. For more information, please follow other related articles on the PHP Chinese website!

Hot AI Tools

Undress AI Tool
Undress images for free

Undresser.AI Undress
AI-powered app for creating realistic nude photos

AI Clothes Remover
Online AI tool for removing clothes from photos.

Clothoff.io
AI clothes remover

Video Face Swap
Swap faces in any video effortlessly with our completely free AI face swap tool!

Hot Article
Hot Tools

Notepad++7.3.1
Easy-to-use and free code editor

SublimeText3 Chinese version
Chinese version, very easy to use

Zend Studio 13.0.1
Powerful PHP integrated development environment

Dreamweaver CS6
Visual web development tools

SublimeText3 Mac version
God-level code editing software (SublimeText3)


 How to use the XLOOKUP function in Excel?
Aug 03, 2025 am 04:39 AM
How to use the XLOOKUP function in Excel?
Aug 03, 2025 am 04:39 AM
XLOOKUP is a modern function used in Excel to replace old functions such as VLOOKUP. 1. The basic syntax is XLOOKUP (find value, search array, return array, [value not found], [match pattern], [search pattern]); 2. Accurate search can be realized, such as =XLOOKUP("P002", A2:A4, B2:B4) returns 15.49; 3. Customize the prompt when not found through the fourth parameter, such as "Productnotfound"; 4. Set the matching pattern to 2, and use wildcards to perform fuzzy search, such as "Joh*" to match names starting with Joh; 5. Set the search mode
 how to add page numbers in word
Aug 05, 2025 am 05:51 AM
how to add page numbers in word
Aug 05, 2025 am 05:51 AM
To add page numbers, you need to master several key operations: First, select the page number position and style through the "Insert" menu. If you start from a certain page, you need to insert the "section break" and cancel the "link to the previous section"; second, set the "Home page different" to hide the home page number, check this option in the "Design" tab and manually delete the home page number; third, modify the page number format such as Roman numerals or Arabic numerals, and select and set the starting page number in the "Page Number Format" after sectioning.
 How to add transitions between slides in a PPT?
Aug 11, 2025 pm 03:31 PM
How to add transitions between slides in a PPT?
Aug 11, 2025 pm 03:31 PM
Open the "Switch" tab in PowerPoint to access all switching effects; 2. Select switching effects such as fade in, push, erase, etc. from the library and click Apply to the current slide; 3. You can choose to keep the effect only or click "All Apps" to unify all slides; 4. Adjust the direction through "Effect Options", set the speed of "Duration", and add sound effects to fine control; 5. Click "Preview" to view the actual effect; it is recommended to keep the switching effect concise and consistent, avoid distraction, and ensure that it enhances rather than weakens information communication, and ultimately achieve a smooth transition between slides.
 How to create a photo collage on a single PPT slide?
Aug 03, 2025 am 03:32 AM
How to create a photo collage on a single PPT slide?
Aug 03, 2025 am 03:32 AM
InsertphotosviatheInserttab,resizeandarrangethemusingAligntoolsforneatpositioning.2.Optionally,useatableorshapesasalayoutguidebyfillingcellsorshapeswithimagesforastructuredgrid.3.Enhancevisualsbyapplyingconsistentstyles,effects,andbackgroundoverlaysf
 Complete guide to collaborate in Word and Real Time Co -authorship
Aug 17, 2025 am 01:24 AM
Complete guide to collaborate in Word and Real Time Co -authorship
Aug 17, 2025 am 01:24 AM
Microsoft Word CollolaBate: How to work with co -authors in Word, edit in real time and manage versions easily.
 How to customize the tapes in Office step by step
Aug 22, 2025 am 06:00 AM
How to customize the tapes in Office step by step
Aug 22, 2025 am 06:00 AM
Learn to customize the tapes in Office: Change names, hide chips and create your own commands.
 How AI Will Give Superpowers To ERP Solutions
Aug 29, 2025 am 07:27 AM
How AI Will Give Superpowers To ERP Solutions
Aug 29, 2025 am 07:27 AM
Artificial intelligence holds the key to transforming ERP (Enterprise Resource Planning) systems into next-generation powerhouses—equipping organizations with what can only be described as digital superpowers. This shift isn't just a minor upgrade; i
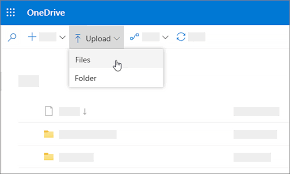 How to Create Folders and Files in OneDrive
Aug 03, 2025 am 04:39 AM
How to Create Folders and Files in OneDrive
Aug 03, 2025 am 04:39 AM
Before you can upload files and folders to OneDrive, it's important to understand how to create them in the first place.Once your files are successfully saved to OneDrive, organizing them effectively can greatly improve your workflow. Below are step-
