
Java Virtual Machine (JVM) is a program that ensures Java apps can run on any machine. However, there can sometimes be problems with the JVM that frustrate developers and upset users. If you have trouble with the JVM, don’t worry. This guide will show easy steps to fix the Java Virtual Machine Launcher error.
Java Virtual Machine uses Java bytecode, which translates the version of the original Java code. The launcher is the one that starts and sets up the JVM with the right memory, security, and other settings. If you have issues with the JVM launcher, the methods mentioned below can help you fix them.
When you run a Java program with administrator privileges, it gets access to the system resources without issues, which helps avoid problems with files, settings, and security. Here’s how you can do it:
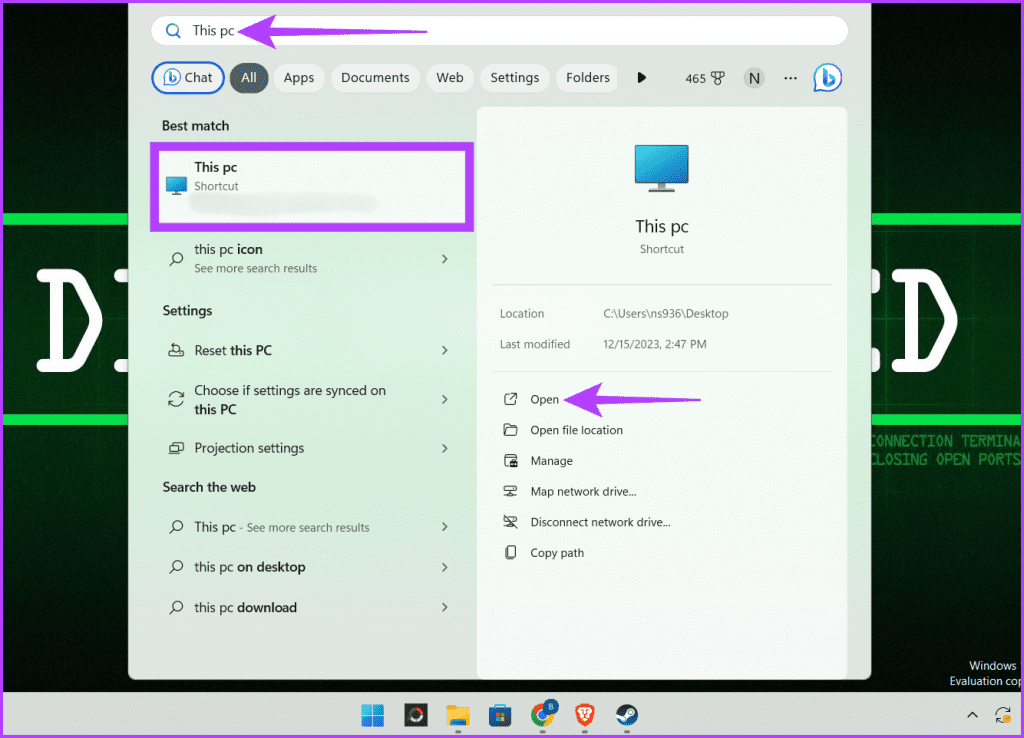
Step 1: Press Windows S on your keyboard, type This PC, and click Open.
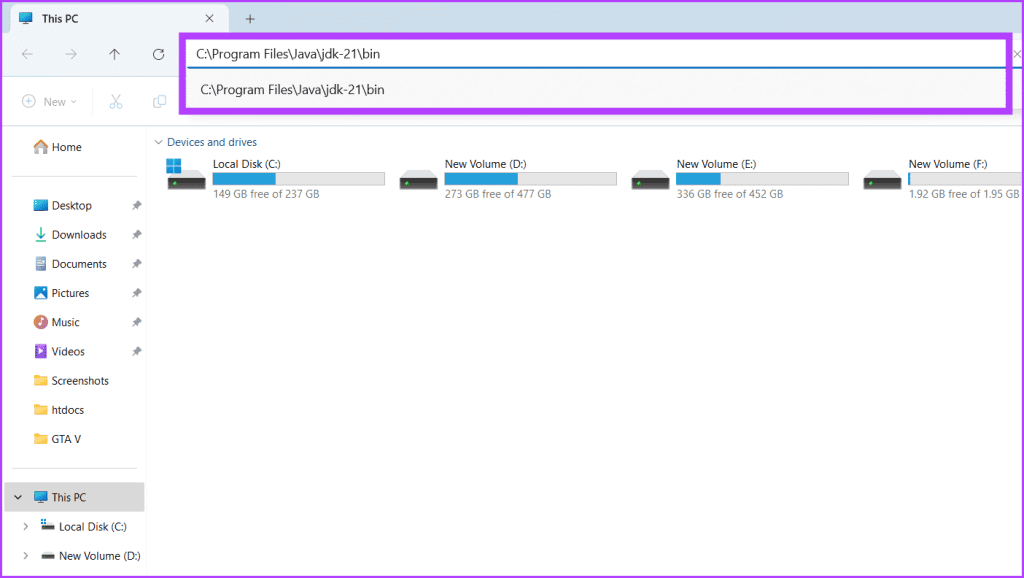
Step 2: Paste the following in the address bar and hit Enter.
C:\Program Files\Java\jdk-21\bin
Note: If you’ve installed Java at a different location, head there.
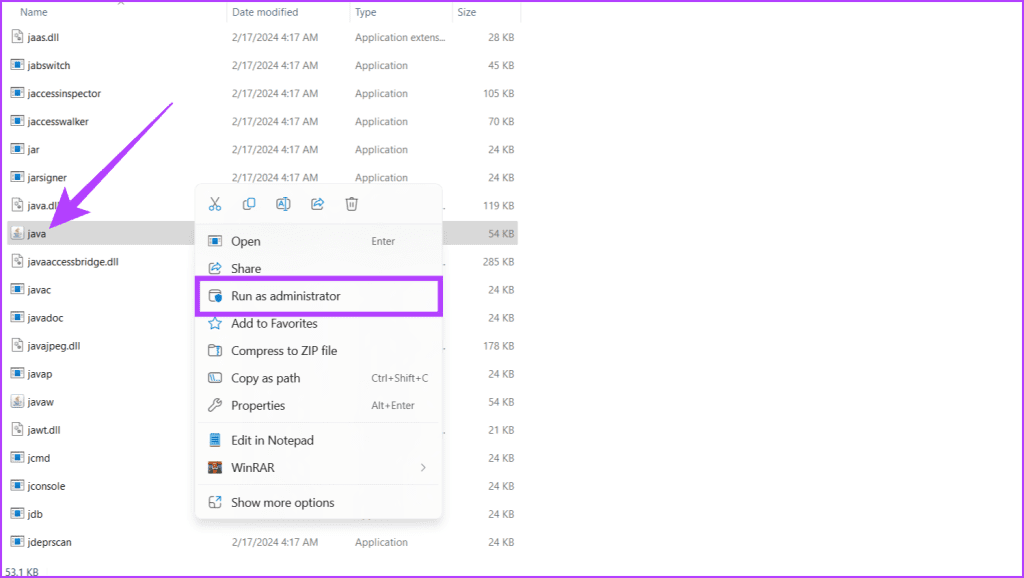
Step 3: Locate the Java app, right-click on it, and choose Run as administrator.
Ensuring that the Java Runtime Environment (JRE) or Java Development Kit (JDK) is correctly installed on the system serves as a crucial initial step when addressing the “Could Not Create the Java Virtual Machine” error on Windows. Moreover, it also checks if all the necessary components are in place.
Verifying the installation involves checking the system’s PATH environment variable to confirm that it includes the correct Java directory. Adhere to the steps below to check if Java is correctly installed on your device:
Step 1: Click the Start icon, type Command Prompt, and click Run as administrator. When prompted, click Yes.

Step 2: In the cmd window, write the command below and hit Enter to run it.
java --version

If found, this command will now check for a Java installation and display its version and installation path. If you see information about a Java version and its path, rest assured that Java is correctly installed on your Windows device.
Also Read: How to open Command Prompt on Windows 11
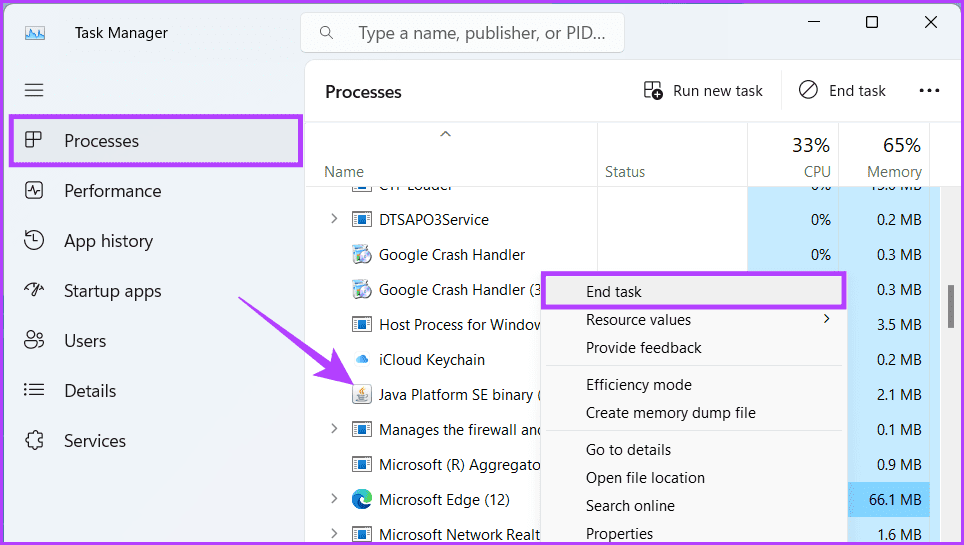
When confronted with the perplexing failed to launch Java Virtual Machine error, one of the quick fixes is to check if the Java process is running in the background. If so, end them. Here’s how:
Step 1: Launch Task Manager by pressing the Ctrl Shift Esc keys on your keyboard. Ensure to be in the Processes tab.
Step 2: Locate all the Java programs under Background Processes. Right-click on them and click End Task to close the process.
Step 3: Repeat the process until all the Java processes are terminated.
Sometimes, the culprit behind your Java Virtual Machine (JVM) Launcher woes isn’t the JVM but the software running in the background. These can be antivirus programs, firewalls, or other applications. Disabling them temporarily can expose the true source of the conflict.
If the JVM Launcher launches flawlessly after turning off a specific program, rest assured that you’ve identified the enemy. Here’s how to disable the apps and processes running in the background:
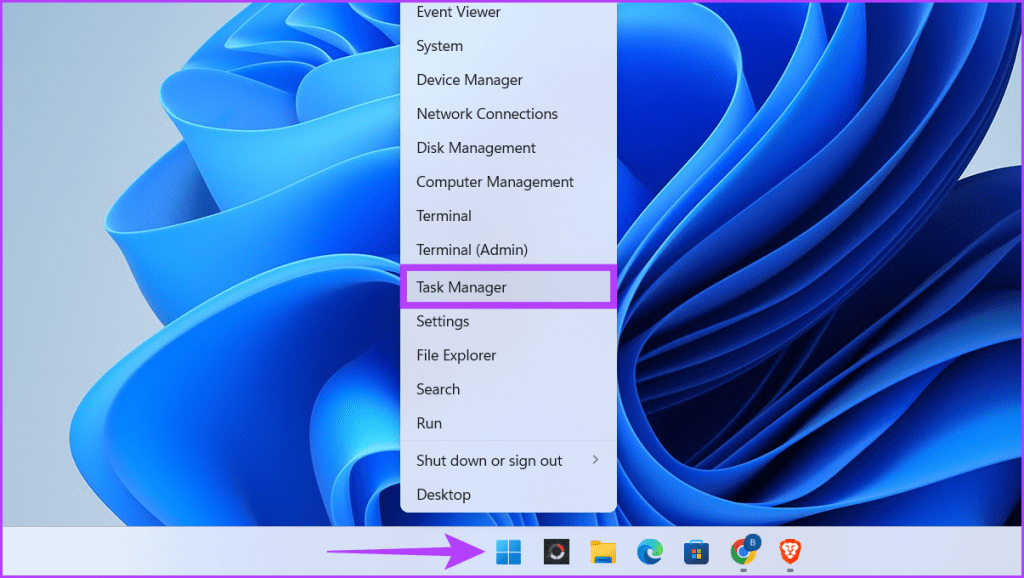
Step 1: Right-click on the Windows icon and select Task Manager.
Step 2: Ensure that you are in the Process tab. Right-click on the programs you wish to close under the Apps and Background Process section and select End Task.

Once you disable any programs, check if the JVM starts running. If you find the culprit, enable the rest of the programs again.
Also Read: How to open Task Manager on Windows 11.
If you see the “Could not create the Java Virtual Machine” error, your Java program lacks memory. The memory allocated to Java is called Java heap. To fix this, increase the Java heap size. You can change the runtime parameters in Java Runtime Environment Settings or adjust the _JAVA_OPTIONS variable.
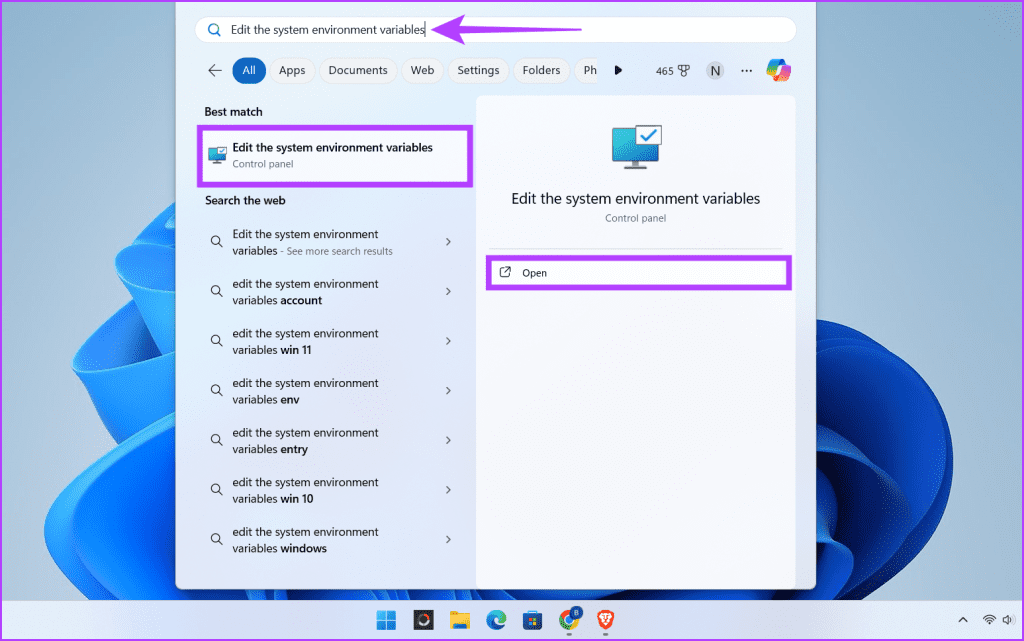
Step 1: Press the Windows S keys, write ‘Edit the system environment variables’, and click Open.
Step 2: Click the Environment Variables button.

Step 3: Under the System Variable section, click on the New button. Enter the following details in the boxes and click OK twice.
Note: -Xmx512M defines that you’ve allocated 512MB of system memory.

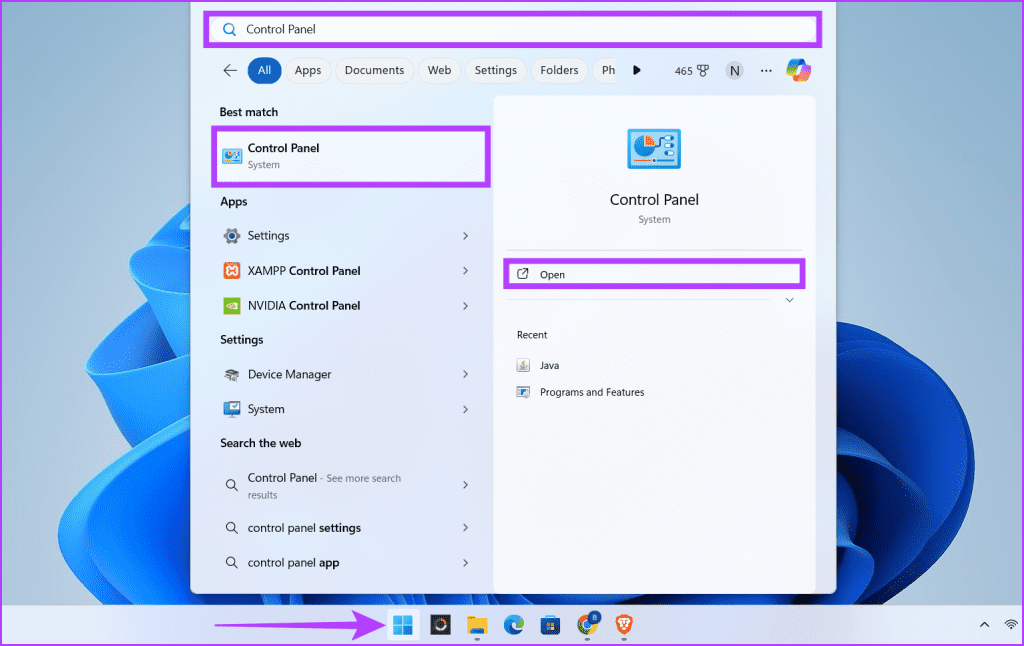
Step 1: Click the Start icon, type Control Panel, and click Open.
Step 2: Navigate to Programs.
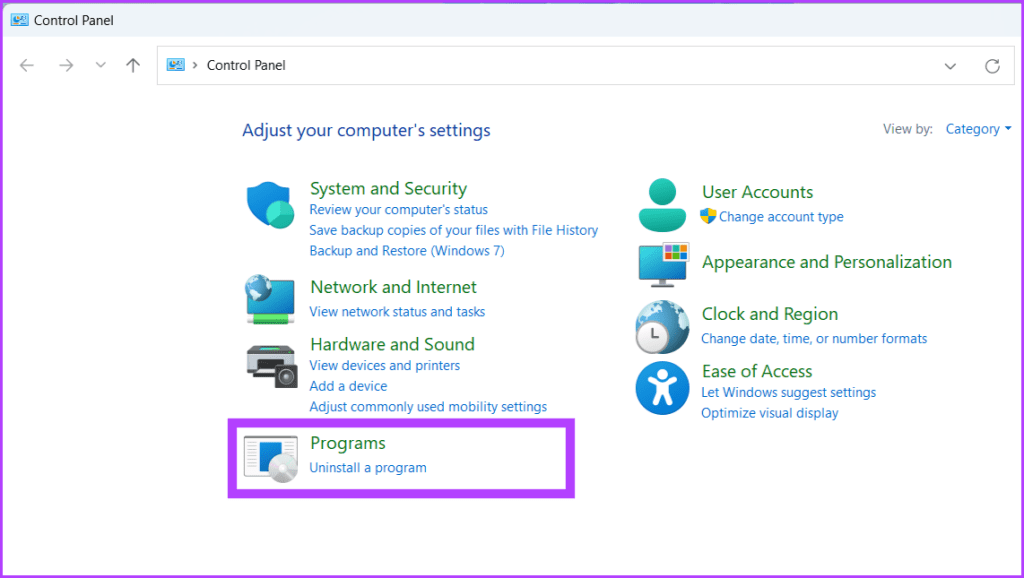
Step 3: Click Java from the options.

Step 4: Head to the Java tab and click the View button.

Step 5: Double-click on the Runtime Parameters column and write -Xmx512m to assign 512MB memory for the Java apps. Finally, click OK to save the changes.

A Java Virtual Machine launcher error could stem from various causes. However, a simple yet surprisingly effective solution is to give your Java installation a fresh start. Uninstalling and reinstalling Java can clear away corrupted files, outdated configurations, and conflicting settings, rebooting the entire engine and giving it a clean slate.
This refresh can resolve issues from incomplete updates, incompatible components, or lingering glitches from previous installations. Here’s how to uninstall Java:
Step 1: Launch a web browser.
Step 2: Head to the Java Uninstall Tool page. Download and install the program.
Step 3: Press the Windows icon, type JavaUninstallTooll in the search box, and click Open. Select Yes when prompted.

Step 4: Click the Agree button to initiate the uninstall process. Choose Yes when prompted to continue.
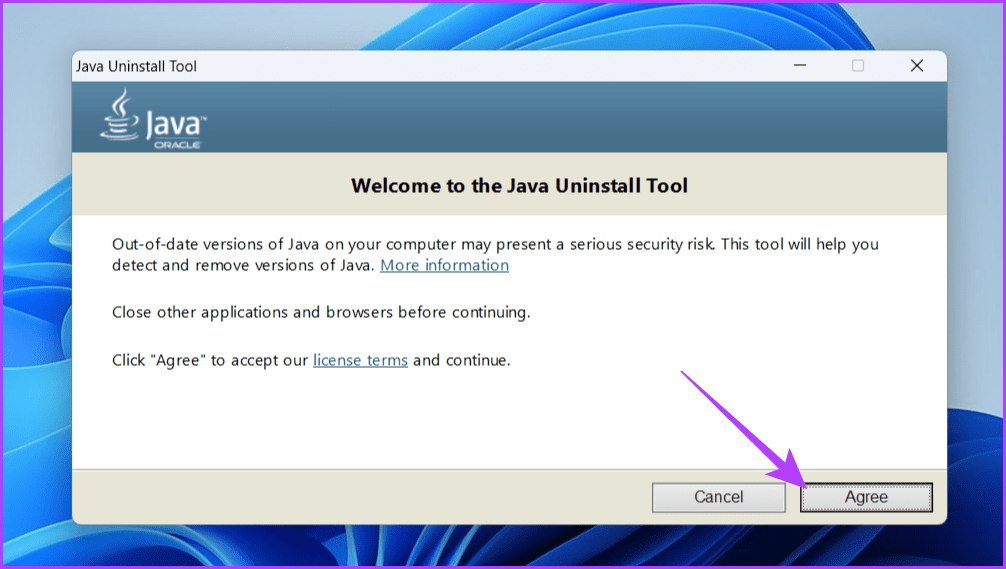
Step 5: Select the Java version you want to uninstall and click Next. Confirm by pressing Yes in the pop-up.

Step 6: Press Yes when asked to remove the Java Deployment Cache.
Note: It helps you free up some space on your device.

Step 7: The JVM is now uninstalled. Now, to reinstall the Java Virtual Machine, click the Get Java button.
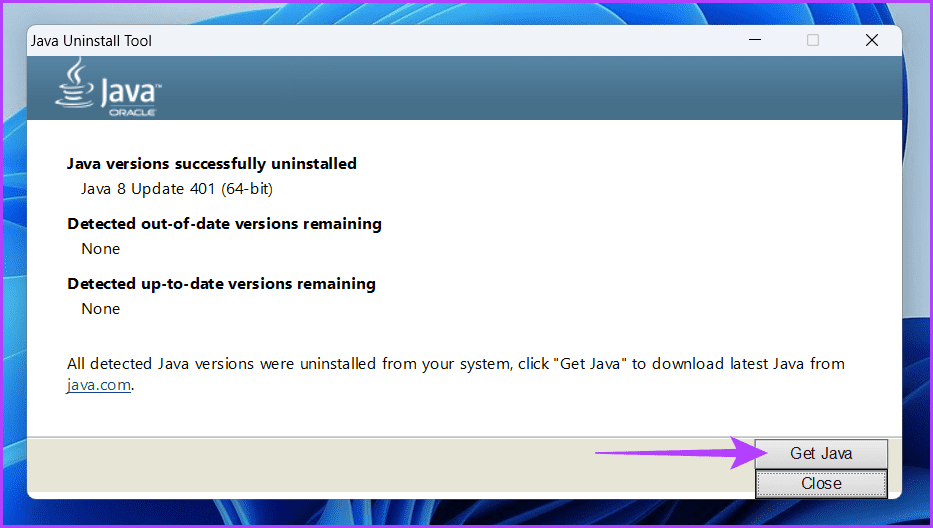
Step 8: Download and install the Java files.
Performing a clean boot on your Windows PC might be the hidden key to unlocking a smooth Java experience. A clean boot temporarily disables non-essential programs and services, creating a pristine environment for software installation.
This can help isolate if conflicting background processes hinder Java’s installation or launch. To do so, open your Windows device in a clean boot state and install the Java Virtual Machine.
Java is a widely used programming language. It works on many different operating systems and devices. The Java Virtual Machine is a program that runs Java code. If there’s an issue with the data or code being processed by the JVM, you might see a Java virtual machine launcher error. We hope the methods above helped you fix the Java Virtual Machine error.
The above is the detailed content of 7 Ways to Fix Java Virtual Machine Launcher Error on Windows. For more information, please follow other related articles on the PHP Chinese website!


