Beginners who are new to FoxMail may be confused about how to set up automatic reply emails. In order to help the majority of novices solve this problem, PHP editor Yuzai specially compiled a detailed guide to teach you step by step how to easily let FoxMail automatically reply to emails. If you are also interested in this feature, you may wish to continue reading this article to learn more about how to set up automatic reply emails in FoxMail.
How to set up automatic reply email in FoxMail? How to set up automatic reply to emails in FoxMail
1. First open foxmail, as shown in the picture.

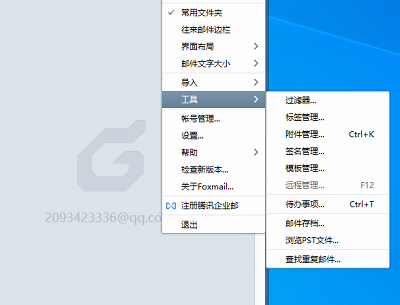
2. After entering, click the three dots on the upper right, as shown in the picture.

3. Click Tool Selection-Filter, as shown in the picture.

4. Click the New option above, as shown in the picture.

5. Set the name as automatic reply, set the execution time to when receiving the email, and set the condition to I am among the recipients, as shown in the picture.

6. Set the action below as an automatic reply. The text input email has been received (the reply text can be customized), as shown in the picture.

7. Finally, click Execute Now below to complete, as shown in the picture.

The above is the detailed content of How to set up automatic reply to emails in FoxMail How to set up automatic reply to emails in FoxMail. For more information, please follow other related articles on the PHP Chinese website!
 Computer 404 error page
 Solution to the Invalid Partition Table prompt when Windows 10 starts up
 How to solve the problem of missing ssleay32.dll
 How to set IP
 How to open state file
 Why is the mobile hard drive so slow to open?
 What are the basic units of C language?
 What platform is Kuai Tuan Tuan?


