
New project and header file problems For programmers who use Microsoft Visual Studio, creating new projects and header files is a common operation, but sometimes they encounter difficulties. This article is carefully compiled by PHP editor Xigua. It will introduce the detailed steps of creating a new project and header file in Microsoft Visual Studio to help you easily solve this problem. Continue reading this article to learn exactly how.
How to create a new project and header file in Microsoft Visual Studio? How to create a new project and header file in Microsoft Visual Studio
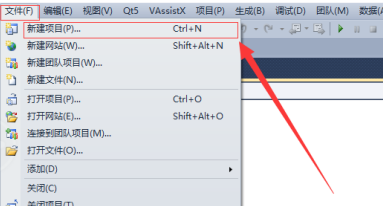
Left-click the file button in the menu bar and click the "New Project" option. You can also use the keyboard shortcut "ctrl+N" to create a new project;

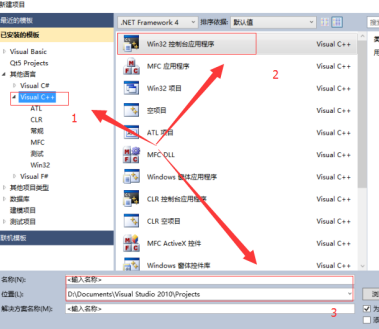
Click the "Visual C++" menu option in the installed template, select the Win32 console application, modify the project name and storage location and click the "OK" button;
In "Welcome to Win32 Applications" Click the "Next" button directly in "Program Wizard";
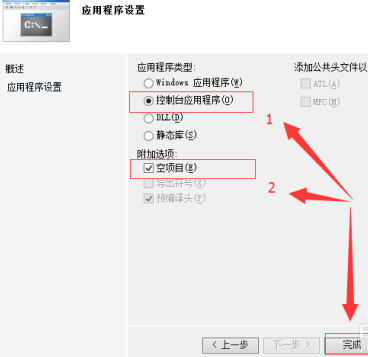
Select "Console Application" and "Empty Project" in "Application Settings" and click the "Finish" button;
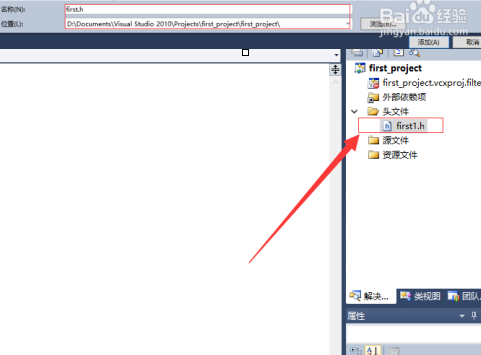
This is empty The project is established. In the right column (or left column) "Solution Explorer", select the "Header File" or "Source File" folder to create the header file, select "Add" and select "New Item";

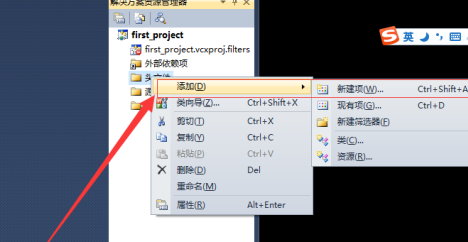
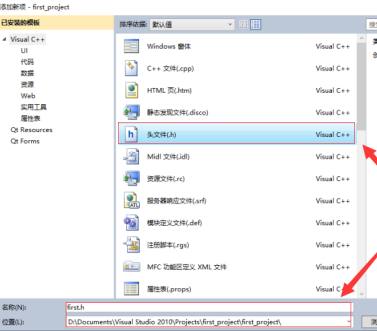
Select the corresponding .h file, name it, click the "Add" button to complete the header file creation;
The above is the detailed content of How to create a new project and header file in Microsoft Visual Studio How to create a new project and header file in Microsoft Visual Studio. For more information, please follow other related articles on the PHP Chinese website!


