Does the freeze-frame effect of VideoStudio give you a headache? PHP editor Xiaoxin will reveal this problem for you one by one. Freeze frames can make your videos more expressive and visually impactful, allowing you to highlight key moments in a unique way. Below, we will delve into the detailed steps of creating freeze-frame effects in VideoStudio, from concept introduction to operation guide, to help you easily master this practical technique.
The first step is to run the VideoStudio video editing software, and then add the prepared video material to the video track. Click the [Play] button to let the video play to the place you want to freeze, then click the [Snapshot] function option in [Edit] to save the frame of the current screen to a file called [Image] in the [Image Library].

The second step is to click the [Scissors] shape button in the lower right corner of the video preview box to divide the video into two pieces.

The third step is to drag the [Image] file saved in the first step to the video track, and the position is in the middle of the two videos just split.

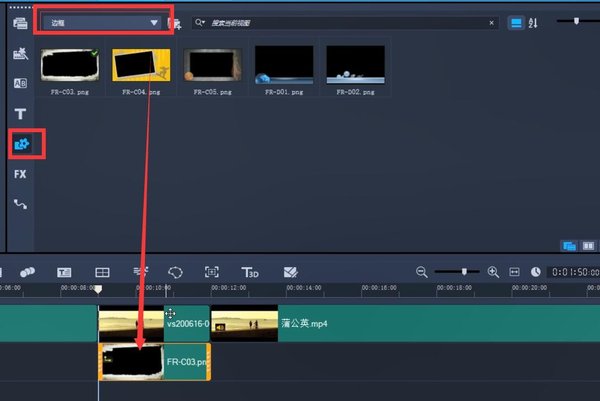
The fourth step is to click [Graphic] to expand the drop-down menu and select [Border]. Then drag this [Border] to the overlay track, corresponding to the position of [Freeze Frame], and set [Duration Play Time] to the playback time of the freeze frame.

The fifth step, in order to make the video effect richer, you can also add a transition effect to the freeze frame, select the [page turning] effect, and add it to the back of the freeze frame.

The above is the detailed content of How to create a freeze-frame effect in VideoStudio_Tutorial on creating a freeze-frame effect in VideoStudio. For more information, please follow other related articles on the PHP Chinese website!


