主要实现功能:
- 登陆网页
- 动态等待网页加载
- 验证码下载
很早就有一个想法,就是自动按照脚本执行一个功能,节省大量的人力——个人比较懒。花了几天写了写,本着想完成验证码的识别,从根本上解决问题,只是难度太高,识别的准确率又太低,计划再次告一段落。
希望这次经历可以与大家进行分享和交流。
Python打开浏览器
相比与自带的urllib2模块,操作比较麻烦,针对于一部分网页还需要对cookie进行保存,很不方便。于是,我这里使用的是Python2.7下的selenium模块进行网页上的操作。
测试网页:http://graduate.buct.edu.cn
打开网页:(需下载chromedriver)
为了支持中文字符输出,我们需要调用sys模块,把默认编码改为 UTF-8
<code class="hljs python">from selenium.webdriver.support.ui import Select, WebDriverWait
from selenium import webdriver
from selenium import common
from PIL import Image
import pytesser
import sys
reload(sys)
sys.setdefaultencoding('utf8')
broswer = webdriver.Chrome()
broswer.maximize_window()
username = 'test'
password = 'test'
url = 'http://graduate.buct.edu.cn'
broswer.get(url)</code>等待网页加载完毕
使用的是selenium中的WebDriverWait,上面的代码中已经加载
<code class="hljs livecodeserver">url = 'http://graduate.buct.edu.cn'
broswer.get(url)
wait = WebDriverWait(webdriver,5) #设置超时时间5s
# 在这里输入表单填写并加载的代码
elm = wait.until(lambda webdriver: broswer.find_element_by_xpath(xpathMenuCheck))</code>
元素定位、字符输入
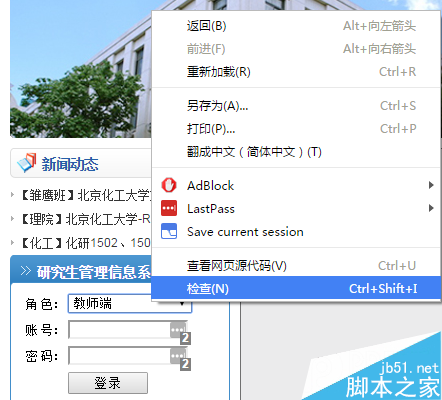
接下来我们需要进行登录操作:这里我使用的是Chrome,右键选择需要进行填写内容的部分,选择检查,会自动转跳到 F12下的开发者模式(全程需要这个功能来找到相关的资源)。

vczKprbLJnJkcXVvO9Gh1PHT0LnYtcSyv7fWPGJyIC8+DQo8aW1nIGFsdD0="这里写图片描述" src="http://www.jb51.net/uploadfile/Collfiles/20160414/20160414092144893.png" title="\" />
这里我们看到有一个value = “1”,考虑到下拉框的属性,我们只要想办法把这个value赋值给UserRole就好了。
这里使用的是通过selenium的Select模块来进行选择,定位控件使用 find_element_by_**,能一一对应,很方便。
<code class="hljs sql">select = Select(broswer.find_element_by_id('UserRole'))
select.select_by_value('2')
name = broswer.find_element_by_id('username')
name.send_keys(username)
pswd = broswer.find_element_by_id('password')
pswd.send_keys(password)
btnlg = broswer.find_element_by_id('btnLogin')
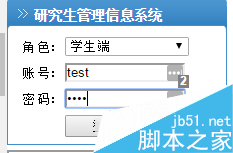
btnlg.click()</code>这是用脚本自动填充完的效果,之后就会转跳到下一页。

这里,我需要的是功能是自动对学术报告进行报名

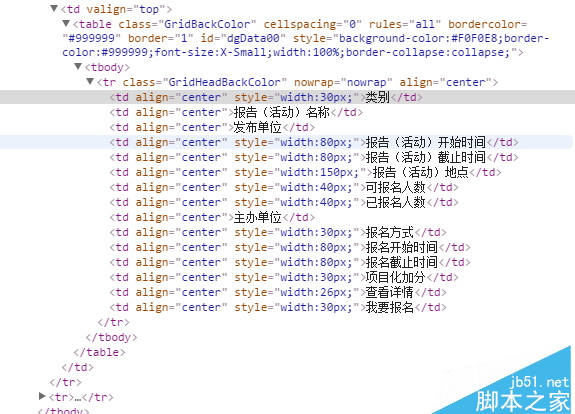
对需要已有的报告右键即可发现和这个活动有关的消息,因现在没有报告,所以只显示了标题,但对于后面的有效报告识别有相似的地方。

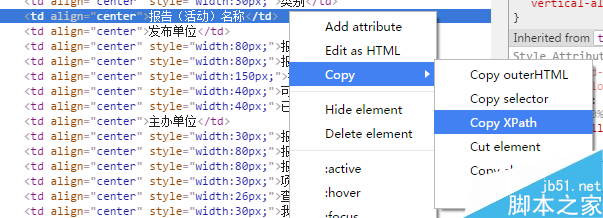
对于元素的定位,我优先选择了 xpath,根据测试,可以唯一定位一个元素的位置,很好用。
<code class="hljs perl">//*[@id="dgData00"]/tbody/tr/td[2] (前面是xpath)</code>

爬取信息
接下来我们要进行的步骤是爬取现有的有效报告:
<code class="hljs axapta"># 寻找有效报告
flag = 1
count = 2
count_valid = 0
while flag:
  try:
    category = broswer.find_element_by_xpath('//*[@id="dgData00"]/tbody/tr[' + str(count) + ']/td[1]').text
    count += 1
  except common.exceptions.NoSuchElementException:
    break
# 获取报告信息
flag = 1
for currentLecture in range(2, count):
  # 类别
  category = broswer.find_element_by_xpath('//*[@id="dgData00"]/tbody/tr[' + str(currentLecture) + ']/td[1]').text
  # 名称
  name = broswer.find_element_by_xpath('//*[@id="dgData00"]/tbody/tr[' + str(currentLecture) + ']/td[2]').text
  # 单位
  unitsPublish = broswer.find_element_by_xpath('//*[@id="dgData00"]/tbody/tr[' + str(currentLecture) + ']/td[3]').text
  # 开始时间
  startTime = broswer.find_element_by_xpath('//*[@id="dgData00"]/tbody/tr[' + str(currentLecture) + ']/td[4]').text
  # 截止时间
endTime = broswer.find_element_by_xpath('//*[@id="dgData00"]/tbody/tr[' + str(currentLecture) + ']/td[5]').text</code>爬取验证码

对网页中的验证码进行元素审查后,我们发现了其中的一个一个链接,是 IdentifyingCode.apsx,后面我们就对这个页面进行加载,并批量获取验证码。

爬取的思路是用selenium截取当前页面(仅显示部分),并保存到本地——需要翻页并截取特定位置的请研究:
broswer.set_window_position(**)相关函数;然后人工进行验证码的定位,通过PIL模块进行截取并保存。
最后调用谷歌在Python下的pytesser进行字符识别,但这个网站的验证码有很多的干扰,外加字符旋转,仅仅能识别其中的一部分字符。
<code class="hljs livecodeserver"># 获取验证码并验证(仅仅一幅)
authCodeURL = broswer.find_element_by_xpath('//*[@id="Table2"]/tbody/tr[2]/td/p/img').get_attribute('src') # 获取验证码地址
broswer.get(authCodeURL)
broswer.save_screenshot('text.png')
rangle = (0, 0, 64, 28)
i = Image.open('text.png')
frame4 = i.crop(rangle)
frame4.save('authcode.png')
qq = Image.open('authcode.png')
text = pytesser.image_to_string(qq).strip()</code>
<code class="hljs axapta"># 批量获取验证码
authCodeURL = broswer.find_element_by_xpath('//*[@id="Table2"]/tbody/tr[2]/td/p/img').get_attribute('src') # 获取验证码地址
# 获取学习样本
for count in range(10):
  broswer.get(authCodeURL)
  broswer.save_screenshot('text.png')
  rangle = (1, 1, 62, 27)
  i = Image.open('text.png')
  frame4 = i.crop(rangle)
  frame4.save('authcode' + str(count) + '.png')
  print 'count:' + str(count)
  broswer.refresh()
broswer.quit()</code>爬取下来的验证码

一部分验证码原图:


从上面的验证码看出,字符是带旋转的,而且因为旋转造成的重叠对于后续的识别也有很大的影响。我曾尝试过使用神经网络进行训练,但因没有进行特征向量的提取,准确率低得离谱。
关于Python爬虫爬验证码实现功能详解就给大家介绍到这里,希望对大家有所帮助!
 Python crawler method to obtain data
 How to restore IE browser to automatically jump to EDGE
 Is java front-end or back-end?
 Wireless network card cannot connect
 How to find the sum of even items in an array in php
 Usage of fscanf function
 How to check MD5 value
 Why the computer keeps restarting automatically


