I am new to node.js, so I will record some processes for future reference. If there are any ambiguities or errors, criticisms and corrections are welcome.
What is Node.js?
I read some articles on the Internet, and my understanding is that the function is similar to apache and can be understood as the server side. However, the implementation mechanism is different, and the concurrency effect is very good. Its goal is to replace the Apache server mechanism.
Okay, let’s start the environment configuration directly:
1, download Node.js
Go directly to the official website to download, http://www.nodejs.org/download/ Select Windows Installer (.msi) version 64 bit. Here you will find a Windows Binary (.exe), which is an independent Node.js environment terminal. You don’t need to install it after downloading it, you can use it directly. I recommend downloading the .msi and then installing it.
2. Install Node.js
Because it is a Win8 system, there will be some problems during installation.
1) Error 2502, Error 2503
When you see this kind of problem, everyone knows that it is because of insufficient permissions. Just use administrator permissions to execute it.
2) Unable to execute .msi file
You can right-click cmd, open the terminal as an administrator, and then execute "msiexec /package node-v0.10.31-x64.msi" to install. It will be OK all the way.
3) How to verify successful installation
cmd to enter the Node.js installation directory, for example, mine is "C:ccnodejs". In this directory, you will see several executable files such as node.exe, npm, etc. If you have already installed the If the path is added to Path, then there is no need to enter the installation directory to execute node.
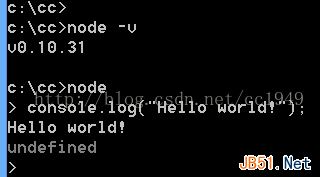
Enter node -v in cmd to view the version;
You can also enter Node mode, and then enter "console.log("Hello world!");" to see if the output is normal, as shown in the figure below:

4) Further verify the server function
Create a new js file, such as test.js, with the following content:
var http = require("http");

http.createServer(
function(req, res) {
 res.writeHead(200, {"Content-Type":"text/html"});
 res.write("<h1>Node.js</h1>");
 res.write("<p>Hello World</p>");
 res.end("<p>This is just testing Node working !!! </p>");
}).listen(3000);

console.log("HTTP server is listening at port 3000.");
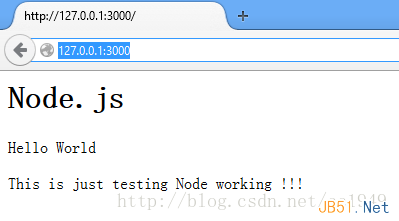
Then execute: node test.js on the command line, as shown below:

You can open http://127.0.0.1:3000/ in the browser to see the output web page result:

OK, if everything is normal so far, it means that the basic functions of Node.js are installed successfully!
But we often need to use other installation packages, such as express, so let’s talk about npm
3. Install npm module
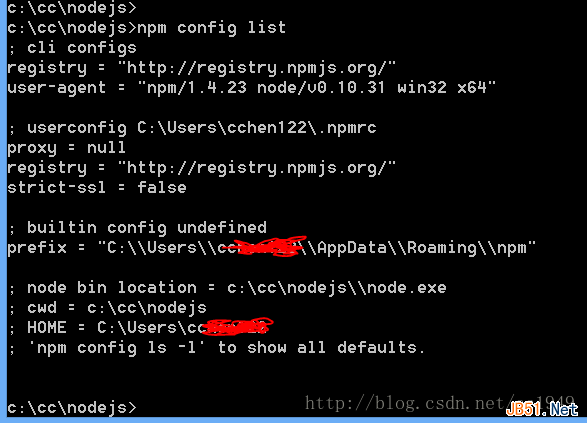
First check the npm config configuration: enter the command npm config list

Here are some explanations that Win8 or Chinese users need to understand and configure as needed:
1) Create a new directory npm in the C:Users***AppDataRoaming directory, otherwise an error will be reported when executing npm install.
2) You can run the following two commands to set up the proxy. Note that the proxy address is changed to the proxy that is actually available to you.
npm config set proxy=http://127.0.0.1:8087(这个是默认的)
npm config set proxy=null (这个是设置成不用proxy)
npm config set registry=http://registry.npmjs.org
3) If you report an error step by step, it is usually an agency problem.
4) If successful, it should be OK to execute npm install express at this time.
4. To install other required modules, just npm install name. Let me mention here that npm supports the installation of self-defined modules. But beginners don’t need to worry about this.
Okay, the Node.js configuration is completed and it’s done.


