

This article mainly introduces the use of the attachment upload component uploadify of the Web development framework based on MVC4+EasyUI. Friends in need can refer to
1. Instructions for the upload component uploadify And script reference
Uploadify is a well-known upload plug-in for JQuery. Using Flash technology, Uploadify overcomes the limitations of the browser and controls the entire upload process, achieving no refresh on the client. File upload, thus realizing the upload progress control on the client, so you must first make sure that Adobe's Flash plug-in has been installed in the browser.
Uploadify currently has two versions, a free one based on Flash, and a paid version based on HTML5. We use the free version, and the current version is v3.2.1.
This component requires the support of the Jquery library. Under normal circumstances, you need to add the Jquery js library, as shown below
But due to my Web development The framework is based on EasyUI. Generally, the relevant class library will be referenced at the beginning of the web page, which already includes the Jquery class library, as shown below.
@*添加Jquery,EasyUI和easyUI的语言包的JS文件*@
So we only need to add the Javascript class library (jquery.uploadify.js) and its style file (uploadify.css):
 @*添加对uploadify控件的支持*@
  @**@
2. Use of the upload component uploadify in the Web interface
First we need to place two There are two controls, one for uploading, one for displaying the uploaded list, and the other is the button operation for adding upload and canceling upload, as shown below.
The interface effect initialization is as follows:

Of course, in the next step we need to add the corresponding file upload initialization The operation script code is as follows.
In the above script, there are comments. You can understand the relevant attributes at a glance. If you don’t understand, you can also go to the official website to find out. It is worth noting that
'uploader': '/FileUpload/Upload'
This line is to submit the file to the MVC Action for processing. We can handle it in the Upload of the controller FileUpload.
In addition, after the attachment is uploaded, we need to update the interface to display the uploaded list, then we need to add the following function processing.
'onQueueComplete': function (event, data) {The last thing to note is that when uploading files, we need to dynamically obtain the values of some elements on the interface and pass them as parameters, then we need Perform the following processing in the onUploadStart function.
$("#file_upload").uploadify("settings", 'formData', { 'folder': '政策法规', 'guid': $("#Attachment_GUID").val() }); //动态传参数3. The C# background processing code of upload component uploadify
is in the above transfer parameters , I used Chinese values. Under normal circumstances, this will result in Chinese garbled characters in the background, so we need to set its content format in the controller's Action function, as shown below.
ControllerContext.HttpContext.Request.ContentEncoding = Encoding.GetEncoding("UTF-8");
ControllerContext.HttpContext.Response.ContentEncoding = Encoding.GetEncoding("UTF-8");
ControllerContext.HttpContext.Response.Charset = "UTF-8";The complete background processing Action code of the controller FileUpload is as follows:
 public class FileUploadController : BaseController
  {
    [AcceptVerbs(HttpVerbs.Post)]
    public ActionResult Upload(HttpPostedFileBase fileData, string guid, string folder)
    {
      if (fileData != null)
      {
        try
        {
          ControllerContext.HttpContext.Request.ContentEncoding = Encoding.GetEncoding("UTF-8");
          ControllerContext.HttpContext.Response.ContentEncoding = Encoding.GetEncoding("UTF-8");
          ControllerContext.HttpContext.Response.Charset = "UTF-8";
          // 文件上传后的保存路径
          string filePath = Server.MapPath("~/UploadFiles/");
          DirectoryUtil.AssertDirExist(filePath);
          string fileName = Path.GetFileName(fileData.FileName);   //原始文件名称
          string fileExtension = Path.GetExtension(fileName);     //文件扩展名
          string saveName = Guid.NewGuid().ToString() + fileExtension; //保存文件名称
          FileUploadInfo info = new FileUploadInfo();
          info.FileData = ReadFileBytes(fileData);
          if (info.FileData != null)
          {
            info.FileSize = info.FileData.Length;
          }
          info.Category = folder;
          info.FileName = fileName;
          info.FileExtend = fileExtension;
          info.AttachmentGUID = guid;
          info.AddTime = DateTime.Now;
          info.Editor = CurrentUser.Name;//登录人
          //info.Owner_ID = OwerId;//所属主表记录ID
          CommonResult result = BLLFactory.Instance.Upload(info);
          if (!result.Success)
          {
            LogTextHelper.Error("上传文件失败:" + result.ErrorMessage);
          }
          return Content(result.Success.ToString());
        }
        catch (Exception ex)
        {
          LogTextHelper.Error(ex);
          return Content("false");
        }
      }
      else
      {
        return Content("false");
      }
    }
    private byte[] ReadFileBytes(HttpPostedFileBase fileData)
    {
      byte[] data;
      using (Stream inputStream = fileData.InputStream)
      {
        MemoryStream memoryStream = inputStream as MemoryStream;
        if (memoryStream == null)
        {
          memoryStream = new MemoryStream();
          inputStream.CopyTo(memoryStream);
        }
        data = memoryStream.ToArray();
      }
      return data;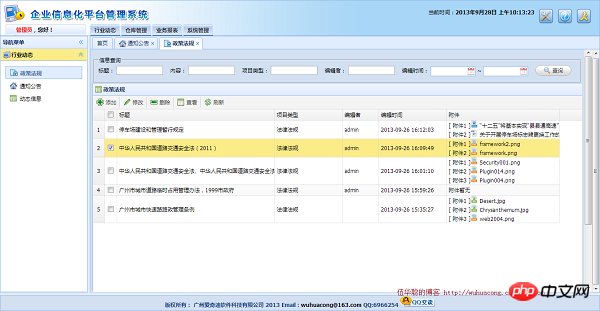
} 4. The interface display of the upload component uploadify in the Web development framework
The specific interface effect of the upload component in the Web development framework is as follows. The following picture is attached to the overall list. exhibit.
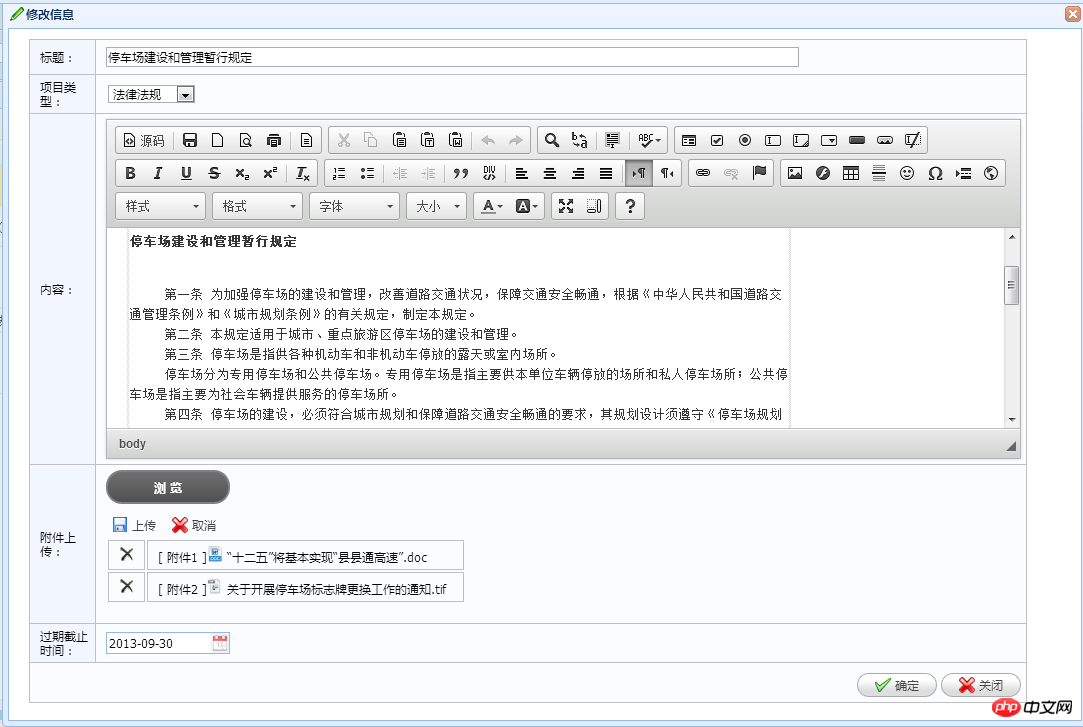
The attachment editing and uploading interface is as shown below.
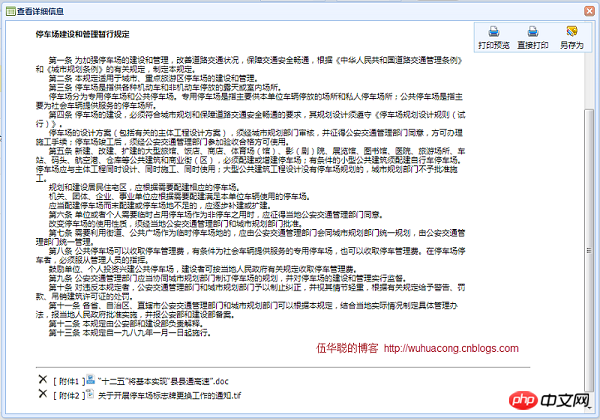
The attachment information viewing effect is as follows:
The above is the detailed content of Develop the use of attachment upload component uploadify based on MVC4+EasyUI. For more information, please follow other related articles on the PHP Chinese website!


![[Web front-end] Node.js quick start](https://img.php.cn/upload/course/000/000/067/662b5d34ba7c0227.png)


