在上一篇《HTML/css实现好玩的文本液体填充效果》中给大家介绍了怎么使用HTML/css实现好玩的文本液体填充效果,感兴趣的朋友可以去学习了解一下~
本文将给大家介绍如何使用HTML和CSS制作玻璃/模糊效果叠加。
具体是什么样的效果呢?
下面我们直接上完整的代码:
<!DOCTYPE HTML>
<html>
<head>
<meta charset="UTF-8">
<title></title>
<link rel="stylesheet" href="https://stackpath.bootstrapcdn.com/bootstrap/4.3.1/css/bootstrap.min.css">
<style>
body {
margin: 0;
padding: 0;
}
section {
position: relative;
background: url(004.jpg);
background-attachment: fixed;
height: 100vh;
}
section .layout {
position: relative;
top: 35%;
left: 30%;
max-width: 600px;
padding: 50px;
box-shadow: 0 10px 20px rgba(0, 0, 0, .5);
color: rgb(255, 254, 254);
}
section .layout::before {
content: '';
position: absolute;
top: 0;
bottom: 0;
left: 0;
right: 0;
background: url(004.jpg);
background-attachment: fixed;
filter: blur(8px);
}
section .layout h2 {
position: relative;
}
section .layout p {
position: relative;
}
section .layout button {
position: relative;
}
</style>
</head>
<body>
<section>
<div class="layout">
<h2>PHP中文网</h2>
<p>
php中文网提供大量免费、原创、高清的php视频教程,并定期举行公益php培训!可边学习边在线修改示例代码,查看执行效果!php从入门到精通,一站式php自学平台!
</p>
<button class="btn btn-outline-danger">
按钮
</button>
</div>
</section>
</body>
</html>效果如下:
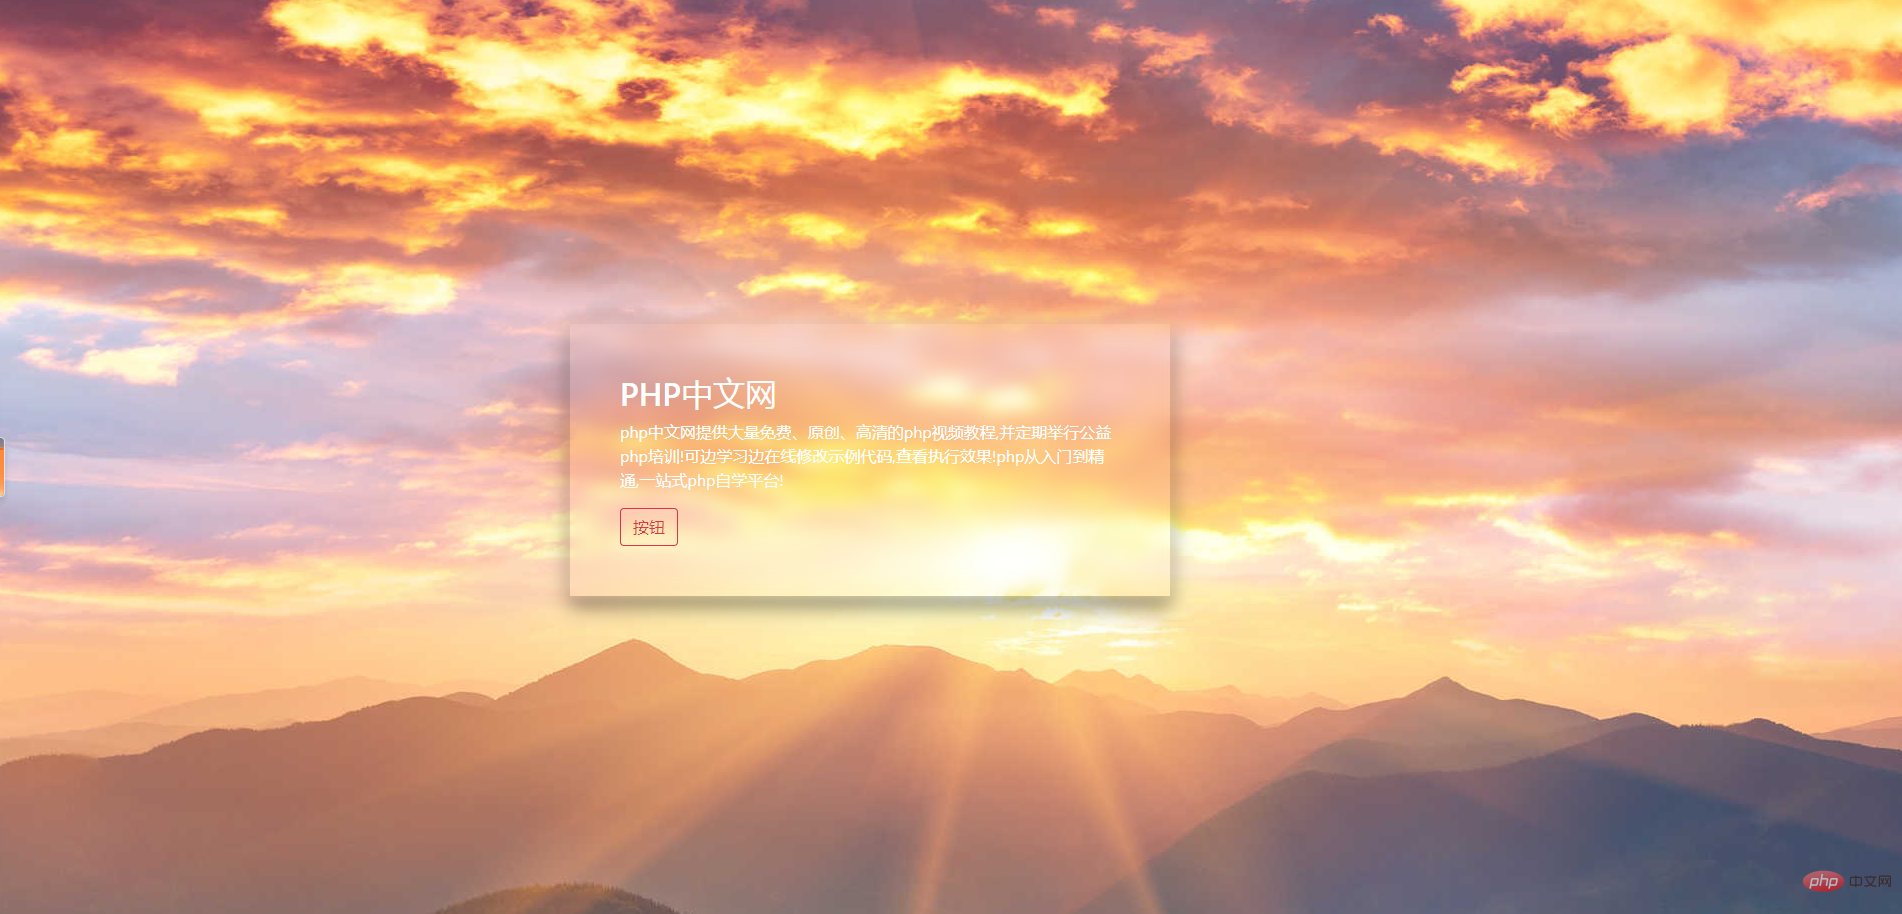
这里主要需要大家掌握filter属性和:before 选择器:
filter属性:
filter属性定义了元素(通常是)的可视效果(例如:模糊与饱和度)。
注:旧版 Internet Explorer 浏览器(4.0 to 8.0) 支持的非标准 "filter" 属性已被废弃。 IE8 及更低版本浏览器通常使用 opacity 属性。
:before 选择器:
:before 选择器在被选元素的内容前面插入内容,要使用 content 属性来指定要插入的内容。
注:对于 IE8 及更早版本中的 :before,必须声明 。
PHP中文网平台有非常多的视频教学资源,欢迎大家学习《css视频教程》《HTML视频教程》!
以上是如何用HTML和CSS制作玻璃/模糊效果?的详细内容。更多信息请关注PHP中文网其他相关文章!
