

在本章中,我们将学习以下与路由相关的主题 -
在本节中,我们将了解如何实现路由、如何将参数从 URL 传递到控制器的操作、如何生成 URL 以及如何重定向到特定 URL。通常,路由在文件 config/routes.php 中实现。路由可以通过两种方式实现 -
这里是一个展示这两种类型的示例。
// Using the scoped route builder.
Router::scope('/', function ($routes) {
   $routes->connect('/', ['controller' => 'Articles', 'action' => 'index']);
});
// Using the static method.
Router::connect('/', ['controller' => 'Articles', 'action' => 'index']);
这两个方法都会执行ArticlesController的index方法。在这两种方法中,作用域路由构建器提供了更好的性能。
Router::connect()方法用于连接路由。以下是该方法的语法 -
static Cake\Routing\Router::connect($route, $defaults =[], $options =[])
Router::connect() 方法有三个参数 -
第一个参数是您要匹配的 URL 模板。
第二个参数包含路由元素的默认值。
第三个参数包含路由的选项,一般包含正则表达式规则。
这是路线的基本格式 -
$routes->connect(
   'URL template',
   ['default' => 'defaultValue'],
   ['option' => 'matchingRegex']
);
在 config/routes.php 文件中进行更改,如下所示。
config/routes.php
<?php
use Cake\Http\Middleware\CsrfProtectionMiddleware;
use Cake\Routing\Route\DashedRoute;
use Cake\Routing\RouteBuilder;
$routes->setRouteClass(DashedRoute::class);
$routes->scope('/', function (RouteBuilder $builder) {
   // Register scoped middleware for in scopes.
      $builder->registerMiddleware('csrf', new CsrfProtectionMiddleware([
      'httpOnly' => true,
   ]));
   $builder->applyMiddleware('csrf');
   $builder->connect('/', ['controller' => 'Tests', 'action' => 'show']);
   $builder->connect('/pages/*', ['controller' => 'Pages', 'action' => 'display']);
   $builder->fallbacks();
});
在 src/Controller/TestsController.php 创建 TestsController.php 文件。 将以下代码复制到控制器文件中。
src/Controller/TestsController.php
<?php
declare(strict_types=1);
namespace App\Controller;
use Cake\Core\Configure;
use Cake\Http\Exception\ForbiddenException;
use Cake\Http\Exception\NotFoundException;
use Cake\Http\Response;
use Cake\View\Exception\MissingTemplateException;
class TestsController extends AppController {
   public function show()
   {
   }
}
在src/Template下创建一个文件夹Tests,并在该文件夹下创建一个名为show.php的视图文件。将以下代码复制到该文件中。
src/Template/Tests/show.php
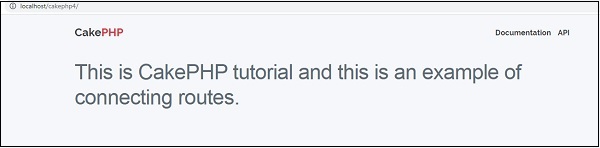
<h1>This is CakePHP tutorial and this is an example of connecting routes.</h1>
通过访问以下 URL 来执行上述示例,该 URL 位于 http://localhost/cakephp4/
上面的 URL 将产生以下输出。
传递的参数是在 URL 中传递的参数。这些参数可以传递给控制器的操作。这些传递的参数通过三种方式提供给您的控制器。
以下示例显示了我们如何将参数传递给控制器的操作。访问以下 URL:http://localhost/cakephp4/tests/value1/value2
这将匹配以下路线。
$builder->connect('tests/:arg1/:arg2', ['controller' => 'Tests', 'action' => 'show'],['pass' => ['arg1', 'arg2']]);
这里,URL 中的 value1 将被分配给 arg1,value2 将被分配给 arg2。
将参数传递给控制器的操作后,您可以使用以下语句获取参数。
$args = $this->request->params[‘pass’]
传递给控制器操作的参数将存储在 $args 变量中。
参数也可以通过以下语句传递给操作 -
$routes->connect('/', ['controller' => 'Tests', 'action' => 'show',5,6]);
上面的语句将向 TestController 的 show() 方法传递两个参数 5 和 6。
在 config/routes.php 文件中进行更改,如以下程序所示。
config/routes.php
<?php
use Cake\Http\Middleware\CsrfProtectionMiddleware;
use Cake\Routing\Route\DashedRoute;
use Cake\Routing\RouteBuilder;
$routes->setRouteClass(DashedRoute::class);
$routes->scope('/', function (RouteBuilder $builder) {
// Register scoped middleware for in scopes.
$builder->registerMiddleware('csrf', new CsrfProtectionMiddleware([
      'httpOnly' => true,
   ]));
   $builder->applyMiddleware('csrf');
   $builder->connect('tests/:arg1/:arg2', ['controller' => 'Tests', 'action' => 'show'],['pass' => ['arg1', 'arg2']]);
   $builder->connect('/pages/*', ['controller' => 'Pages', 'action' => 'display']);
   $builder->fallbacks();
});
在 src/Controller/TestsController.php 创建 TestsController.php 文件。 将以下代码复制到控制器文件中。
src/Controller/TestsController.php
<?php
declare(strict_types=1);
namespace App\Controller;
use Cake\Core\Configure;
use Cake\Http\Exception\ForbiddenException;
use Cake\Http\Exception\NotFoundException;
use Cake\Http\Response;
use Cake\View\Exception\MissingTemplateException;
class TestsController extends AppController {
public function show($arg1, $arg2) {
      $this->set('argument1',$arg1);
      $this->set('argument2',$arg2);
   }
}
在 src/Template 创建一个文件夹 Tests 并在该文件夹下创建一个名为 show.php 的 View 文件。将以下代码复制到该文件中。
src/Template/Tests/show.php.
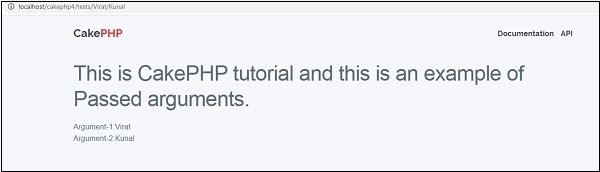
<h1>This is CakePHP tutorial and this is an example of Passed arguments.</h1>
<?php
   echo "Argument-1:".$argument1."<br/>";
   echo "Argument-2:".$argument2."<br/>";
?>
通过访问以下 URL http://localhost/cakephp4/tests/Virat/Kunal
执行上面的示例执行后,上述 URL 将产生以下输出。
这是 CakePHP 的一个很酷的功能。使用生成的 URL,我们可以轻松更改应用程序中 URL 的结构,而无需修改整个代码。
url( string|array|null $url null , boolean $full false )
上面的函数将接受两个参数 -
第一个参数是一个数组,指定以下任意一项 - 'controller'、'action'、'plugin'。此外,您还可以提供路由元素或查询字符串参数。如果是字符串,则可以给定任何有效 url 字符串的名称。
如果为 true,完整的基本 URL 将被添加到结果中。默认为 false。
在 config/routes.php 文件中进行更改,如以下程序所示。
config/routes.php
<?php
use Cake\Http\Middleware\CsrfProtectionMiddleware;
use Cake\Routing\Route\DashedRoute;
use Cake\Routing\RouteBuilder;
$routes->setRouteClass(DashedRoute::class);
$routes->scope('/', function (RouteBuilder $builder) {
   // Register scoped middleware for in scopes.
   $builder->registerMiddleware('csrf', new CsrfProtectionMiddleware([
      'httpOnly' => true,
   ]));
   $builder->applyMiddleware('csrf');
   $builder->connect('/generate',['controller'=>'Generates','action'=>'show']);
   $builder->fallbacks();
});
Create a GeneratesController.php file at src/Controller/GeneratesController.php. Copy the following code in the controller file.
src/Controller/GeneratesController.php
<?php
declare(strict_types=1);
namespace App\Controller;
21
use Cake\Core\Configure;
use Cake\Http\Exception\ForbiddenException;
use Cake\Http\Exception\NotFoundException;
use Cake\Http\Response;
use Cake\View\Exception\MissingTemplateException;
class GeneratesController extends AppController {
   public function show()
   {
   }
}
Create a folder Generates at src/Template and under that folder, create a View file called show.php. Copy the following code in that file.
src/Template/Generates/show.php
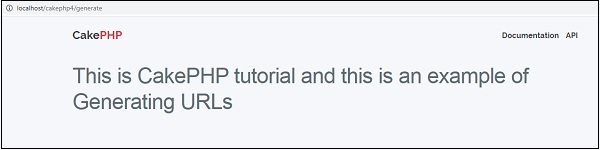
<h1>This is CakePHP tutorial and this is an example of Generating URLs<h1>
Execute the above example by visiting the following URL −
http://localhost/cakephp4/generate
The above URL will produce the following output −
Redirect routing is useful, when we want to inform client applications that, this URL has been moved. The URL can be redirected using the following function −
static Cake\Routing\Router::redirect($route, $url, $options =[])
There are three arguments to the above function as follows −
A string describing the template of the route.
A URL to redirect to.
An array matching the named elements in the route to regular expressions which that element should match.
Make Changes in the config/routes.php file as shown below. Here, we have used controllers that were created previously.
config/routes.php
<?php
use Cake\Http\Middleware\CsrfProtectionMiddleware;
use Cake\Routing\Route\DashedRoute;
use Cake\Routing\RouteBuilder;
$routes->setRouteClass(DashedRoute::class);
$routes->scope('/', function (RouteBuilder $builder) {
   // Register scoped middleware for in scopes.
   $builder->registerMiddleware('csrf', new CsrfProtectionMiddleware([
      'httpOnly' => true,
   ]));
   $builder->applyMiddleware('csrf');
   $builder->connect('/generate',['controller'=>'Generates','action'=>'show']);
   $builder->redirect('/redirect','https://tutorialspoint.com/');
   $builder->fallbacks();
});
Execute the above example by visiting the following URLs.
URL 1 − http://localhost/cakephp4/generate
URL 2 − http://localhost/cakephp4/redirect
You will be redirected to https://tutorialspoint.com
以上是CakePHP 路由的详细内容。更多信息请关注PHP中文网其他相关文章!


