Apple在發布macOS High Sierra後,系統也終於自帶了php v7.1,相較於之前,如果想使用php7,還得額外想辦法( Homebrew 或php-osx )而言著實方便了不少。
但是,系統自帶的PHP只有基礎的配置,如果想做PHP開發,Xdebug還是必須的,以下就總結一下如何在macOS High Sierra中為系統自帶的PHP增加Xdebug模組。 【推薦:PHP7教學】
基礎環境( macOS 及PHP 資訊)
- ##macOS High Sierra: v10.13.3
- PHP: v7.1.7
安裝Xdebug
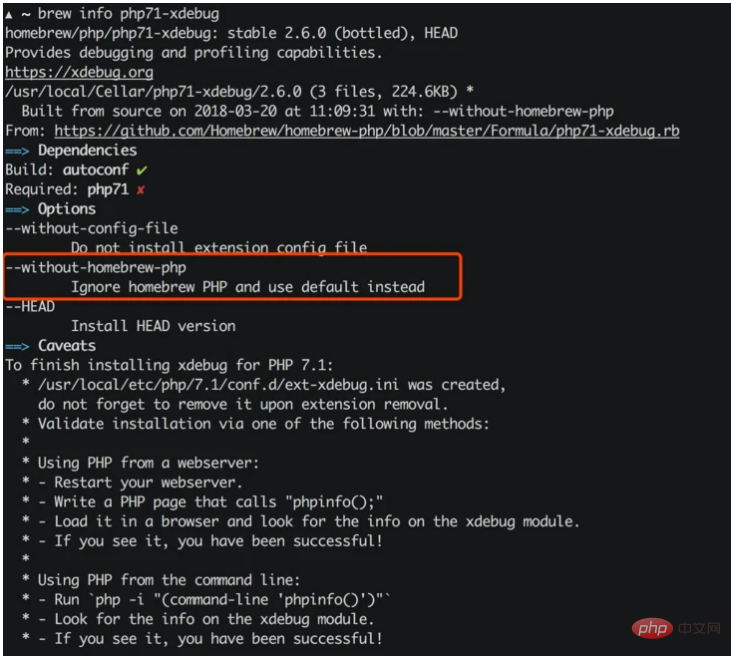
Xdebug官網安裝文件中有MAC推薦的方式,鑑於系統自帶的是PHP是v7.1.7,所以在選擇的時候,需要選擇php71-xdebug這個安裝套件。

php71-xdebug依賴php71的,所以建議加上--without -homebrew-php這個參數,這樣的話brew就會忽略安裝php71。
brew install php71-xdebug --without-homebrew-php
phpize
grep: /usr/include/php/main/php.h: No such file or directory
grep: /usr/include/php/Zend/zend_modules.h: No such file or directory
grep: /usr/include/php/Zend/zend_extensions.h: No such file or directory
Configuring for:
PHP Api Version:
Zend Module Api No:
Zend Extension Api No:
phpize無法正常工作,phpize是用來準備PHP 擴充函式庫的編譯環境的,理論上系統自帶的PHP應該是有phpize的,但沒有在/usr/include/php/*#裡面找到它需要的模組,而檢索/usr/include時發現這個目錄根本不存在。
/usr/include中補全相關的內容,在OSX v10.10以前系統,需要手動做軟鏈來解決:
sudo ln -s /Applications/Xcode.app/Contents/Developer/Platforms/MacOSX.platform/Developer/SDKs/MacOSX.sdk/usr/include /usr/include
sudo也不行):
ln: /usr/include: Operation not permitted
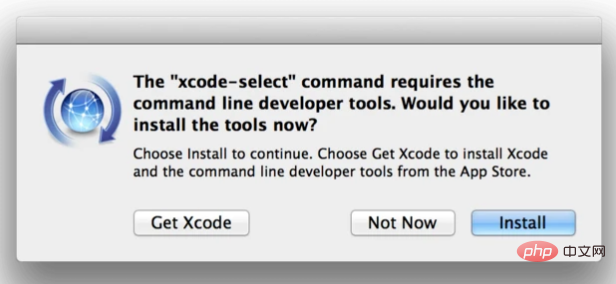
Command Line Tools就夠了,上面的問題,其實只要安裝Command Line Tools就可以解決:
xcode-select --install
 ##等待安裝結束以後,再用
來安裝php71-xdebug:brew install php71-xdebug --without-homebrew-php
To finish installing xdebug for PHP 7.1:
  * /usr/local/etc/php/7.1/conf.d/ext-xdebug.ini was created,
    do not forget to remove it upon extension removal.
  * Validate installation via one of the following methods:
  *
  * Using PHP from a webserver:
  * - Restart your webserver.
  * - Write a PHP page that calls "phpinfo();"
  * - Load it in a browser and look for the info on the xdebug module.
  * - If you see it, you have been successful!
  *
  * Using PHP from the command line:
  * - Run `php -i "(command-line 'phpinfo()')"`
  * - Look for the info on the xdebug module.
  * - If you see it, you have been successful!
開啟PHP的Xdebug
經過上面步驟,系統裡面是有Xdebug了,但在
php.ini設定檔中不一定有,因此需要手動新增Xdebug的設定項目:<div class="code" style="position:relative; padding:0px; margin:0px;"><pre class="brush:php;toolbar:false">[xdebug]
zend_extension="/usr/local/opt/php71-xdebug/xdebug.so"
xdebug.remote_enable = 1
xdebug.remote_autostart = 1
xdebug.remote_connect_back = 1
xdebug.remote_port = 9000
xdebug.scream = 0
xdebug.show_local_vars = 1</pre><div class="contentsignin">登入後複製</div></div>然後就是重啟
:<div class="code" style="position:relative; padding:0px; margin:0px;"><pre class="brush:php;toolbar:false"># 关闭php-fpm
sudo killall php-fpm
# 启动php-fpm
sudo php-fpm</pre><div class="contentsignin">登入後複製</div></div>運行
後,你就可以看到關於Xdebug的設定內容了:<div class="code" style="position:relative; padding:0px; margin:0px;"><pre class="brush:php;toolbar:false">xdebug
...
xdebug.remote_autostart => On => On
xdebug.remote_connect_back => On => On
xdebug.remote_cookie_expire_time => 3600 => 3600
xdebug.remote_enable => On => On
xdebug.remote_handler => dbgp => dbgp
xdebug.remote_host => localhost => localhost
xdebug.remote_log => no value => no value
xdebug.remote_mode => req => req
xdebug.remote_port => 9000 => 9000
xdebug.remote_timeout => 200 => 200
xdebug.scream => Off => Off
...</pre><div class="contentsignin">登入後複製</div></div>
VSCode是目前最受歡迎的開發工具之一,雖然輕量,但是對標各類IDE毫不遜色,微軟良心之作,透過安裝不同的插件可以擴展它的能力,其中有一款
PHP Debug的插件,可以作為Xdebug的橋樑,方便直接透過Xdebug調試PHP,官方的描述十分貼切:PHP Debug Adapter for Visual Studio Code
官網的指導也寫的相當不錯:
Install XDebug
- The path of your php.ini is shown in your
##On Linux: Either download the source code as a tarball or clone it with git, then compile it.
I highly recommend you make a simple test.php file, put aphpinfo();statement in there, then copy the output and paste it into the XDebug installation wizard. It will analyze it and give you tailored installation instructions for your environment.##In short#In short
##On Windows: Download the appropiate precompiled DLL for your PHP version, architecture (64/32 Bit), thread safety (TS/NTS) and Visual Studio compiler version and place it in your PHP extension folder.to your php.ini.
- Configure PHP to use XDebug by adding
zend_extension=path/ to/xdebug- phpinfo()
output under "Loaded Configuration File".Enable remote debugging in your php.ini:[XDebug] xdebug.remote_enable = 1 xdebug.remote_autostart = 1登入後複製There are other ways to tell XDebug to connect to a remote debugger than
remote_autostart, like cookies, query parameters or browser extensions. I recommendremote_autostartbecause it "just works". There are also a variety of other options, like the port (by default 9000), please see the XDebug documentation on remote debugging for more information.- If you are doing web development, don't forget to restart your webserver to reload the settings
- Verify your installation by checking your
phpinfo()output for an XDebug section.
这里需要注意的是它推荐开启Xdebug配置项中的remote_autostart这一项。
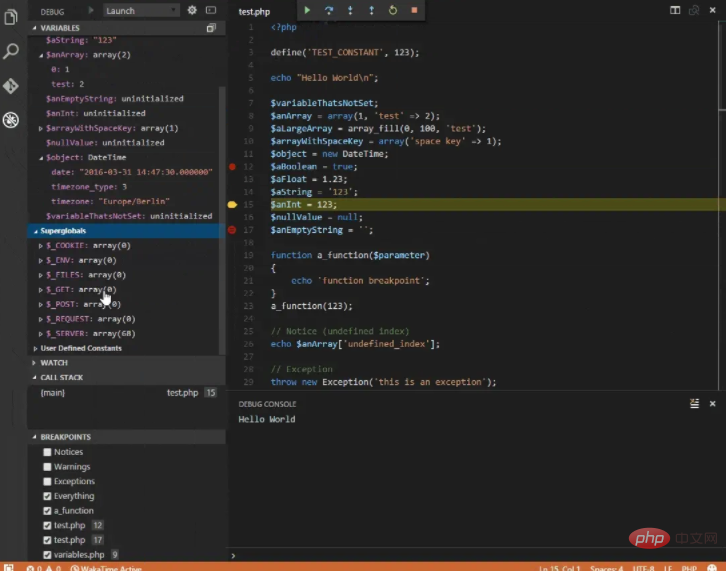
好了,经过上面的操作,你应该可以跟Demo里面一样在VSCode中调试PHP了。


