這篇文章給大家分享的內容是關於ThinkPHP5中使用 Auth2進行驗證的過程分析,有需要的朋友可以參考一下,希望能幫助到大家。
在tp上實現的auth2驗證的,在網上發現筆記很少, 不像yii, 故在此發表一下筆記,用來幫助有相關需求的朋友
PS: 鑑於oauth2有四種方案, 本實例是基於客戶端憑證實現,其他三種就不講述了
一、透過composer安裝
composer require --prefer-dist bshaffer/oauth2- server-php
安裝完成後,如圖: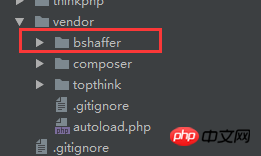
會出現相關的目錄
二、實作授權檔案
1) 建立對應的資料表
先找到Pdo.php文件,如圖:
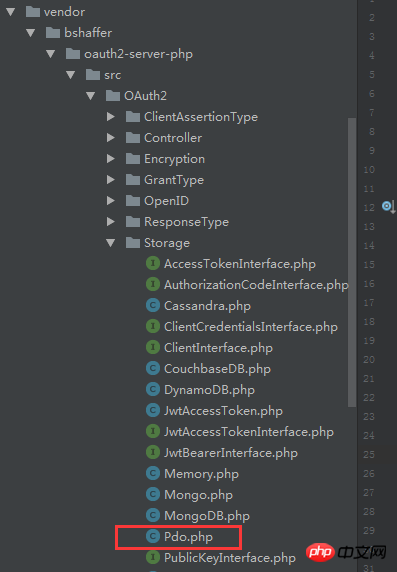
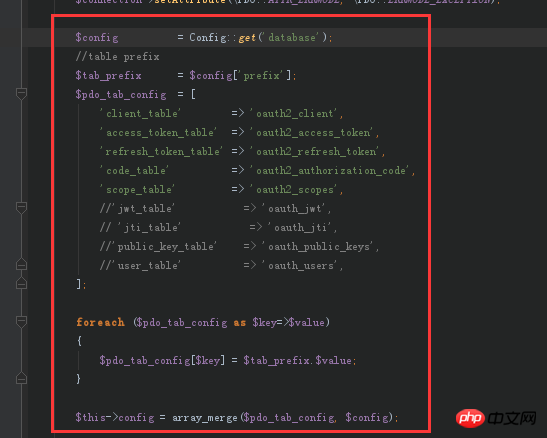
然後找到該位置
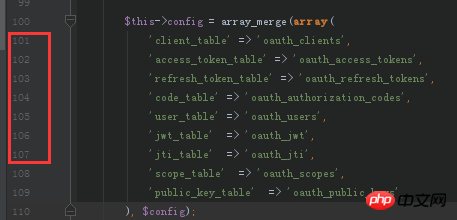
#目的,是告訴你建立表格時的名稱,應該和這裡使用的表名稱一致
關於創建的表,我直接上程式碼,方便各位可以直接複製貼上:
CREATE TABLE
oauth_access_tokens
 (
access_token
 varchar(40) NOT NULL,
client_id
 varchar(80) NOT NULL,
user_id
 int(11) DEFAULT NULL,
expires
 varchar(19) NOT NULL,
scope
 text,
  PRIMARY KEY (
access_token
),
  KEY
fk_access_token_oauth2_client_client_id
 (
client_id
),
  KEY
ix_access_token_expires
 (
expires
),
  CONSTRAINT
fk_access_token_oauth2_client_client_id
 FOREIGN KEY (
client_id
) REFERENCES
pos_oauth2_client
 (
client_id
) ON DELETE CASCADE ON UPDATE CASCADE
) ENGINE=InnoDB DEFAULT CHARSET=utf8;
CREATE TABLE
oauth_authorization_codes
 (
authorization_code
 varchar(40) NOT NULL,
client_id
 varchar(80) NOT NULL,
user_id
 int(11) DEFAULT NULL,
redirect_uri
 text NOT NULL,
expires
 int(11) NOT NULL,
scope
 text,
  PRIMARY KEY (
authorization_code
),
  KEY
fk_authorization_code_oauth2_client_client_id
 (
client_id
),
  KEY
ix_authorization_code_expires
 (
expires
),
  CONSTRAINT
fk_authorization_code_oauth2_client_client_id
 FOREIGN KEY (
client_id
) REFERENCES
pos_oauth2_client
 (
client_id
) ON DELETE CASCADE ON UPDATE CASCADE
) ENGINE=InnoDB DEFAULT CHARSET=utf8;
CREATE TABLE
oauth_clients
 (
client_id
 varchar(80) NOT NULL,
client_secret
 varchar(80) NOT NULL,
redirect_uri
 text NOT NULL,
grant_type
 text,
scope
 text,
created_at
 int(11) DEFAULT NULL,
updated_at
 int(11) DEFAULT NULL,
created_by
 int(11) DEFAULT NULL,
updated_by
 int(11) DEFAULT NULL,
  PRIMARY KEY (
client_id
)
) ENGINE=InnoDB DEFAULT CHARSET=utf8;
CREATE TABLE
oauth_refresh_tokens
 (
refresh_token
 varchar(40) NOT NULL,
client_id
 varchar(80) NOT NULL,
user_id
 int(11) DEFAULT NULL,
expires
 int(11) NOT NULL,
scope
 text,
  PRIMARY KEY (
refresh_token
),
  KEY
fk_refresh_token_oauth2_client_client_id
 (
client_id
),
  KEY
ix_refresh_token_expires
 (
expires
),
  CONSTRAINT
fk_refresh_token_oauth2_client_client_id
 FOREIGN KEY (
client_id
) REFERENCES
pos_oauth2_client
 (
client_id
) ON DELETE CASCADE ON UPDATE CASCADE
) ENGINE=InnoDB DEFAULT CHARSET=utf8;
CREATE TABLE
oauth_scopes
 (
scope
 text,
is_default
 tinyint(1) DEFAULT NULL
) ENGINE=MyISAM DEFAULT CHARSET=utf8;
新增一條資料
insert  into
oauth_clients
(
client_id,
client_secret,
redirect_uri,
grant_type,
scope,
created_at,
updated_at,
created_by,
updated_by
) values ('admin','123456','http://','client_credentials',NULL,NULL,NULL,NULL,NULL);
PS,說明一下,如圖:
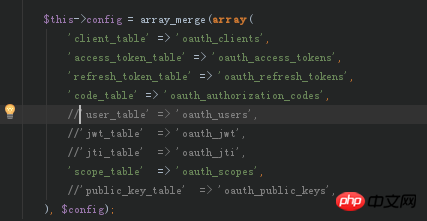
#在我實際使用中,只用到這五張表,也就是上面建立的五張表,在這個config裡面,剩下的幾個選項我是全部註銷掉了的
另外還有一個情況,說明一下: 有可能各位,對資料表設定了表前綴, 也是需要在此進行相關修改的, 例如我創建的,見圖:

所以我進行了相關的修改:
#2) 建立授權檔案Oauth2.php, 名字隨便自己取
<?phpnamespace appcommon;/**
@author jinyan
@create 20180416
*/use OAuth2StoragePdo;use thinkConfig;
class Oauth2{/**
* @Register new Oauth2 apply
* @param string $action
* @return boolean|\OAuth2\Server
*/
function grantTypeOauth2($action=null)
{
Config::load(APP_PATH.'database.php');
$storage = new Pdo(
[
'dsn' => config('dsn'),
'username' => config('username'),
'password' => config('password')
]
);
$server = new \OAuth2\Server($storage, array('enforce_state'=>false));
// Add the "Client Credentials" grant type (it is the simplest of the grant types)
$server->addGrantType(new \OAuth2\GrantType\ClientCredentials($storage));
// Add the "Authorization Code" grant type (this is where the oauth magic happens)
$server->addGrantType(new \OAuth2\GrantType\AuthorizationCode($storage));
// Add the "User Credentials" grant type (this is where the oauth magic happens)
$server->addGrantType(new \OAuth2\GrantType\UserCredentials($storage));
return $server;
}
/**
* @校验token值
* @param unknown $server
*/
protected function checkApiAuthroize($server)
{
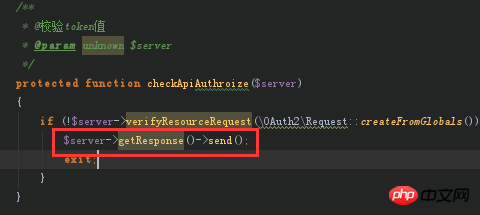
if (!$server->verifyResourceRequest(\OAuth2\Request::createFromGlobals())) {
$server->getResponse()->send();
exit;
}
}} ?>
3) 建立token文件, Access.php
<?phpnamespace apprestfulcontroller;use appcommonOauth2;
/**
@uathor:jinyan
*/
class Access extends Oauth2{protected $_server;
/**
* @授权配置
*/
public function __construct()
{
return $this->_server = $this->grantTypeOauth2();
}
/**
*
*/
private function _token()
{
// Handle a request for an OAuth2.0 Access Token and send the response to the client
$this->_server->handleTokenRequest(\OAuth2\Request::createFromGlobals())->send('json', 'oauth2_');
}
/**
* @get access_token
*/
public function access_token()
{
$this->_token();
}} ?>
那麼如何請求一個access_token的值呢?直接呼叫這個acccess_token()的方法即可
request url: http://restful.thinkphp.com/r...
還請得之前建立資料表時,有添加一條新數據了嗎?其作用就是相當於用來取得access_token的帳號密碼之類的, 記得需要使用Post方式取得token
請求的參數
{
client_id=admin
client_secret=123456
grant_type=client_credentials //这个参数是固定的
}如果請求成功的話,會傳回如下圖中所示:

貼上,透過ff瀏覽器httprequest的請求介面:

4) 透過access_token 取得介面資料 ,Sms.php
<?php
namespace apprestfulcontroller;
/**
Created by PhpStorm.
User: Administrator
Date: 2018/7/29
Time: 22:02
*/
use appcommonOauth2;
class Sms extends Oauth2
{
protected $_server;
/**
* @授权配置
*/
public function __construct()
{
$this->_server = $this->grantTypeOauth2();
}
public function test()
{
//access_token验证
$this->checkApiAuthroize($this->_server);
echo '成功请求到数据';
}
}三、 測試效果如圖:
#1)首先不帶access_token請求,test()方法:
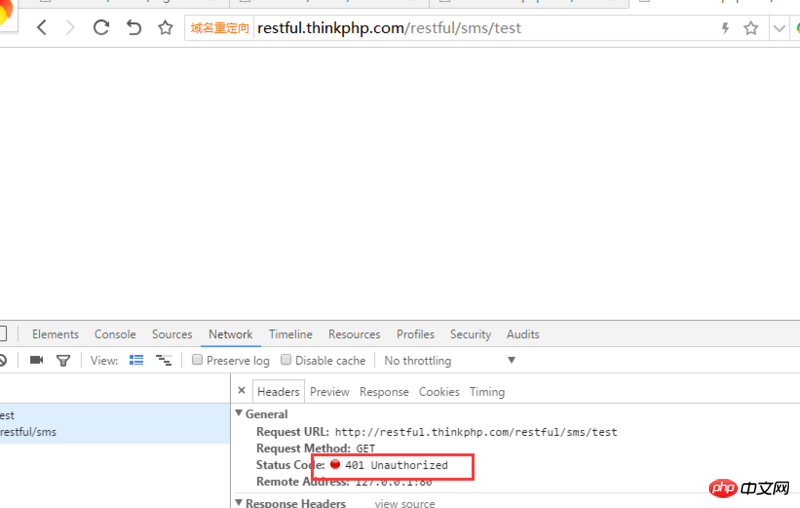
#結果出現一個401未驗證通過的狀態
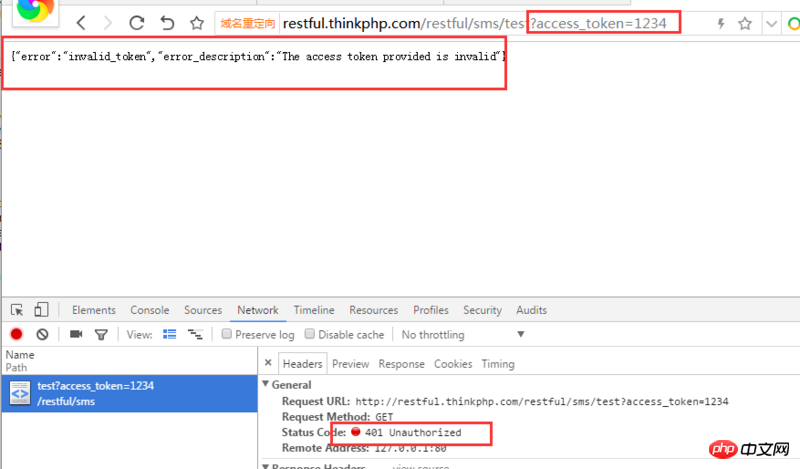
## 2)接著請求一個錯誤的access_token, test()方法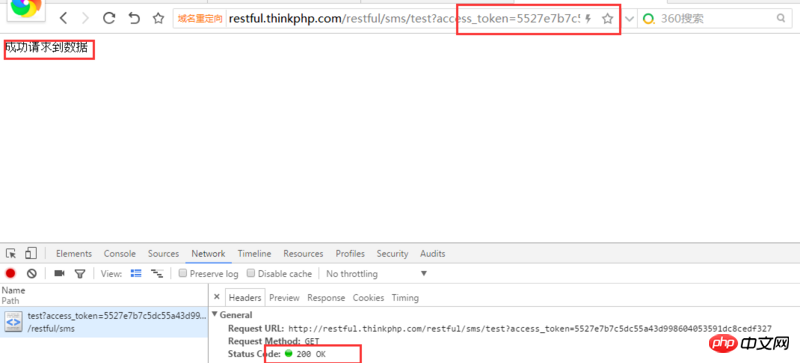
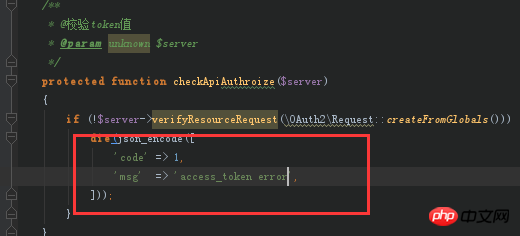
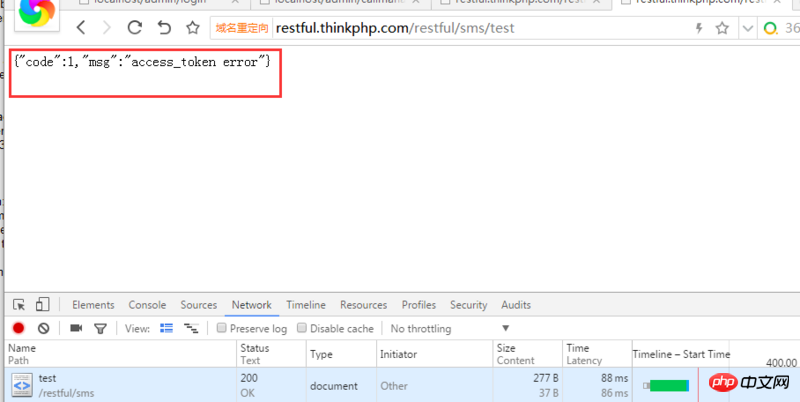
所以,基於第1種情況與第2種情況,你應該自訂一個token未驗證成功的方法,如圖:


完結。
###thinkphp驗證碼的實作( form、ajax實作驗證)_php實例#######以上是ThinkPHP5中使用 Auth2進行驗證的流程分析的詳細內容。更多資訊請關注PHP中文網其他相關文章!


