

本文主要為大家介紹了關於vue中如何創建多個ueditor的相關資料,文中透過範例程式碼介紹的非常詳細,對大家的學習或工作具有一定的參考學習價值,需要的朋友們下面隨著小編來一起學習學習吧。希望能幫助大家。
前言
前一段時間公司Vue.js專案需要使用UEditor富文本編輯器,在百度上搜尋一圈沒有發現詳細的說明,決定自己嘗試,忙活了一天終於搞定了。
ueditor是百度編輯器,官網網址:http://ueditor.baidu.com/website/
完整的功能演示,可參考:http://ueditor.baidu.com /website/onlinedemo.html
最近工作中要求升級,需要在vue中創建多個ueditor實例,我使用neditor,其實就是把ueditor樣式美化了下,其他和ueditor幾乎一樣,下面話不多說了,來一起看看詳細的介紹吧。
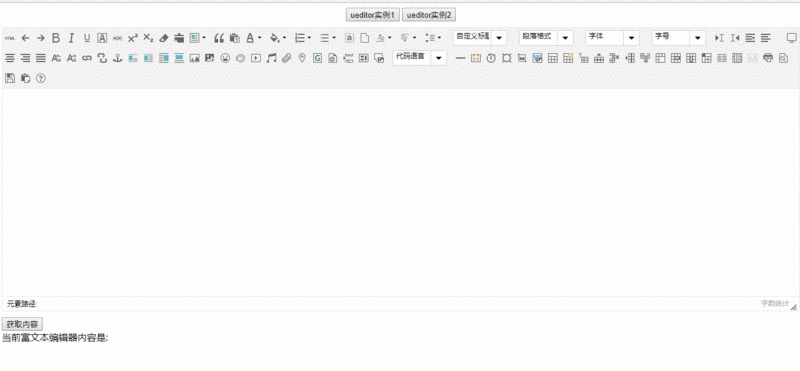
截圖
說明
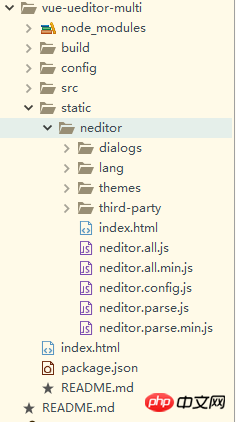
下載ueditor或neditor原始碼,拷貝到static目錄下面
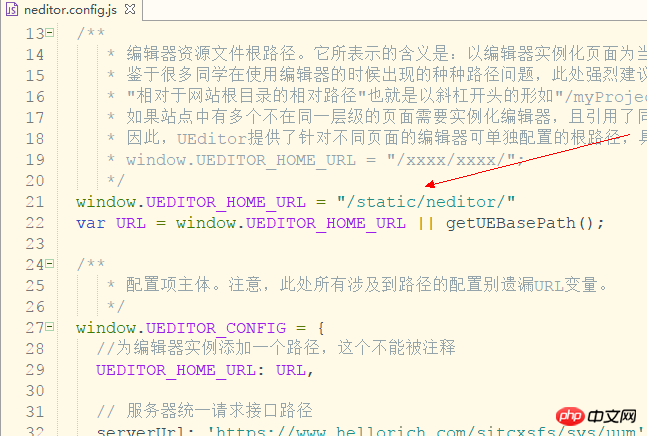
然後修改ueditor.config.js設定檔
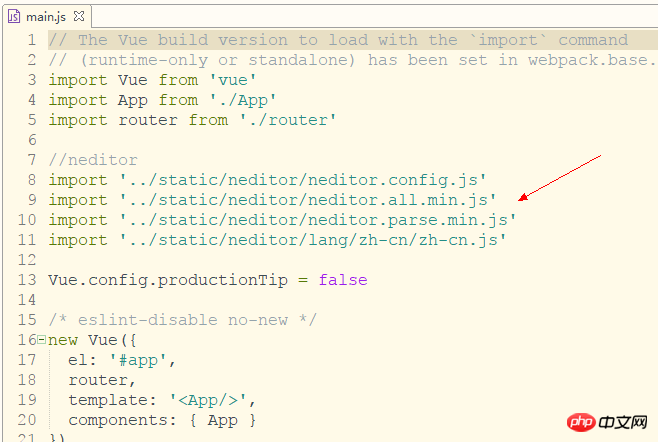
#在vue專案的main.js新增ueditor參考
新建3個頁面home,tab1,tab2。 tab1和tab2是home下面的子頁
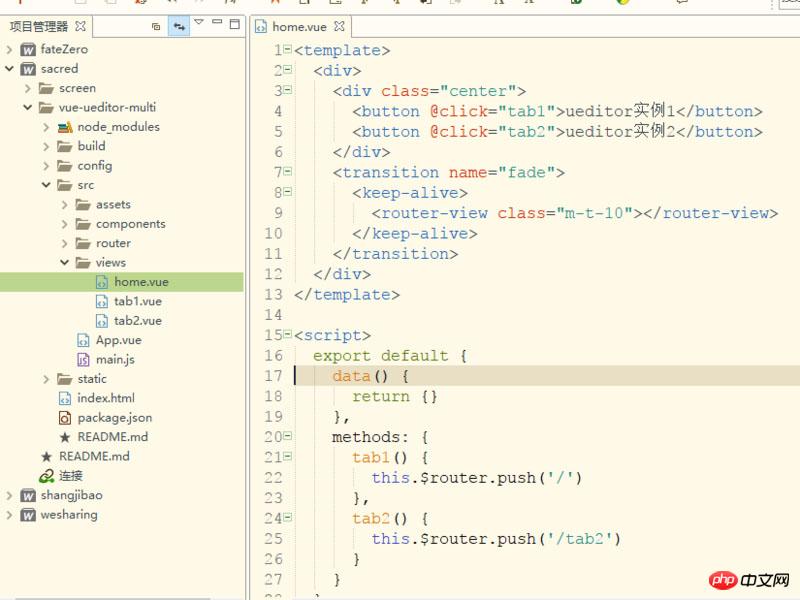
在router-view外面一定要加入keep-alive元件和transition元件,不然ueditor實例無法儲存
#在components資料夾下面新建一個editor作為編輯器的公共組件
在tab1中調用editor,同時要傳入一個id並在editor頁面接受,注意如果需要多個實例,id一定不能相同
 <template>
 <p>
 <editor ref="editor" id="tab1Editor"></editor>
 <button @click="getContent" class="m-t-10">获取内容</button>
 <p>
 <span>当前富文本编辑器内容是: {{content}}</span>
 </p>
 </p>
 </template>

 <script>
 import Editor from '@/components/editor'
 export default {
 name: 'tab1',
 components: { Editor },
 data() {
 return {
 content:''
 }
 },
 methods: {
 //获取内容
 getContent(){
 this.content = this.$refs.editor.content
 }
 }
 }
 </script>

 <style scoped>
 .m-t-10{
 margin-top: 10px;
 }
</style>editor頁面程式碼,因為我們在router-view套用了keep-alive,所以ueditor的初始化一定要放在activated裡面,
確保每次進入頁面都會重新渲染ueditor,在deactivated裡面呼叫ueditor的destroy方法,確保每次離開頁面的時候
會銷毀編輯器實例,這樣就可以渲染多個ueditor實例了,並且每次切換都能保存編輯器的內容。
如果多個tab只需要一個實例請呼叫reset()方法
 <template>
 <p>
 <p :id="this.id"></p>
 </p>
 </template>

 <script>
 export default {
 name: 'editor',
 props: ['id'],
 data() {
 return {
 ue: '', //ueditor实例
 content: '', //编辑器内容
 }
 },
 methods: {
 //初始化编辑器
 initEditor() {
 this.ue = UE.getEditor(this.id, {
 initialFrameWidth: '100%',
 initialFrameHeight: '350',
 scaleEnabled: true
 })
 //编辑器准备就绪后会触发该事件
 this.ue.addListener('ready',()=>{
 //设置可以编辑
 this.ue.setEnabled()
 })
 //编辑器内容修改时
 this.selectionchange()
 },
 //编辑器内容修改时
 selectionchange() {
 this.ue.addListener('selectionchange', () => {
 this.content = this.ue.getContent()
 })
 }
 },
 activated() {
 //初始化编辑器
 this.initEditor()
 },
 deactivated() {
 //销毁编辑器实例,使用textarea代替
 this.ue.destroy()
 //重置编辑器,可用来做多个tab使用同一个编辑器实例
 //如果要使用同一个实例,请注释destroy()方法
 //this.ue.reset()
 }
 }
</script>大家學會了嗎?趕快動手嘗試。
相關建議:
以上是vue中建立多個ueditor實例教程分享的詳細內容。更多資訊請關注PHP中文網其他相關文章!


