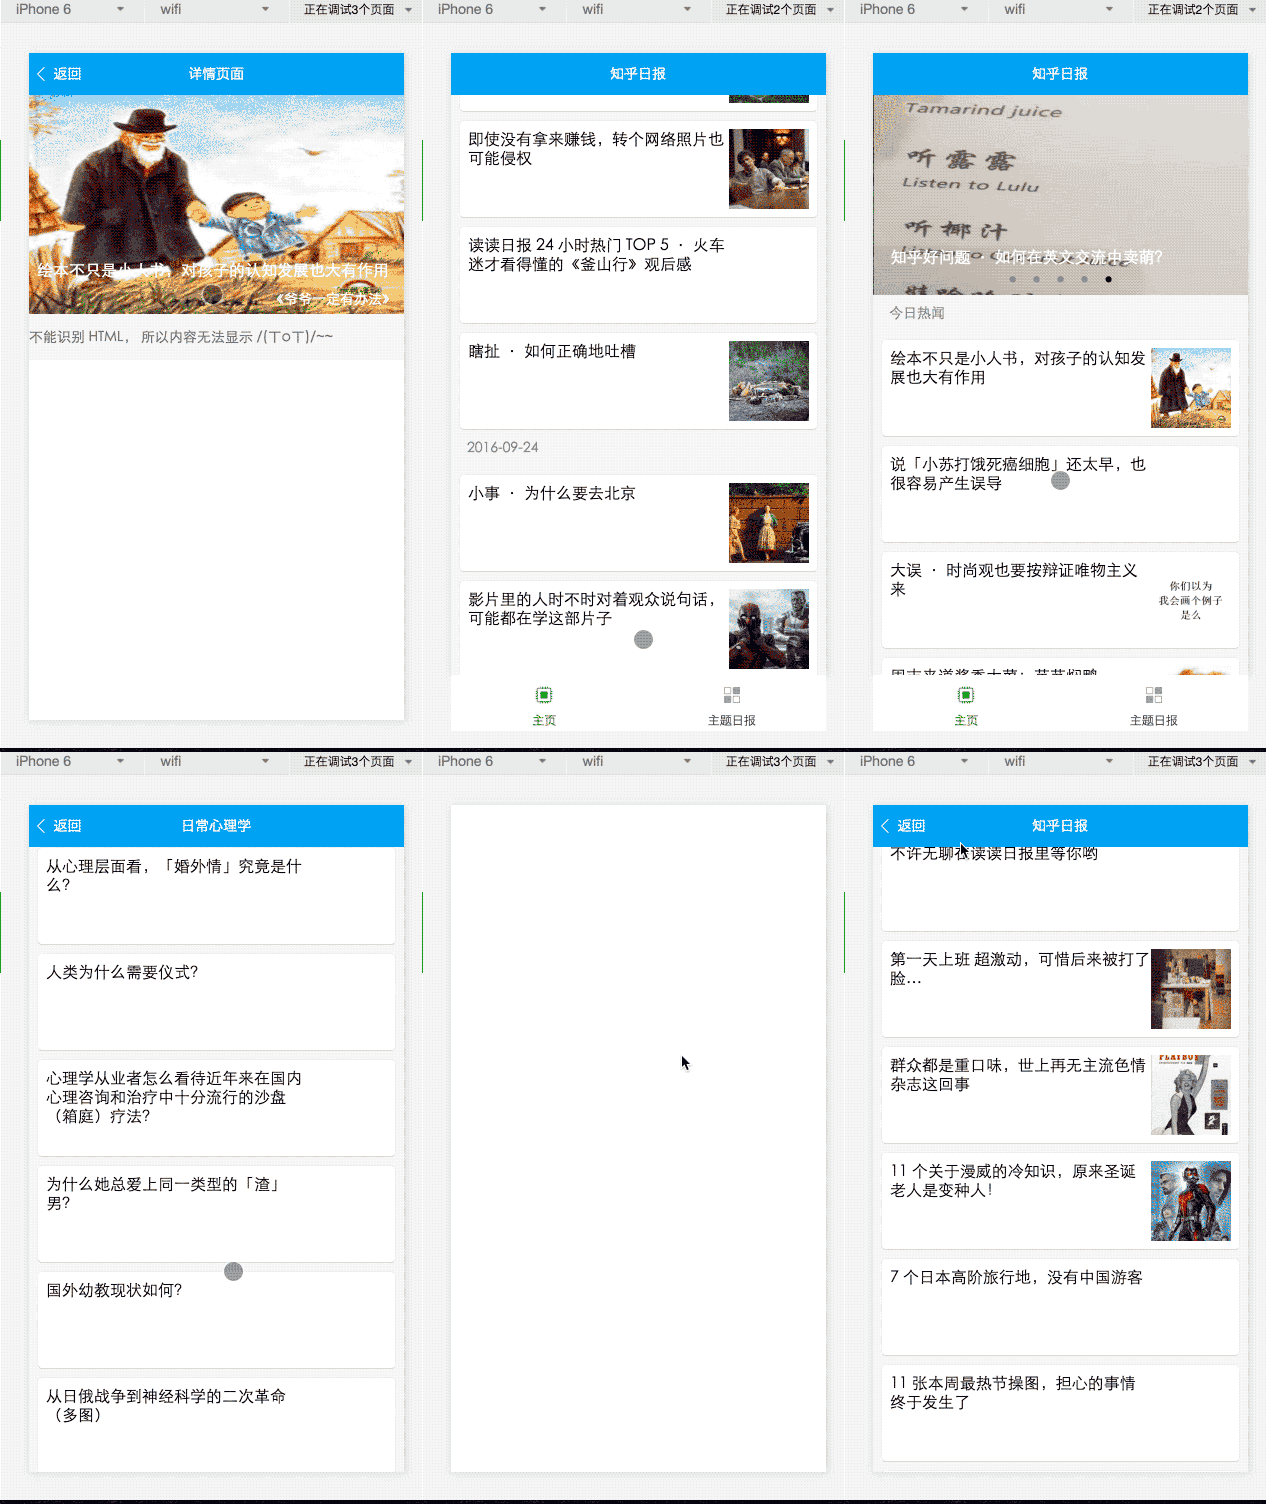
I believe that everyone has been fascinated by mini programs recently, so I took advantage of the weekend to quickly play the mini program version of Zhihu Daily to calm down my shock. This article mainly summarizes this development experience and the pitfalls I have encountered. Friends in need can refer to it.
Let’s take a look at the renderings first

##Development environment preparation
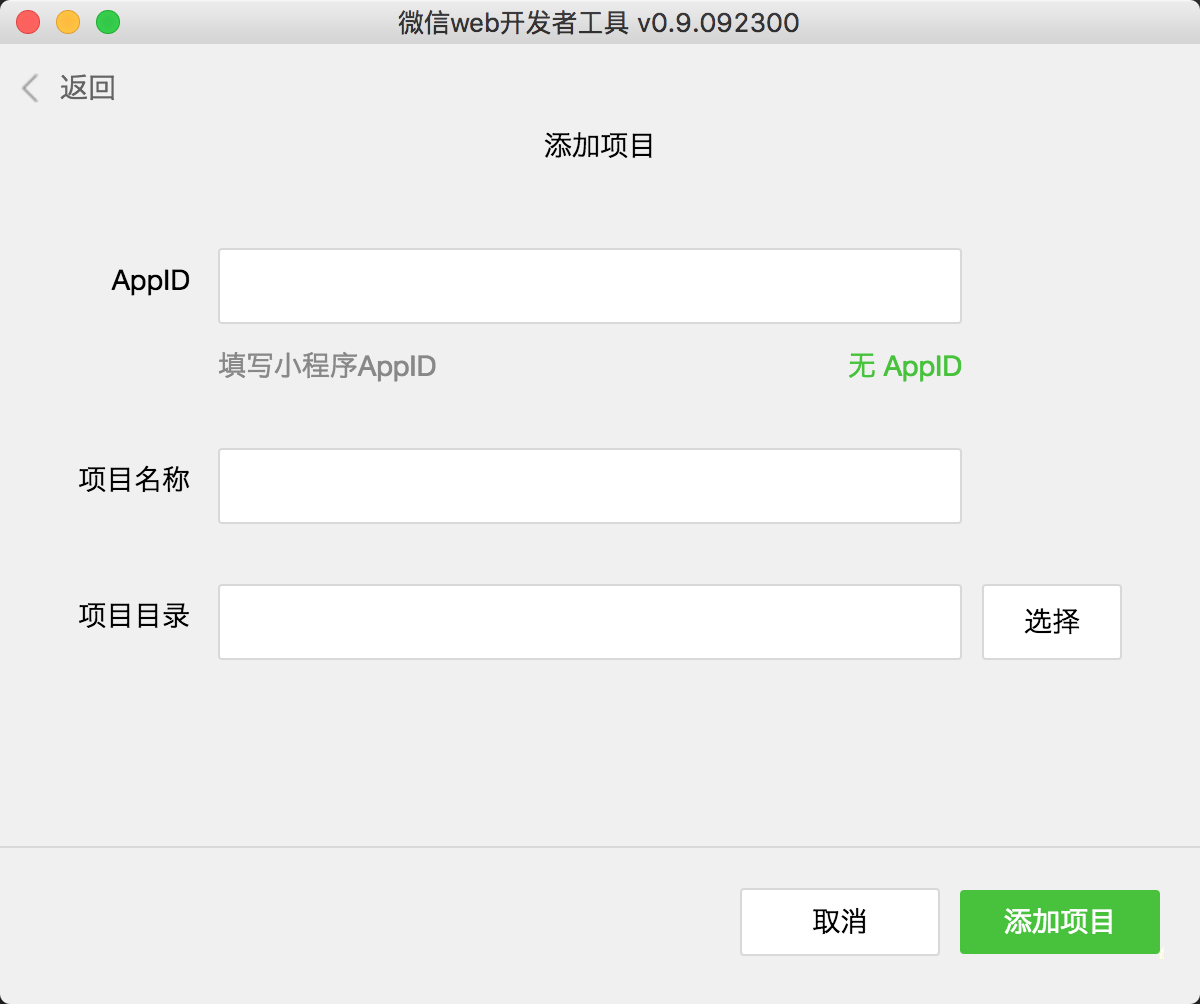
The mini program was cracked on the second day after it came out, and WeChat downloaded the development tools on the third day. Now you only need to download the WeChat developer tools to use them,
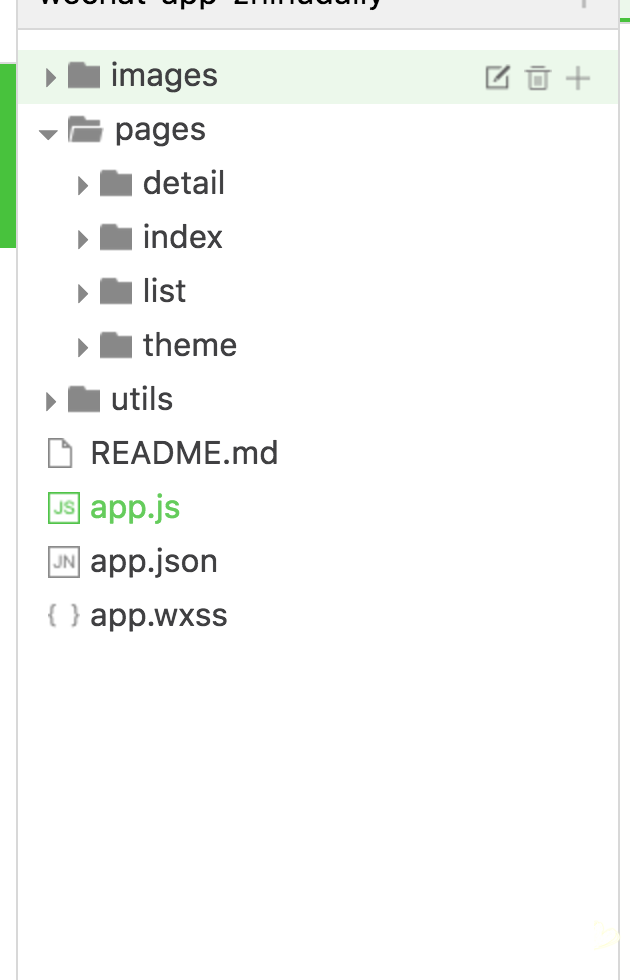
Directory structure
 ## 1. app.js registers app logic, app.wxss global style file app.json configuration information
2. pages stores page files
3. utils tool code
4. images picture resource files
Each page in the mini program will have three files. wxml .wxss .js, corresponding to the structure, style, and logic, which is equivalent to the relationship between html css and js in the web page.
Develop the first pageThe code comes from the new project
<!--index.wxml-->
<view class="container">
 <view bindtap="bindViewTap" class="userinfo">
 <image class="userinfo-avatar" src="{{userInfo.avatarUrl}}" background-size="cover"></image>
 <text class="userinfo-nickname">{{userInfo.nickName}}</text>
 </view>
 <view class="usermotto">
 <text class="user-motto">{{motto}}</text>
 </view>
</view>/**index.wxss**/
.userinfo {
display: flex;
flex-direction: column;
align-items: center;
}
.userinfo-avatar {
width: 128rpx;
height: 128rpx;
margin: 20rpx;
border-radius: 50%;
}
.userinfo-nickname {
color: #aaa;
}
.usermotto {
margin-top: 200px;
}//index.js
//获取应用实例
var app = getApp()
Page({
data: {
motto: 'Hello World',
userInfo: {}
},
//事件处理函数
bindViewTap: function() {
wx.navigateTo({
url: '../logs/logs'
})
},
onLoad: function () {
console.log('onLoad')
var that = this
//调用应用实例的方法获取全局数据
app.getUserInfo(function(userInfo){
//更新数据
that.setData({
userInfo:userInfo
})
})
}
})In the newly created project, you will see these codes under the index. Next, they are Introduction to wxml wxss js
This is a description file of the page structure, mainly used for the following content
1. Use tags to specify components using
2. Use wx:for wx:if and other instructions to complete some logical processing on the template
3. Use bind* to bind events
style file, and basic css syntax The same, but the supported selector syntax is limited. See here. You can use flexbox to complete the layout.
You can also use the import command internally to introduce external style files
@import "common.wxss";

.pd {
 padding-left: 5px;
}Page logic control, follow the commonJs specification
// util.js
function formatTime(date) {
 // ....
}

function formatDate(date, split) {
 // ...
}
module.exports = {
 formatTime: formatTime,
 formatDate: formatDate
}
var utils = require('../../utils/util.js')Use the Page method on the page to register a page
Page({
 data:{
 // text:"这是一个页面"
 },
 onLoad:function(options){
 // 页面初始化 options为页面跳转所带来的参数
 },
 onReady:function(){
 // 页面渲染完成
 },
 onShow:function(){
 // 页面显示
 },
 onHide:function(){
 // 页面隐藏
 },
 onUnload:function(){
 // 页面关闭
 }
})Page({
data: {
text: '这是一个页面'
},
onLoad: function() {
this.setData({
text: 'this is page'
})
}
})The following content comes from WeChat official documents.
The small program uses
wx:if=""
<view wx:if="{{condition}}"> True </view>wx:elif
andwx:else to add an else block:
<view wx:if="{{length > 5}}"> 1 </view>
<view wx:elif="{{length > 2}}"> 2 </view>
<view wx:else> 3 </view>wx:for
The control attribute is bound to an array, and the component can be repeatedly rendered using the data of each item in the array.Built-in variables index (subscript for array traversal), item (each item for array traversal)
<view wx:for="{{items}}">
{{index}}: {{item.message}}
</view>
Page({
items: [{
message: 'foo',
},{
message: 'bar'
}]
})wx:for-item
to specify the variable name of the current element of the arrayUse
wx:for-index
<view wx:for="{{array}}" wx:for-index="idx" wx:for-item="itemName">
 {{idx}}: {{itemName.message}}
</view>wxml Just use bind[eventName]="handler"
Syntax binding event<view bindtap="bindViewTap" class="userinfo"><text>tap</text></view>
Page({
bindViewTap: function(e) {
console.log(e.taget)
}
})data-*
ande.target.dateset Pass parameters
<view bindtap="bindViewTap" data-test-msg="啦啦啦啦啦啦" class="userinfo"><text>tap</text></view>
Page({
 bindViewTap: function(e) {
  // 会自动转成驼峰式命名
  console.log(e.taget.dataset.testMsg) // 啦啦啦啦啦啦
 }
})目前踩过的坑
事件绑定中 e.target.dataset
当在父组件绑定事件和参数,点击时又子组件冒泡事件到父组件,这个时候 e.target.dataset 为空
<view bindtap="bindViewTap" data-test-msg="啦啦啦啦啦啦" class="userinfo">
 <view><text>tap</text></view>
</view>
Page({
 bindViewTap: function(e) {
  console.log(e.taget.dataset.testMsg) // undefined
 }
})在线图片加载不稳定
在知乎日报这个项目上有大量图片需要从网上下载,这里 image 组件额显示显得极其不稳定,有很多的图片都显示不出来.
总结
微信小程序现在还在内测阶段,有很多的问题需要完善,不过对于开发速度和体验来说还是不错的,期待正式发布的那一天。以上就是本文的全部内容了,希望对大家学习使用微信小程序能有所帮助。
更多Zhihu Daily development example of WeChat mini program version相关文章请关注PHP中文网!
 Mechanical energy conservation law formula
 How to solve the problem that the phpstudy port is occupied
 How to check port status with netstat
 Top 30 global digital currencies
 Compressed file encryption
 What software is ae
 kb4012212 What to do if the update fails
 How many types of usb interfaces are there?


