

Course 2857
Course Introduction:Course introduction: 1. Cross-domain processing, token management, route interception; 2. Real interface debugging, API layer encapsulation; 3. Secondary encapsulation of Echarts and paging components; 4. Vue packaging optimization and answers to common problems.

Course 1795
Course Introduction:Apipost is an API R&D collaboration platform that integrates API design, API debugging, API documentation, and automated testing. It supports grpc, http, websocket, socketio, and socketjs type interface debugging, and supports privatized deployment. Before formally learning ApiPost, you must understand some related concepts, development models, and professional terminology. Apipost official website: https://www.apipost.cn

Course 5521
Course Introduction:(Consult WeChat: phpcn01) The comprehensive practical course aims to consolidate the learning results of the first two stages, achieve flexible application of front-end and PHP core knowledge points, complete your own projects through practical training, and provide guidance on online implementation. Comprehensive practical key practical courses include: social e-commerce system backend development, product management, payment/order management, customer management, distribution/coupon system design, the entire WeChat/Alipay payment process, Alibaba Cloud/Pagoda operation and maintenance, and project online operation. .....

Course 5172
Course Introduction:(Consult WeChat: phpcn01) Starting from scratch, you can solve conventional business logic, operate MySQL with PHP to add, delete, modify, and query, display dynamic website data, master the MVC framework, master the basics of the ThinkPHP6 framework, and learn and flexibly master all knowledge involved in PHP development. point.

Course 8713
Course Introduction:(Consult WeChat: phpcn01) The learning objectives of the front-end development part of the 22nd issue of PHP Chinese website: 1. HTML5/CSS3; 2. JavaScript/ES6; 3. Node basics; 4. Vue3 basics and advanced; 5. Mobile mall/ Website background homepage layout; 6. Automatic calculation of tabs/carousels/shopping carts...
Laravel 9 and Livewire validation: Uniqueness validation unless updated
2023-11-09 17:41:05 0 2 204
CSS scope custom properties are not recognized when used to evaluate variables in the parent scope
2023-11-01 21:53:10 0 1 180
Sort JavaScript map by decimal key
2023-09-19 14:44:41 0 1 242
Remove quotes from strings in ReactJS: Guide
2023-09-17 23:46:44 0 1 200
How to use React Hook Form 7 with MUI switch
2023-09-16 19:43:09 0 1 174
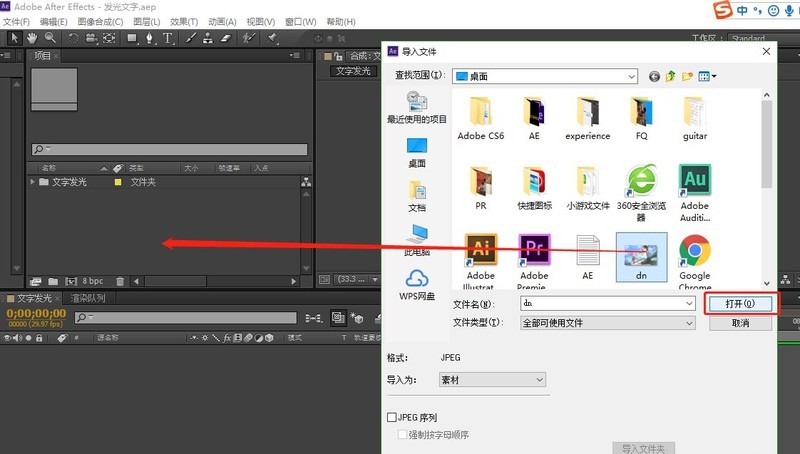
Course Introduction:1. Open AE, create a new project, and import the materials. 2. Select the material you just imported, drag it to the new composition icon under the project panel, and create a new composition group. 3. Select the material in the layer panel and click Effects in the menu bar - Simulation - CC Rainfall (the 2019 version of AE is CCRainfall). 4. Set the rain-related parameters in the special effects console, and you can see the rain effect. 5. Once done, you can add it to the rendering queue and render and export it.
2024-05-09 comment 0 920

Course Introduction:1、首先将你的照片导入到PS当中,按CTRL+J复制新建一个图层。然后再在图层的上方新建一个图层,这个图层就是做下雨效果的图层。2、在新的图层上按Shift+F5进行填充界面,将其填充为纯黑色。3、接着在图层上点击上方滤镜进行滤镜操作:滤镜A:【杂色】-【添加杂色】;数量选择10-15,越大说明雨越大;分布选择为【高斯分布】;勾选【单色】滤镜B:【模糊】-【动感模糊】;角度为45-90,这代表雨下落的方向和角度;距离为10-50,这代表雨滴的密集程度。3、调整好之后,点击确定。并将图层混合模式设置为【变亮
2024-05-16 comment 203

Course Introduction:PS rain effect production steps: First open the PS software and import a picture material; then create a new transparent layer, and select the fill tool to fill the layer with white; then click the filter option in the menu bar, and in the pop-up Select Pixelate from the list; finally adjust the parameters in the Dotted settings window.
2020-11-06 comment 0 27311

Course Introduction:Import the photo into PS, press CTRL+J to copy and create a new layer. Then create a new layer above the layer. This layer is the layer that will create the rain effect. Press Shift+F5 on the new layer to fill the interface with pure black. Click on the upper filter on the layer to perform filter operations: Filter A: [Noise]-[Add Noise]; select 10-15 for the quantity, the larger it means the heavier the rain; select [Gaussian Distribution] for the distribution; check Select [Monochrome] Filter B: [Blur]-[Motion Blur]; the angle is 45-90, which represents the direction and angle of rain falling; the distance is 10-50, which represents the density of raindrops. After making adjustments, click OK. And set the layer blending mode to [Lighten] to filter out the black background. Ruofa
2024-04-17 comment 0 329

Course Introduction:In the previous article "Getting Started: See How to Add Gradient Effects to Pictures in PS (Knowledge Sharing)", I introduced you to the new color-changing method of PS, which can create gradient effects on photos. The following article will share with you how to add a rain effect to a photo, turning the photo into a rain scene in seconds. Let’s see how to do it together.
2021-07-27 comment 0 4761