

Course 2857
Course Introduction:Course introduction: 1. Cross-domain processing, token management, route interception; 2. Real interface debugging, API layer encapsulation; 3. Secondary encapsulation of Echarts and paging components; 4. Vue packaging optimization and answers to common problems.

Course 1795
Course Introduction:Apipost is an API R&D collaboration platform that integrates API design, API debugging, API documentation, and automated testing. It supports grpc, http, websocket, socketio, and socketjs type interface debugging, and supports privatized deployment. Before formally learning ApiPost, you must understand some related concepts, development models, and professional terminology. Apipost official website: https://www.apipost.cn

Course 5521
Course Introduction:(Consult WeChat: phpcn01) The comprehensive practical course aims to consolidate the learning results of the first two stages, achieve flexible application of front-end and PHP core knowledge points, complete your own projects through practical training, and provide guidance on online implementation. Comprehensive practical key practical courses include: social e-commerce system backend development, product management, payment/order management, customer management, distribution/coupon system design, the entire WeChat/Alipay payment process, Alibaba Cloud/Pagoda operation and maintenance, and project online operation. .....

Course 5172
Course Introduction:(Consult WeChat: phpcn01) Starting from scratch, you can solve conventional business logic, operate MySQL with PHP to add, delete, modify, and query, display dynamic website data, master the MVC framework, master the basics of the ThinkPHP6 framework, and learn and flexibly master all knowledge involved in PHP development. point.

Course 8713
Course Introduction:(Consult WeChat: phpcn01) The learning objectives of the front-end development part of the 22nd issue of PHP Chinese website: 1. HTML5/CSS3; 2. JavaScript/ES6; 3. Node basics; 4. Vue3 basics and advanced; 5. Mobile mall/ Website background homepage layout; 6. Automatic calculation of tabs/carousels/shopping carts...
输入法 - How to install Sougou in an English version of Ubuntu Gnome?
2017-04-21 11:15:34 0 4 1435
2017-04-17 14:29:43 0 1 227
开源软件 - How to become an employee of the Linux Foundation?
2017-04-17 12:01:20 0 2 223
2017-04-17 11:58:24 0 2 125
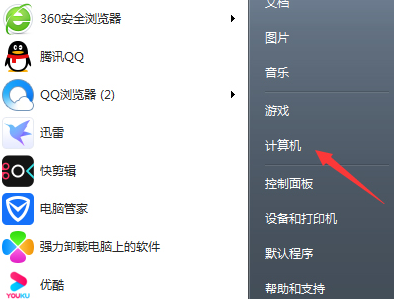
Course Introduction:When we use the win7 system, some operations require everyone permission to operate. Most users don't know how to obtain this everyone permission. So today's win7 tutorial will share the solution for the majority of users. Let’s walk through the steps to get it. How to obtain everyone permission in win7 system: 1. Open the device and enter the computer page. 2. Right-click the disk on which everyone permission needs to be set and select "Properties". (D drive is used as an example here) 3. After the disk properties window pops up, select the "Security" option. 4. Click "Edit&rdqu"
2024-02-10 comment 0 663

Course Introduction:In the process of using the computer, occasionally there will be some operation permission issues. After all, insufficient permissions will lead to a series of problems such as being unable to access, delete, edit, and read. How to set everyone permissions on Win7 computer? Friends who don’t know how to operate can refer to the tutorial shared by the editor today. Win7 computer setting everyone permissions tutorial Open the device and enter the computer page; right-click the disk where you need to set everyone permissions and select Properties; (take D drive as an example) when the disk properties window pops up, select the security option; click Edit, Add, Advanced , search immediately; find everyone in the search results, and click OK; jump to the select user or group window, and click OK again;
2023-07-11 comment 0 835
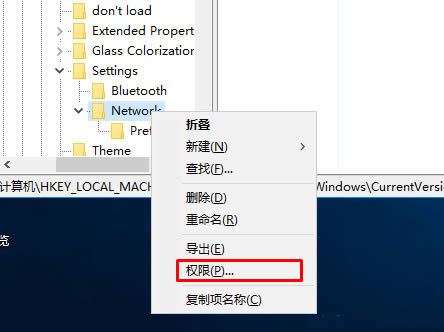
Course Introduction:Some users often need to modify some settings through the registry editor when using win10 computers, but sometimes they cannot change due to insufficient permissions. In this case, we only need to add an everyone permission. So what about the win10 registry? What about adding everyone permissions? Next, the editor will give you a detailed introduction to the method of adding everyone permission to the win10 registry. If you are interested, come and take a look. 1. Select the file that needs to be modified in the registry, right-click and select "Permissions". 2. After entering the new window, click the "Advanced" button. 3. Then click "Change&" to the right of "Owner"
2024-01-13 comment 0 344

Course Introduction:1. Take e-disk as an example. Open [Computer], and click [eDisk], right-click [Properties]. As shown in the figure: 2. In the [Window] page, switch the interface to the [Security] option, and click the [Edit] option below. As shown in the figure: 3. In the [Permissions] option, click the [Add] option. As shown in the figure: 4. The users and groups window pops up and click the [Advanced] option. As shown in the figure: 5. Click to expand the [Find Now] - [Everyone] options in order. When completed, click OK. As shown in the figure: 6. When you see that the user [everyone] has been added to [Group or User] on the [E Disk Permissions] page, select [everyone] and check the box in front of [Full Control]. After the setting is completed, Just press [OK]
2024-03-26 comment 900
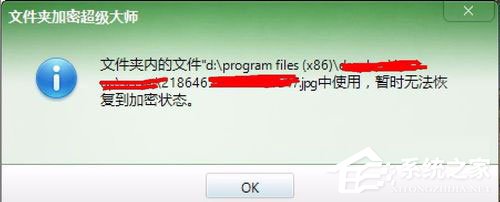
Course Introduction:Recently, Win7 system users reported that when Folder Encryption Super Master is closed, it prompts that the file is occupied, causing the software to fail to close normally. In fact, this is because the file is directly dragged to the encrypted folder without clicking Temporary Decryption. The file does not have access rights, so the encrypted folder cannot be closed. At this point, we need to add Everyone permissions to the file. So how does Win7 system add Everyone permissions to files? Let's look down together. How to add Everyone permission to files in Win7 system? 1. Click the pop-up window, then click the Close button in the control panel for 5 consecutive times. After closing the folder, decrypt the folder; 2. After decryption, find the occupied file and click the right mouse button on the file.
2023-07-19 comment 0 864