Course Intermediate 11279
Course Introduction:"Self-study IT Network Linux Load Balancing Video Tutorial" mainly implements Linux load balancing by performing script operations on web, lvs and Linux under nagin.

Course Advanced 17603
Course Introduction:"Shangxuetang MySQL Video Tutorial" introduces you to the process from installing to using the MySQL database, and introduces the specific operations of each link in detail.

Course Advanced 11314
Course Introduction:"Brothers Band Front-end Example Display Video Tutorial" introduces examples of HTML5 and CSS3 technologies to everyone, so that everyone can become more proficient in using HTML5 and CSS3.
2022-07-21 12:27:18 0 0 800
Caching reporting data in the same transaction database vs using a data warehouse
2024-02-26 19:20:23 0 1 390
Ways to fix issue 2003 (HY000): Unable to connect to MySQL server 'db_mysql:3306' (111)
2023-09-05 11:18:47 0 1 789
Experiment with sorting after query limit
2023-09-05 14:46:42 0 1 708
CSS Grid: Create new row when child content overflows column width
2023-09-05 15:18:28 0 1 597

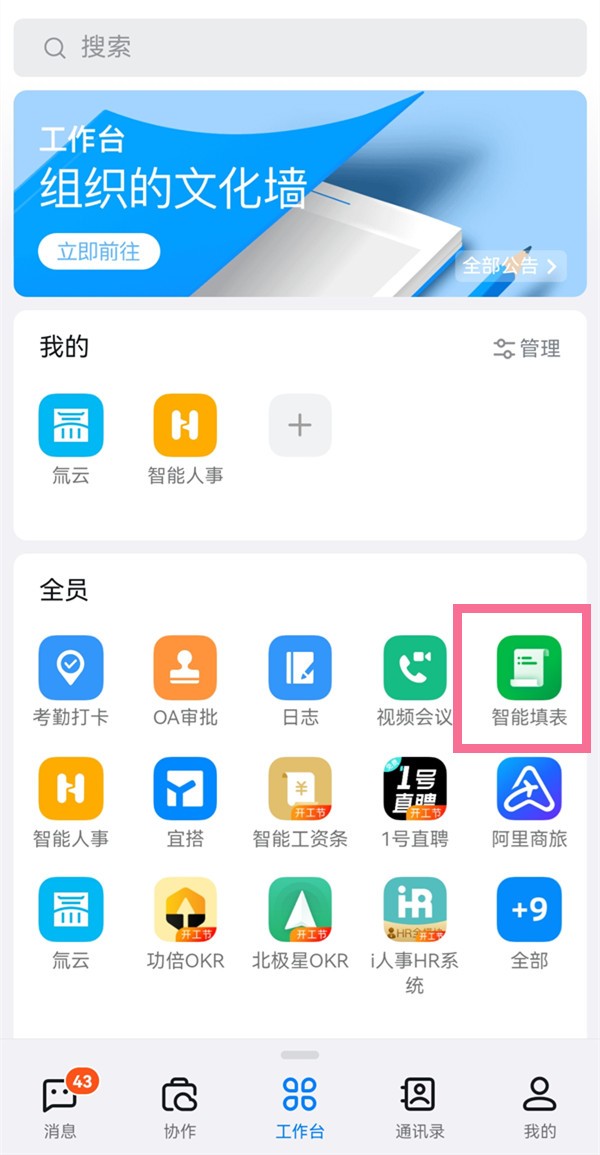
Course Introduction:1. First open DingTalk on your mobile phone and find [Smart Form Filling] on the [Workbench] interface. 2. Then select [Statistics] under the name of the template you want to view and export data.
2024-03-29 comment 0 1097

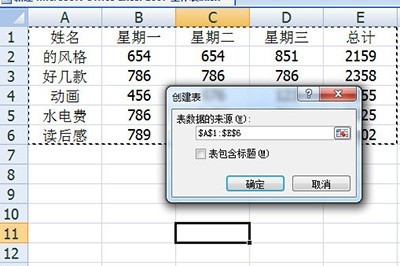
Course Introduction:1. We first press the shortcut key CTRT+T on the keyboard to create a table using the template that comes with Excel, and select the table. Remember to check Include table title. After clicking OK, our form will be beautified. 2. Then notice the total column, we can select it, then click [Click Format] - [Data Table] to choose a striking data bar color. Then select the sorting method as descending order, so that our data statistics will be displayed clearly. 3. Finally, we select the table and press the shortcut key ALT+F1 to quickly generate a statistical chart, which is very simple.
2024-06-04 comment 0 318

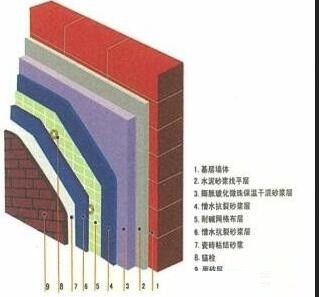
Course Introduction:In the past expression habits of the AutoCAD platform, walls are generally expressed with double lines. For example, [200mm thick masonry wall] is expressed with double lines with a spacing of 200mm. As for the filling layers and surface layers on both sides of the masonry, they are generally described in the general description or construction list and are not shown on the plan view. They are only shown on the local enlarged plane or large sample with a scale of less than 1:50. The schematic diagram of the multi-layer structure of the wall is shown in the figure. However, on the Revit platform, the setting of the wall is more complicated. The material can be set to a multi-level composite material, as shown in the figure, or only a single layer of material can be set. The setting of the material affects not only the plane expression of the wall, but also the The view expression of vertical sections also has an impact on collaborative design between disciplines, subsequent engineering quantity statistics, 4D simulation, etc., so it has an impact on
2024-04-23 comment 0 417

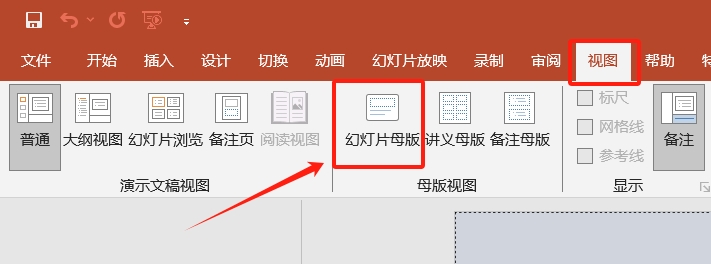
Course Introduction:Master view is a powerful tool in PPT that can help us unify the format, layout and design style of slides. Today let’s take a look at how to use the master view to unify the PPT format and make each slide look consistent and professional. Step 1: Open the master view After opening PPT, select [Slide Master] in the [View] tab list in the top menu bar. Step 2: Edit the master layout After entering the master view, you can see the various layout templates of the PPT, including the title page, content page, etc. We just need to click on any layout to start editing the format and design we want to apply to all slides. Step Three: Adjust Text Style and Format In the master view, click the text box or title area to enter text
2024-07-25 comment 0 1154

Course Introduction:Solution to the problem that WinXP system cannot open the mobile hard disk: Method 1, press "win+r", enter the command "regedit", expand the project to explorer, double-click to open "NoDriveTypeAutoRun", change 95 to 9D, method 2, enter Command "gpedit.msc", click to open Computer Configuration - Administrative Templates - System, then find and select "Turn off AutoPlay", select all drives, and click Exit. Detailed solution tutorial for WinXP system cannot open the mobile hard disk: Recommended: How to take a screenshot of WinXP system Method 1. Enter Regedit in "Run" of the "Start" menu, open the Registry Editor, and expand to HKEY_CURRE
2024-01-29 comment 0 1116