Course Intermediate 11461
Course Introduction:"Self-study IT Network Linux Load Balancing Video Tutorial" mainly implements Linux load balancing by performing script operations on web, lvs and Linux under nagin.

Course Advanced 17743
Course Introduction:"Shangxuetang MySQL Video Tutorial" introduces you to the process from installing to using the MySQL database, and introduces the specific operations of each link in detail.

Course Advanced 11447
Course Introduction:"Brothers Band Front-end Example Display Video Tutorial" introduces examples of HTML5 and CSS3 technologies to everyone, so that everyone can become more proficient in using HTML5 and CSS3.
Ways to fix issue 2003 (HY000): Unable to connect to MySQL server 'db_mysql:3306' (111)
2023-09-05 11:18:47 0 1 927
Experiment with sorting after query limit
2023-09-05 14:46:42 0 1 800
CSS Grid: Create new row when child content overflows column width
2023-09-05 15:18:28 0 1 679
PHP full text search functionality using AND, OR and NOT operators
2023-09-05 15:06:32 0 1 656
Shortest way to convert all PHP types to string
2023-09-05 15:34:44 0 1 1073

Course Introduction:CSS3 Technical Practice: Creating Beautiful Button Styles Introduction: In web design, buttons are one of the very important elements. A good-looking button can not only improve the user experience, but also increase the beauty of the web page. CSS3 technology provides rich style selectors and animation effects, allowing us to easily create beautiful button styles. This article will introduce some commonly used CSS3 techniques and how to use them to create a variety of button effects. 1. Basic Button Styles First, let’s create a set of basic button styles. The following is a
2023-09-09 comment 0 925

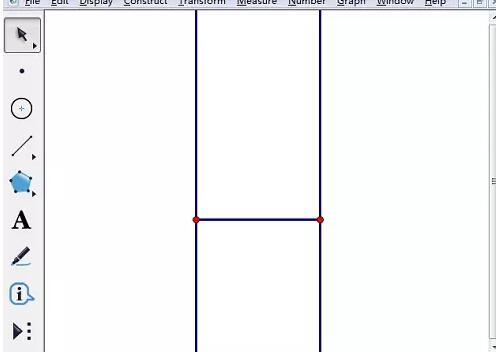
Course Introduction:1. Draw any line segment, select the two endpoints of the line segment and the line segment, [Construct] - [Perpendicular Line] to get two perpendicular lines. 2. Select the two endpoints of the line segment, [Construction] - [Construct a circle with the center and points on the circumference] to get two circles. Use the selection tool to click at the intersection of the two vertical lines and the two circles to get the other two points of the square. 3. Select four points counterclockwise and go to [Construction] - [Line Segment] to get a square. Pick a point on the initial side of the square. 4. Select point A (original image), click the menu [Transform] - [Iteration], a dialog box will appear, click point G (initial image) (select again after the iteration dialog box appears), the number of iterations is 4, Click the [Iteration] button. 5. Hide unnecessary objects and beautify graphics. Note: When point B is taken on different sides, after iteration
2024-04-17 comment 0 446

Course Introduction:1. Create a new layer and use the [Ellipse Marquee Tool] to draw a perfect circle in the night sky. 2. Right-click inside the circle, select [Feather] in the menu, and then feather it by 5 pixels. 3. Set the foreground color to white and press ALT+DEL to quickly fill it. 4. Press Shift+D to reset the foreground color, and use [Filter]-[Rendering]-[Clouds] to create the moon shadow effect. 5. Click [Create new fill or adjustment layer] below the layer and select Curves. First click the cut button below, and then pull the black and white slider to make the shadow of the moon more realistic. 6. After making adjustments, double-click the layer to open the layer style and add the [Outer Glow] effect. The color can be light yellow.
2024-04-01 comment 0 494

Course Introduction:1. First, we create a new layer and use the [Ellipse Marquee Tool] to draw a perfect circle in the night sky. 2. Then right-click inside the circle, select [Feather] in the menu, and then feather it by 5 pixels. 3. Then set the foreground color to white and press ALT+DEL to quickly fill it. 4. Press Shift+D to reset the foreground color. We use [Filter]-[Rendering]-[Clouds] to create the effect of moon shadow. 5. Click [Create new fill or adjustment layer] below the layer and select Curves. First click the cut button below, and then pull the black and white slider to make the shadow of the moon more realistic. 6. After making adjustments, double-click the layer to open the layer style and add the [Outer Glow] effect. The color can be light yellow.
2024-06-02 comment 0 850

Course Introduction:Among computer operating systems, WIN7 system is a very classic computer operating system, so how to install win7 system? The editor below will introduce in detail how to install the win7 system on your computer. 1. First download the Xiaoyu system and reinstall the system software on your desktop computer. 2. Select the win7 system and click "Install this system". 3. Then start downloading the image of the win7 system. 4. After downloading, deploy the environment, and then click Restart Now after completion. 5. After restarting the computer, the Windows Manager page will appear. We choose the second one. 6. Return to the computer pe interface to continue the installation. 7. After completion, restart the computer. 8. Finally come to the desktop and the system installation is completed. One-click installation of win7 system
2023-07-16 comment 0 1275