Found a total of 92 related content
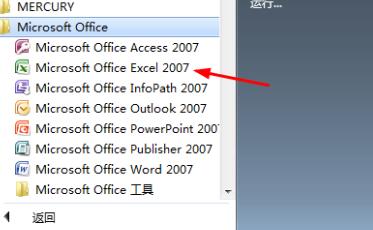
How to solve problems when Excel sends commands to the program
Article Introduction:Most users use Excel when editing tables, but every time they use certain functions, there will be a prompt that there is a problem when sending commands to the program. Faced with this situation, many friends do not know what to do. How to operate, then today’s software tutorial will answer this question for everyone. Users in need are welcome to come to the PHP Chinese website to get it and check it out. Solution to the problem when Excel sends commands to the program: 1. First open the Excel software on your computer. Here is the 2007 version of the software as an example. 2. After opening the software, click the office button in the upper left corner. 3. Then find the Excel option below and click Open. 4. Then click Advanced on the left to enter settings. 5.
2024-09-10
comment 0
780

How to set up fill in Excel table Introduction to fill up method in Excel
Article Introduction:When we use Excel tables, the cell data is filled downwards, and some users need to supplement data upwards, but they don’t know how to do it. It takes a lot of time to do it manually. We can change the menu bar to set it, and that’s it. To realize this function, today’s software tutorial will share the operation method. Users in need can come to the PHP Chinese website to see the complete steps. Introduction to the Excel upward filling method 1. Open the EXCEL2021 software and enter the following parameters. 2. Then select the cell below. 3. Then click [Fill] to set, and then click [Up] to set. 4. This completes the upward filling of the content.
2024-09-14
comment 0
309
How to set the vertical display of the volume adjustment in win10 How to set the vertical display of the volume adjustment in win10
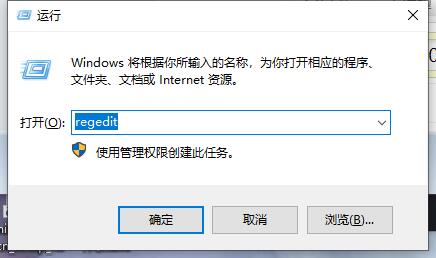
Article Introduction:Hello everyone, do you know? Some computers have a horizontal volume adjustment, but some people want it vertically. So how do you make the volume adjustment in win10 vertical? It's actually very simple, just go to the CurrentVersion in the registry and do it. Next, I will teach you how to change the volume adjustment in win10 to vertical position. How to set the vertical display of volume adjustment in win10 1. First, press the "Win+R" keys to open the run window, and enter "regedit" to open the registry interface. 2. Then, in the opened interface, click to open "HKEY_LOCAL_MACHINE\Software\Microsoft\WindowsNT\Cu
2024-09-09
comment 0
955

How to solve the problem that ASUS Win10 automatically enters the Bios infinite loop after booting
Article Introduction:What should I do if Asus Win10 keeps spinning in circles after booting into the BIOS? This problem may have many causes, such as the system boot file is damaged, the BIOS fails to recognize the hard drive, or the hard drive is damaged, etc. But don’t worry, I have some solutions here, see if they can help you! Method 1: 1. When turning on the computer, continuously press the F2 key to enter the BIOS interface. Use the arrow keys to enter the [security] menu. Use the arrow keys to select the [SecureBootControl] option and set it to Disabled. As shown in the figure: 2. Enter the [Boot] menu through the arrow keys, select the [LaunchCSM] option through the arrow keys, and set it to Enabled. As shown in the picture
2024-09-14
comment 0
370

How to set trigger time in Win10 How to set trigger time in Win10
Article Introduction:Some friends want to set the trigger time when using Win10, but they don’t know how to set the trigger time in Win10. The following editor will give you a detailed introduction to the method of setting the trigger time in Win10. Anyone who needs it Friends, come and take a look. 1. Click Start in the taskbar below, find "Windows Management Tools" in the menu bar, and then click the "Task Scheduler" option to open it. 2. After entering the new interface, click "Task Scheduler Library—Microsoft—Windows" on the left. 3. Then click "Windows Defen
2024-09-19
comment 0
417

Solution to the problem of black screen checking media when Windows 10 computer starts up
Article Introduction:Recently, many friends who use Lenovo notebooks have encountered a blue screen on startup and an error code from checkingmedia. What should they do? In fact, it is very simple. You only need to enter the bios setting interface to solve the problem. If it still doesn't work, you can only reinstall the system. Now let’s introduce in detail the solution to checkmedia’s problem of black screen when Windows 10 computer starts up! Solution to the black screen checkingmedia when Windows 10 computer starts up: 1. Press the shortcut key [F2] to enter the bios setting interface when the computer is turned on, select the "Advanced" menu through the left and right arrow keys, and change the "SATAOperation" hard disk mode to "RAID". 2. Then again
2024-09-13
comment 0
722
How to turn on the wireless function in Win7 How to turn on the wireless function in Win7
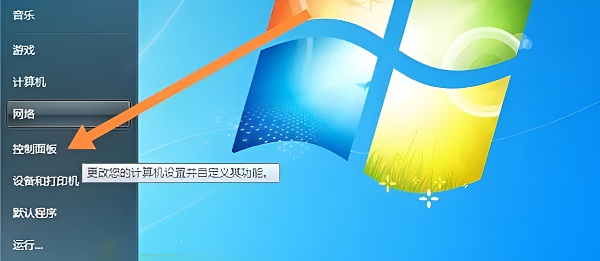
Article Introduction:Some friends found that the wireless function was turned off when the Win7 system was connected to the wireless network. So how to turn on the wireless function in Win7? The following editor will give you a detailed introduction to how to turn on the wireless function in Win7. Friends who need it can take a look. Find out. 1. Click Start in the taskbar below and select "Control Panel" in the menu option to open it. 2. After entering the new interface, click "Network and Sharing Center" to open it. 3. Then click "Change Adapter Settings" on the left. 4. Then find "Wireless Network Connection", right-click and select "Enable".
2024-09-19
comment 0
765

How to turn off the file type discovery function in Win10 How to turn off the file type discovery function in Win10
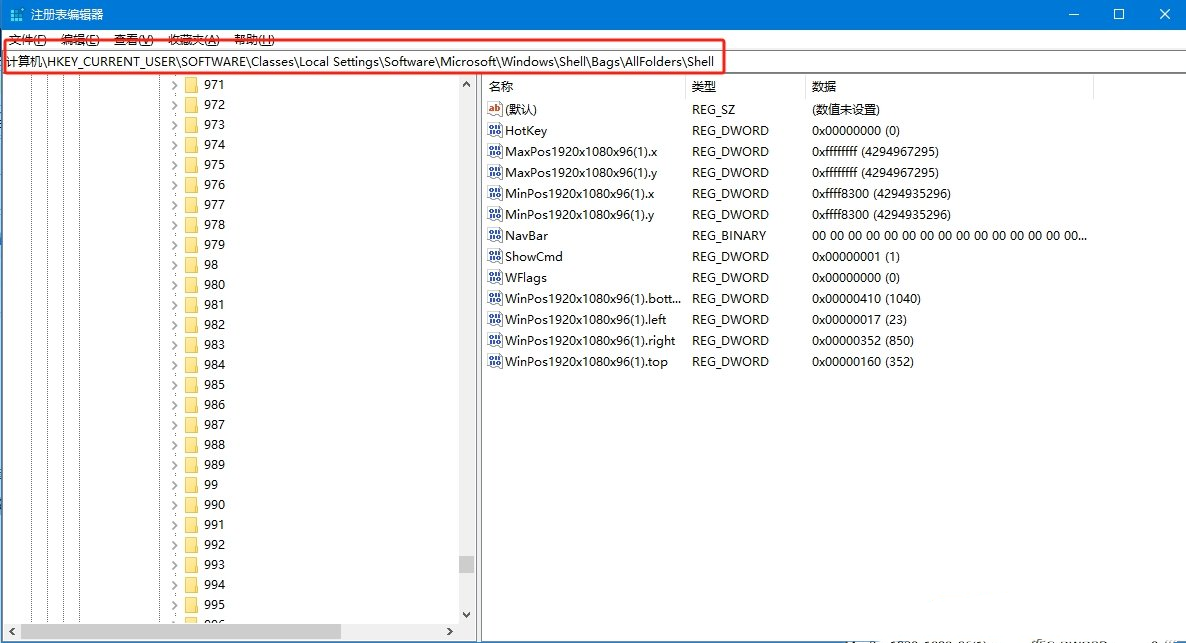
Article Introduction:Hello everyone! Today I’m going to teach you how to turn off the file type discovery function in Win10. It's very simple. You just need to open the registry editor, find the Shell folder, then right-click and create a new string value. I will explain the specific steps in detail below, just follow them. How to turn off the file type discovery function in Win10 1. First, press the "Win R" key to open the run window, and enter the "regedit" command to open the registry editor. 2. Then, in the opened interface, click to expand to the following path: HKEY_CURRENT_USERSoftwareClassesLocalSettingsSoftwareMicrosoft
2024-09-13
comment 0
545
How to turn off the file type discovery function in Win10 How to turn off the file type discovery function in Win10
Article Introduction:Hello everyone, today I will teach you how to turn off the file type discovery function in Win10. It’s actually very simple, just follow the steps below! First, open the registry editor, find the Shell folder, then right-click to create a new string value, and finally set it. Hope this tutorial is helpful to everyone! Method to turn off the Win10 file type discovery function 1. First, press the "Win+R" keys to open the run window, and enter the "regedit" command to open the registry editor. 2. Then, in the opened interface, click to expand to the following path: HKEY_CURRENT_USER\Software\Classes\LocalSettings\Sof
2024-09-09
comment 0
332
How to turn on the power high-performance mode in Win11 How to turn on the power high-performance mode in Win11
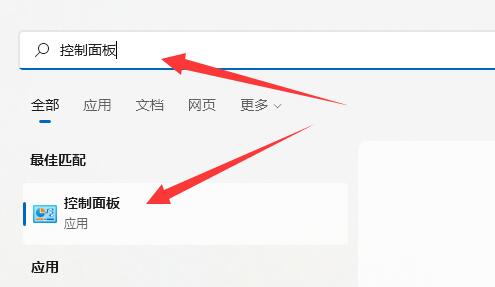
Article Introduction:Some friends found that the system running speed is a bit slow in Win11 and can be improved by turning on the high performance of the power supply. So how to turn on the power high performance mode in Win11? The editor below will give you a detailed introduction to how to enable high-performance mode in Win11. Take a look if necessary! 1. Click the search button in the taskbar below and enter "Control Panel" in the search box above to open it. 2. In the window interface that opens, click the "Hardware and Sound" option. 3. Then click "Select a power plan" under "Power Options". 4. Then click the drop-down arrow on the right side of "Show additional plans".
2024-09-19
comment 0
205
What to do if win10 fonts are blurry and unclear
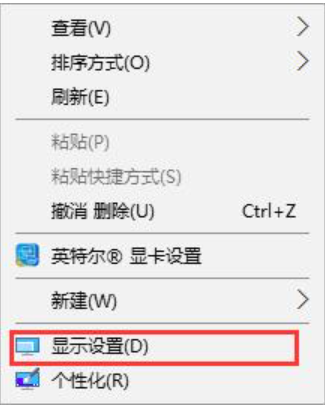
Article Introduction:Many friends said that they encountered a problem when using the Win10 operating system, that is, the fonts displayed on the Win10 interface are very blurry. So what should I do if the Win10 fonts are blurry and unclear? The editor below will share the solution to the problem of blurry and unclear fonts in Win10. Method 1: Turn on high-end scaling settings to adjust resolution 1. Right-click the computer mouse on an empty area of the desktop and select "Display Settings". 2. Then in the "Display" column, change "Scale and Layout" to 100 (strongly recommended). Then click on the "High-End Zoom Settings" to enter. 3. After entering the high-end zoom settings, turn on the "Allow Windows to try to repair applications so that they are not blurry". 4. The resolution must be set
2024-09-19
comment 0
854

What should I do if there is no Bluetooth switch in win10? How to solve the problem of missing bluetooth switch in win10 system
Article Introduction:Hello everyone, today I will share with you how to find the lost Bluetooth switch in win10 system. The win10 system itself has its own Bluetooth function, but some users find that they cannot find the Bluetooth switch and cannot use the Bluetooth function normally. Don’t worry, we can use two methods to retrieve the Bluetooth switch. I will tell you the specific steps. Solution to the lack of Bluetooth switch in win10 system Method 1: 1. First, update the Bluetooth driver and restart the computer after the installation is completed. If the Bluetooth switch option is still not found, continue with the steps below. 2. Press the Win R shortcut key at the same time, enter "services, msc" in the run window, and then press the Enter key to open the service manager. 3.
2024-09-12
comment 0
271
How to Improve the Boot Speed of Windows 11 How to Improve the Boot Speed of Windows 11
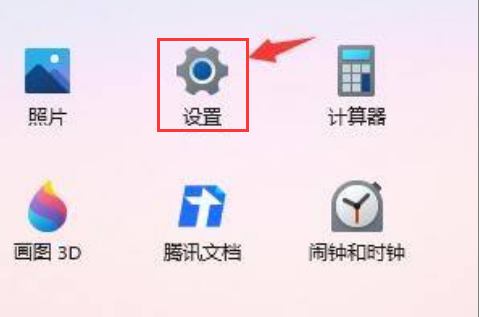
Article Introduction:After updating their computers to the Windows 11 system, many friends found that the boot speed of their computers was significantly slower. So how to solve this problem and how to improve the boot speed of Windows 11? Here the editor will introduce to you how to improve the boot speed of Win11. , if you are interested, let’s learn about it together! 1. Click Start and select the "Settings" option in the menu bar. 2. Click the "Apply" option on the left in the new interface. 3. Find the "Startup" option and open it. 4. After changing the "Sort by" option to the "Status" option, then follow your needs
2024-09-19
comment 0
382
Where to open win10 control panel How to open win10 control panel
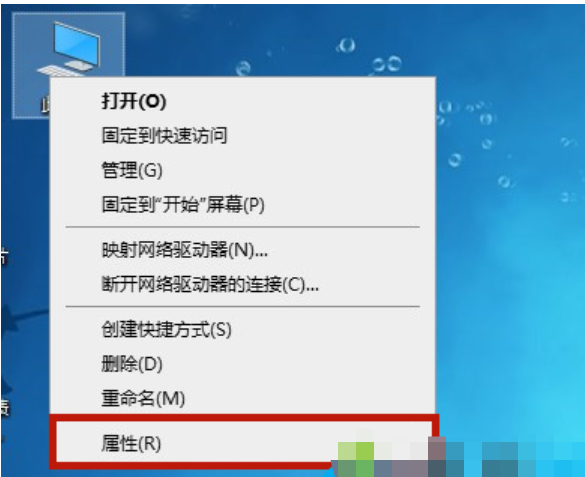
Article Introduction:Where to open win10 control panel? People often ask this question. Here is how to open the win10 control panel. Among them, there is also a method to open the win10 control panel shortcut keys. Let’s take a look with the editor. Method 1: Enter the Control Panel from Computer Properties 1. Right-click My Computer and select "Properties"; 2. Then select "Control Panel Home" in the upper left corner; 3. In this way, we successfully open the Control Panel. Method 2: Find the control panel from the settings 1. Open "Settings" in the start menu bar or directly press the "win I" key; 2. Then search for "Control Panel" in the input box; 3. Enter to open the control panel panel. Method 3: Open the control file from the Windows system folder
2024-09-14
comment 0
322

How to enable hardware acceleration in Win11 How to enable hardware acceleration in Win11
Article Introduction:The hardware acceleration of Win11 can improve the performance of the computer system, but I don’t know how to turn on the hardware acceleration of Win11. Here I will give you a detailed introduction to the method of turning on the hardware acceleration of Win11. Interested friends can come and take a look with the editor. look. 1. Click Start in the taskbar below and select "Settings" in the menu list to open. 2. In the window interface that opens, click the "Display" option on the right. 3. Then click the "Graphics" option under "Related Settings". 4. Then click "Change default graphics settings" under "Default Settings"
2024-09-19
comment 0
543

How to add startup items in Win11 How to add startup items in Win11
Article Introduction:Hello everyone! Today I will teach you how to add startup items on Win11! Sometimes some software needs to start automatically, then we need to add them to the startup items! I will explain how to operate in detail below, follow me and do it together! Method 1 to add startup items in Win11 1. First click on the start menu below, as shown in the figure. 2. Then open the "Settings". 3. Then click the "Apply" option in the left column. 4. Then click on the "Startup" setting. 5. You can add startup items at the location shown in the icon. Method 2 1. We can also right-click the start menu and open "Task Manager". 2. Then enter the "Startup" tab above. 3. Finally, right-click the desired startup item and click "Enable"
2024-09-09
comment 0
387
How to change the name of win11 startup page How to change the name of win11 startup page
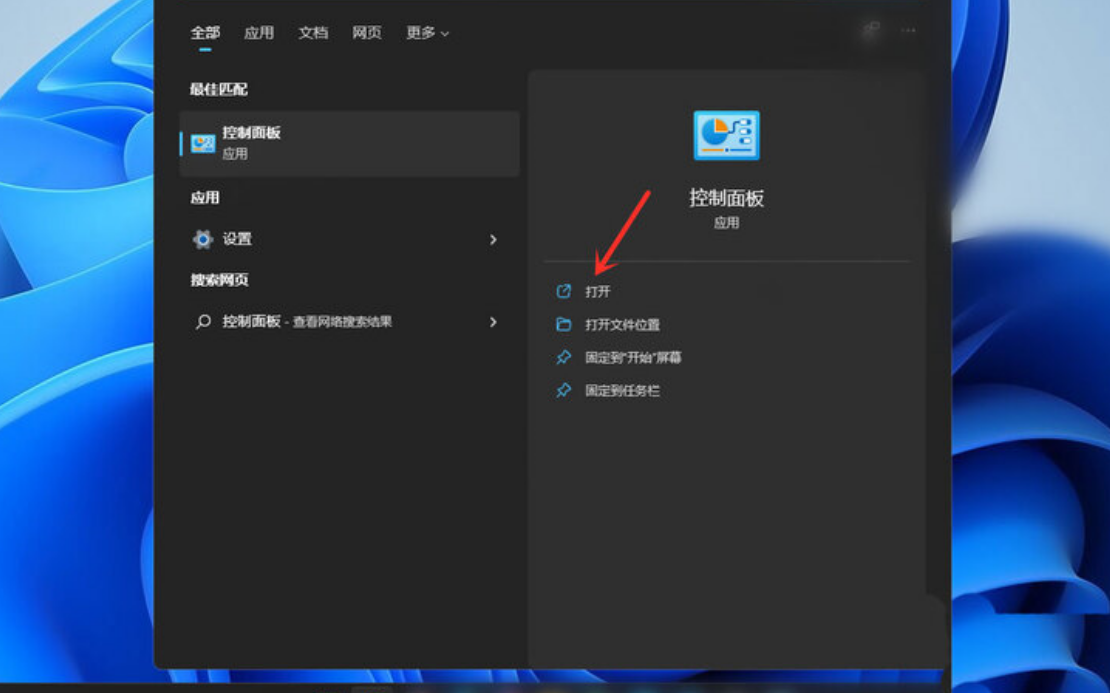
Article Introduction:Hello everyone, today I want to teach you how to change the name of the Win11 startup screen! I believe many friends will find that the default startup screen name is fixed, but we can actually modify it ourselves. The specific steps are very simple. You only need to open the control panel, find the user account, and then click on the user account to operate. Next, let me explain this method to you in detail! How to change the name of win11 startup page Method 1. Click the "Search" icon in the bottom taskbar, enter "Control Panel" in the search box, and click Open on the right. 2. Click the "User Account" option in the new interface. 3. Then click "User Account". 4. Select "Change Account Name" under "Change Account Information". 5. Finally in
2024-09-09
comment 0
666
How to enable SNMP service in Win11 How to enable SNMP service in Win11
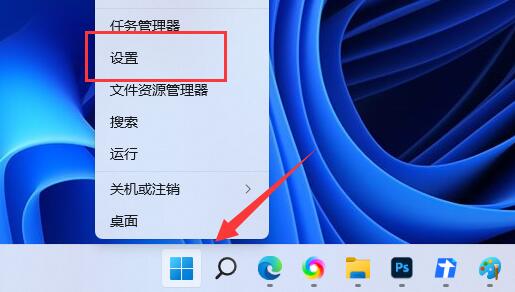
Article Introduction:Some friends want to open the SNMP service for operation, but don't know how to enable the SNMP service in Win11. Now I will give you a detailed introduction to the method of opening the SNMP service in Win11. Friends in need can take a look. 1. Right-click Start in the taskbar below and select "Settings" in the option list to open it. 2. In the window interface that opens, click the "Application" option on the left, and then click the "Optional Features" option on the right. 3. Then click the "View Features" button to the right of "Add Optional Features". 4. In the pop-up window interface, find "
2024-09-19
comment 0
648
How to open disk display in Win11 How to open disk display in Win11
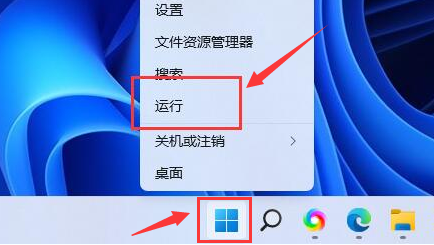
Article Introduction:Some friends want to turn on the disk display when using the Win11 system, but they don’t know how to turn on the disk display in Win11. Today I will give you a detailed introduction to how to turn on the disk display in Win11. Let’s take a look! 1. Right-click Start in the taskbar below and select "Run" in the option list to open it. 2. Enter "gpedit.msc" in the opened dialog box and click "OK" to open. 3. After entering the new window interface, click "User Configuration - Administrative Templates - Windows Components" in the left column. 4. Then click "File Resource Management" on the left
2024-09-14
comment 0
415
How to enable sticky keys on the keyboard in Win11 How to enable sticky keys on the keyboard in Win11
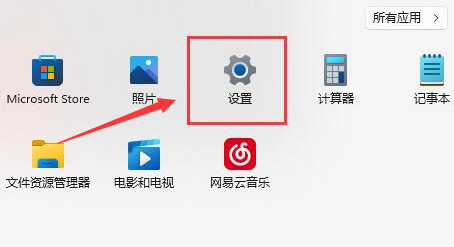
Article Introduction:The sticky keys on the keyboard in the Win11 system can be used conveniently with shortcut key combinations. Some friends want to know how to enable the sticky keys on the keyboard in Win11. Today, I will introduce to you in detail how to enable the sticky keys on the keyboard in Win11. Anyone who needs it Friends, come and take a look! 1. Click Start in the taskbar below and select "Settings" in the menu list. 2. In the window interface that opens, click the "Accessibility" option in the left column. 3. Then click the "Keyboard" option on the right. 4. Finally find the "Sticky Key" and turn on the switch button on the right side of it.
2024-09-18
comment 0
255


