
This article mainly tells you how to build a redis cluster and the issues that need to be paid attention to during the process. It is very good and recommended to everyone. Friends in need can refer to it
Here , build a 6-node redis pseudo-cluster on a Linux virtual machine. The idea is very simple. Open 6 redis instances on a virtual machine, and each redis instance has its own port. In this case, it is equivalent to simulating 6 machines, and then building a redis cluster using these 6 instances.
Premise: redis has been installed, the directory is /usr/local/redis-4.0.1 If not, you can refer to the article Installing redis under windows Installing redis under Linux
redis cluster is used ruby script, so to execute the script, a ruby environment is required. Corresponding to redis-trib.rb in the src directory of the redis source code, redis-trib.rb is a tool officially launched by redis to manage redis clusters. It is based on the cluster commands provided by redis and is encapsulated into a simple, convenient and practical operating tool. so
Install ruby environment:
1.yum install ruby
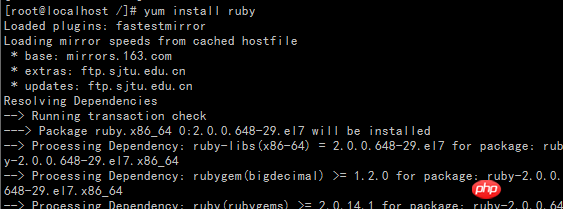
2 .yum install rubygems

3.gem install redis

Centos supports ruby to 2.0.0 by default, and redis requires a minimum of 2.2.2. The solution is to install rvm first and then upgrade the ruby version to 2.3.3.
1.sudo yum install curl
2. Install rvm
##curl -L get.rvm.io | bash -s stable
source /usr/local/rvm/scripts/rvm
rvm list known
rvm install 2.3.3
rvm remove 2.0.0
ruby --version
gem install redis
redis cluster construction
Modify the redis-conf files under the node respectively, because On a machine (192.16819.129), so each instance should have a different port; at the same time, each instance will obviously have its own place to store data; turn on AOF mode; turn on cluster configuration; turn on background mode;

Start the redis service and see if it can be started. ok no problem.
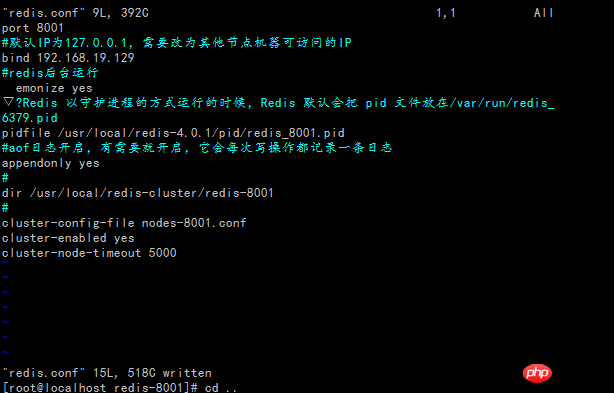
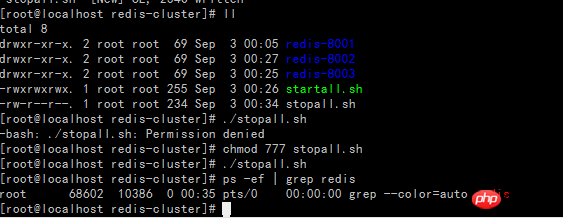
Create the startall.sh script (the prompt permission denied indicates insufficient permissions, execute the command chmod 777 startall.sh to modify the permissions)
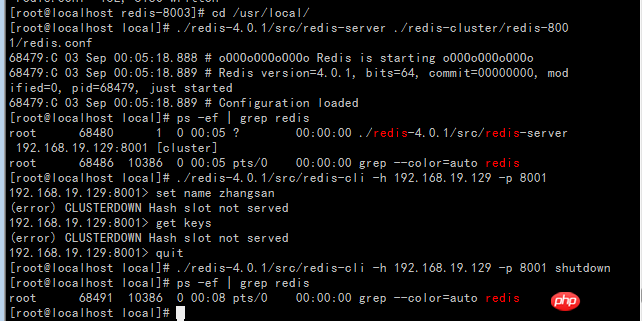
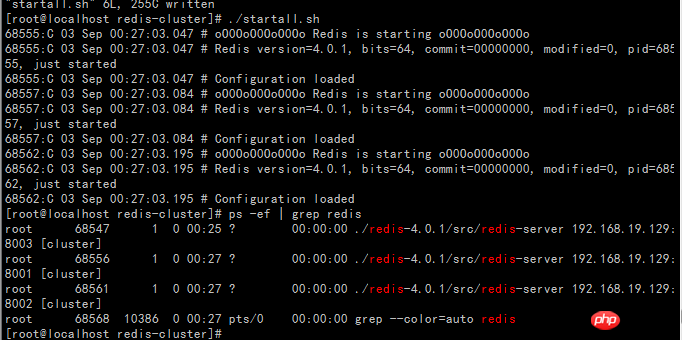
Start the startall.sh script

Create the stopall.sh script

You can see that redis-trib.rb has the following functions:
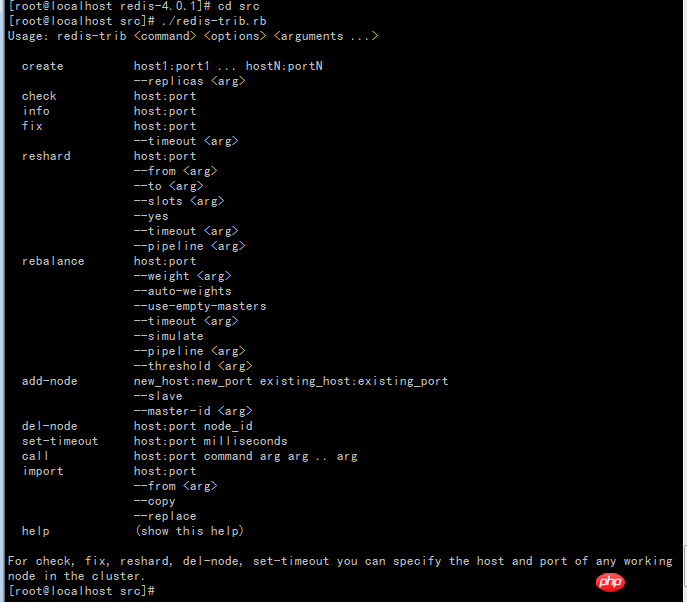
redis-trib.rb mainly has two classes: ClusterNode and RedisTrib. ClusterNode saves the information of each node, RedisTrib is the implementation of each function of redis-trib.rb

Note: It prompts at least 3 master cluster nodes. It was said that 6 are created before, but in actual operation I only created 3 nodes, so it can be concluded that when we create a redis cluster, we need at least three master nodes, and it should be an odd number, so, no Be lazy and create three more.
Special note: The key here is the optional replicas parameter. --replicas 2 means to allocate 2 slaves to each master. replicas means how many slaves are needed. It can be successfully created without filling in this parameter, so there are three masters. We will introduce the replicas parameter later
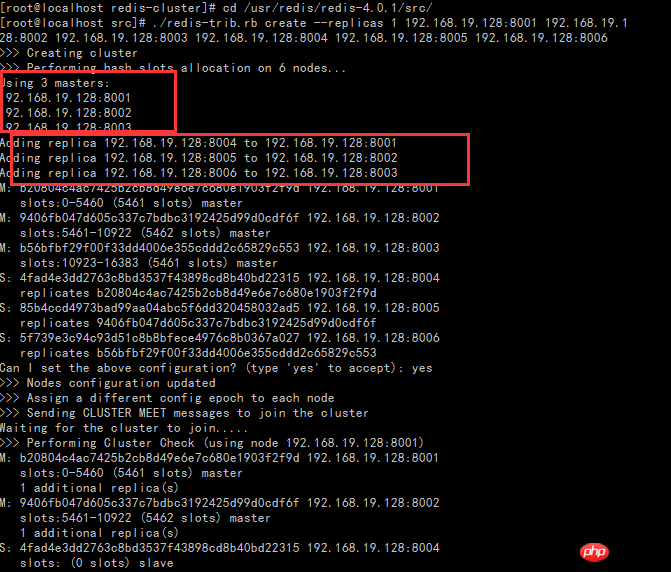
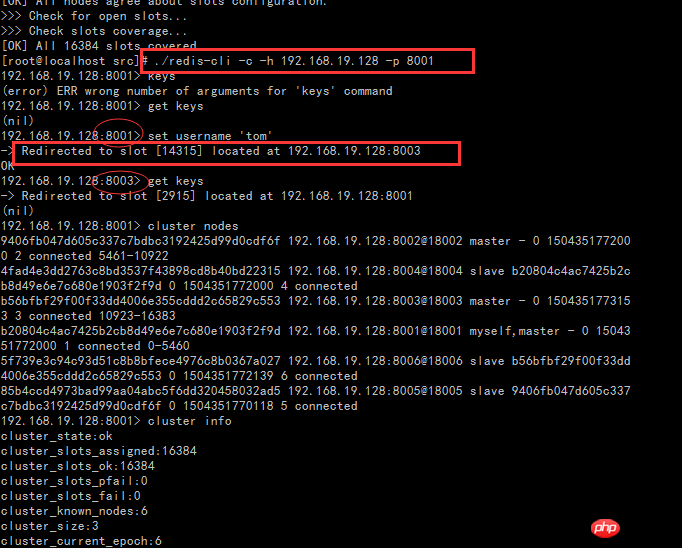
First of all, --replicas 1 1 actually represents a ratio, which is the number of master nodes/ The proportion of slave nodes. So think about it, when creating a cluster, which nodes are the master nodes? Which nodes are slave nodes? The answer is that the order of IP:PORT in the command will be followed, first 3 master nodes, then 3 slave nodes.
Secondly, pay attention to the concept of slot in the picture. For Redis cluster, slot is a place to store data, it is a slot. For each Master, there will be a slot range, but the Slave does not. In the Redis cluster, the Master can still read and write, while the Slave can only read. The writing of data is actually distributed and stored in slots, which is different from the previous master-slave mode of 1.X (Master/Slave data storage in master-slave mode is completely consistent), because 3 The data storage of each Master is different. This will be verified in subsequent essays.
The above is the detailed content of Redis cluster building tutorial and problem solving. For more information, please follow other related articles on the PHP Chinese website!
 Commonly used database software
 What are the in-memory databases?
 Which one has faster reading speed, mongodb or redis?
 How to use redis as a cache server
 How redis solves data consistency
 How do mysql and redis ensure double-write consistency?
 What data does redis cache generally store?
 What are the 8 data types of redis


