This article mainly introduces a detailed tutorial on how to implement SMTP email sending in Python, with the SMTP email sending code attached. Interested friends can refer to it
Introduction
Python tutorial for sending emails. When I searched the website, I found a lot of them, but they all talked about a lot of principles and then launched the implementation code. When I tested using the given code to send emails, it was unsuccessful. It took me a long time to find the reason. This was all caused by the lack of detailed environment debugging, so today I will provide a detailed tutorial, step by step from environment debugging to code implementation. I hope it will help people who are still struggling to find solutions. I haven't been able to get any help from someone who can effectively resolve it.
SMTP protocol
First understand SMTP (Simple Mail Transfer Protocol). The mail transfer agent uses the SMTP protocol to send emails to the recipient's mail server. The SMTP protocol can only be used to send emails, not receive emails, and most email sending servers use the SMTP protocol. The default TCP port number for the SMTP protocol is 25.
Environment debugging
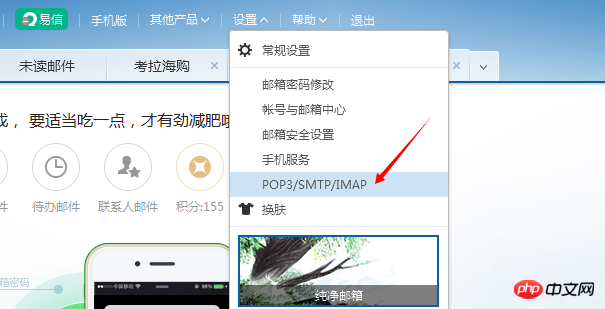
As mentioned above, the email is sent using the SMTP protocol, so you need to check whether the SMTP protocol is turned on in your sender's mailbox first. If not, it is necessary. Turn it on. I tested using the 163.com mailbox as the sender's mailbox. Turn on the SMTP protocol as shown in the figure below.
1. First log in to the 163.com mailbox (NetEase mailbox), as shown below

2. When you see an option "Settings" in the function bar above the mailbox, click the option and then select # from the drop-down menu ##"POP3/SMTP/IMAP"
 ##3. As shown in the figure below, the two red boxes above It must be checked. If it is not checked, you can check it if you want to choose to enable it. Then you can see
in the red box below: SMTP server :smtp.163.com

After the above settings, the environment will be debugged Okay, the code can be implemented below. It is recommended to use pycharm4.5.3
editor to write the code. The following code can be used in both python2.7 and python3.4 version tests. #coding:utf-8 #强制使用utf-8编码格式
import smtplib #加载smtplib模块
from email.mime.text import MIMEText
from email.utils import formataddr
my_sender='发件人邮箱账号' #发件人邮箱账号,为了后面易于维护,所以写成了变量
my_user='收件人邮箱账号' #收件人邮箱账号,为了后面易于维护,所以写成了变量
def mail():
ret=True
try:
msg=MIMEText('填写邮件内容','plain','utf-8')
msg['From']=formataddr(["发件人邮箱昵称",my_sender]) #括号里的对应发件人邮箱昵称、发件人邮箱账号
msg['To']=formataddr(["收件人邮箱昵称",my_user]) #括号里的对应收件人邮箱昵称、收件人邮箱账号
msg['Subject']="主题" #邮件的主题,也可以说是标题
server=smtplib.SMTP("smtp.xxx.com",25) #发件人邮箱中的SMTP服务器,端口是25
server.login(my_sender,"发件人邮箱密码") #括号中对应的是发件人邮箱账号、邮箱密码
server.sendmail(my_sender,[my_user,],msg.as_string()) #括号中对应的是发件人邮箱账号、收件人邮箱账号、发送邮件
server.quit() #这句是关闭连接的意思
except Exception: #如果try中的语句没有执行,则会执行下面的ret=False
ret=False
return ret
ret=mail()
if ret:
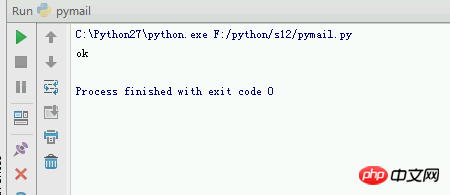
print("ok") #如果发送成功则会返回ok,稍等20秒左右就可以收到邮件
else:
print("filed") #如果发送失败则会返回filed

Although the code can be used, some people inevitably like to mess around and break the code while playing, so here are a few knowledge points to clear up your doubts.
1. I see that there is no "#coding:utf-8" in the first line of the code above. I believe that many people who read this code do not pay much attention to this line. Anyway, it has nothing to do with the code implementation. Just select the utf-8 format when saving; let me tell you, this line of code is very important in python. It is best to add mandatory character encoding to every page, because the python2 version recognizes ASCII encoding by default, so when Chinese characters It is not recognized when it appears in python, and the error message that appears is as shown below:

Error messageExample: File"F:/python/s12/pymail.py",line2SyntaxError:Non-ASCIIcharacter'\xe5'infileF:/python/s12/pymail.pyonline2,butnoencoding
declared ;seehttp://www.python.org/peps/pep-0263.htmlfordetailsSo when the above encoding error message appears, you can add Up
#coding:utf-8#Force encoding to utf-8 or
#coding:GBK# The forced encoding is GBK[Related recommendations]
1.
4. Python uses SMTP to send emails
The above is the detailed content of Share an example of how to implement SMTP to send emails using Python. For more information, please follow other related articles on the PHP Chinese website!


