
Many times, we need to adjust parts of an image, and this adjustment must be smooth and interactive. The Forward Warp tool in Photoshop’s Liquify filter is such a tool and it’s very useful. A similar tool has the face-slimming function of Meitu Xiuxiu. This article describes the principles and algorithms behind such tools.
Let’s take Meitu Xiuxiu as an example to briefly describe the forward transformation function.
First, use the mouse to control a circular selection.
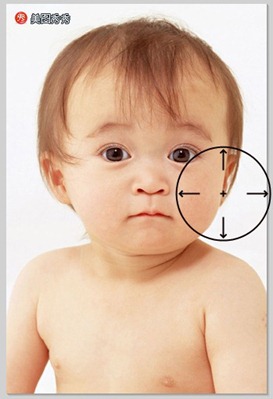
Then, click the left mouse button and drag in a certain direction to produce a smooth forward deformation picture:
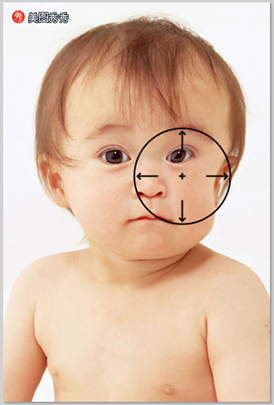
With this tool, you can adjust parts of the picture, and the degree of freedom is relatively large, so it is more practical.
The following explains the principles of this type of algorithm.
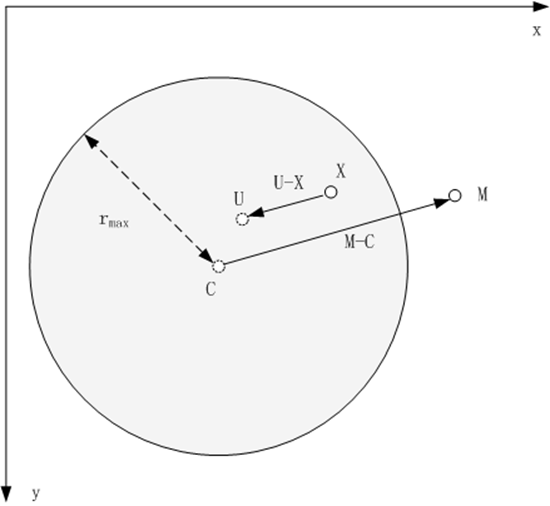
In the above figure, the shaded ring represents a circular selection with a radius of rmax. Among them, point C is the point when the mouse is clicked, which is the center of the circular selection. Drag the mouse from C to M, causing point U in the image to transform to point X. Therefore, the key issue is to find the inverse transformation of the above transformation - when a point , find the pixel value of U. In this way, each pixel in the circular selection is evaluated to obtain the transformed image.
Andreas Gustafsson's Interactive Image Warping article gives this inverse transformation formula:

The characteristics of this deformation algorithm are:
1 Only the image within the circular selection is deformed
2 The closer to the center of the circle, the greater the deformation, the closer to the edge the smaller the deformation, and there is no deformation at the boundary
3 The deformation is smooth
The specific implementation steps are as follows:
1 For each pixel in the circular selection, take out its R, G, and B components and store them in 3 Buffs (rBuff, gBuff, bBuff) (That is, the three Buffs respectively store the values of the R, G, and B channels of the original image in the selection)
2 For each pixel X in the circular selection,
2.1 According to the above formula, calculate the exact position coordinate value U
before its deformation. 2.2 Use the interpolation method to calculate R at the position of U based on the position of U and the values in rBuff, gBuff, and bBuff. G, B and other components
2.3 Synthesize R, G, B and other components into new pixels as the pixel value at , it can be easily written based on the above text - to solve this kind of problem, what is important is not the code, but the ideas and algorithms.
The following is my implementation demonstration:
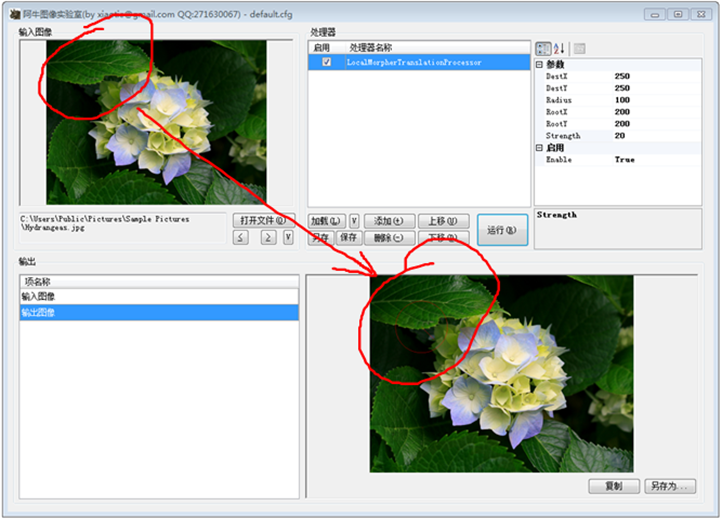 In the above picture, the upper left corner is the original image, and the lower right corner is the deformed image. The red circle encircles the deformation area. As you can see, the deformation is very smooth. I introduced the deformation strength s(strength) in the above algorithm, strength=20 in the above picture.
Introducing strength, the formula must be modified. Here is my modified version of the formula:
 Look at the result——
Original Picture:
 Deformation, strength=20:
Transformation, strength=120:
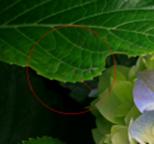
This function in photoshop and Meituxiu Xiu can continuously transform. I guess that this continuous deformation is connected in series by a series of basic deformations. That is, dragging the mouse from M0 to Mn position does not only calculate the M0->Mn transformation, but introduces a series of intermediate ones on the mouse trajectory. Point, M1, M2...Mn-1, and then perform a series of transformations on the image, such as M0->M1, M1->M2,..., Mn-1->Mn.
For more image deformation algorithms: Implementing the forward deformation tool in the Photoshop liquefaction toolbox, please pay attention to the PHP Chinese website for related articles!
 photoshop cs5 serial number
 What should I do if the ps temporary disk is full?
 How to solve waiting for device
 Oracle view table operation history
 How to share a printer between two computers
 ps paint bucket shortcut keys
 Basic usage of insert statement
 How to clean up the computer's C drive when it is full


