


php method to implement ios push: first package the message to be sent and the iPhone logo and send it to APNS; then find the iPhone with the corresponding logo and send the message to the iPhone; finally, send the message Pass it to the corresponding application, and the Push notification will pop up according to the settings.
Recommended: "php video tutorial"
IOS push message is one of many IOS applications All have functions. I have also been researching this function recently. After referring to a lot of information, I finally got it. Here are the steps to share:
The working mechanism of iOS message push can be simple Use the following figure to summarize:

Provider refers to the Push server of a certain iPhone software, APNS is Apple Push Notification Service The abbreviation for Apple Server.
The above picture can be divided into three stages:
The first stage: The application packages the message to be sent and the identification of the destination iPhone and sends it to APNS.
The second stage: APNS searches for the iPhone with the corresponding identification in its own list of iPhones registered for the Push service, and sends the message to the iPhone.
The third stage: iPhone passes the sent message to the corresponding application and pops up a Push notification according to the settings.
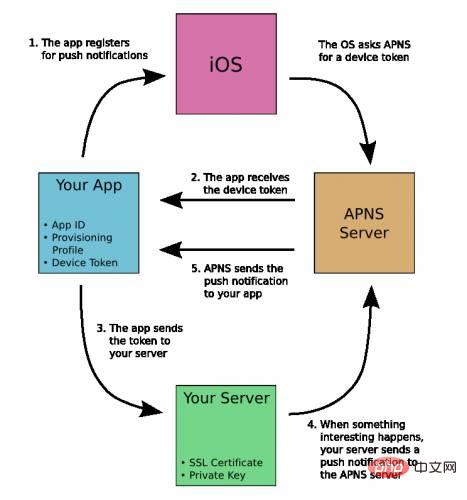
From the picture above we can see:
1. Application registration message push.
2. iOS obtains the device token from the APNS Server, and the application receives the device token.
3. The application sends the device token to the PUSH server program.
4. The server program sends a message to the APNS service.
5. The APNS service sends the message to the iPhone application.
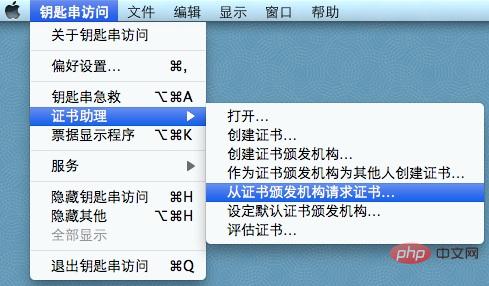
Whether it is the iPhone client and APNS, or the Provider and APNS, they all need to connect through a certificate.
Let me introduce several certificates used.
1. CSR file
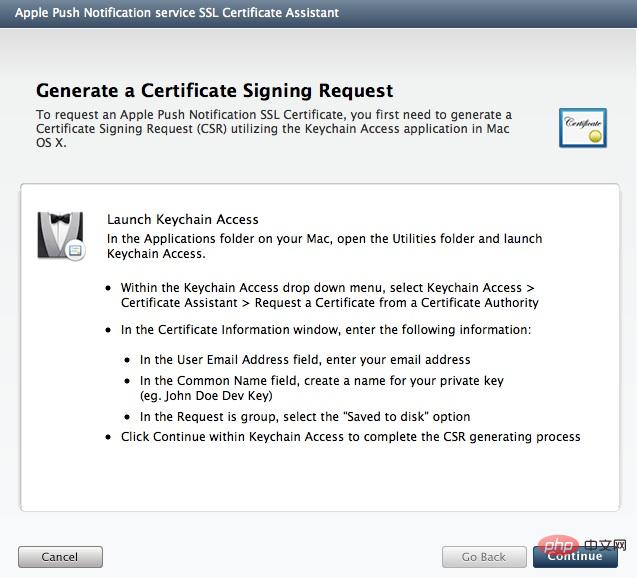
1. Generate Certificate Signing Request (CSR)
2. Fill in your email address and Common name and choose to save to hard drive.
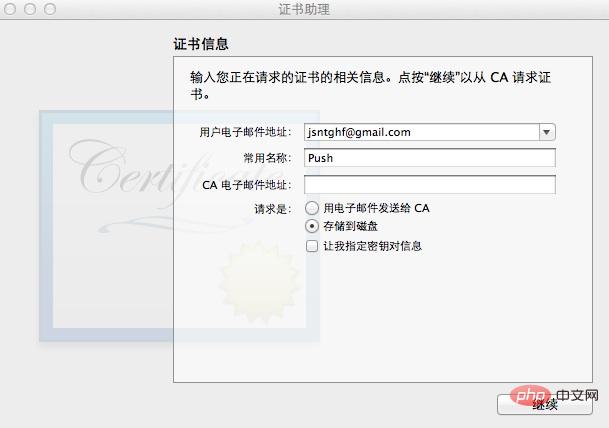
Click to continue:
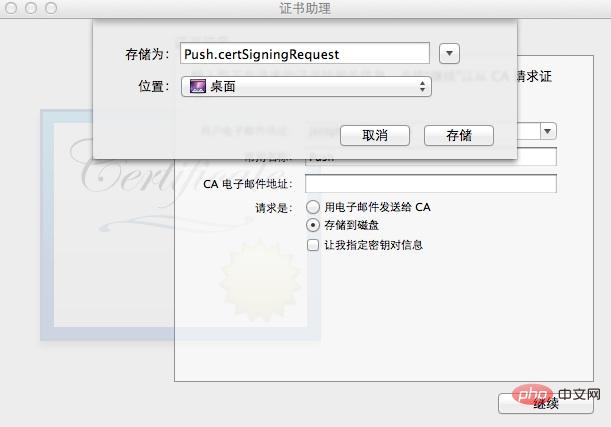
This will generate a Push.certSigningRequest file locally.
2. p12 file
1. Export the key.


2. Enter your password.
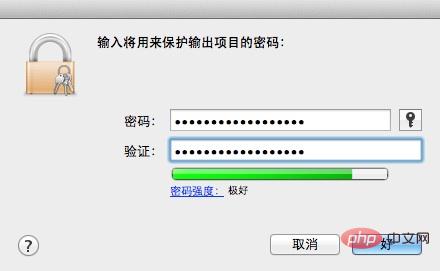
This generates a Push.p12 file.
3. SSL certificate file
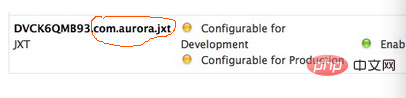
1. Log in to the iOS Provisioning Portal with your paid account and create a new App ID. For this process, please refer to: Real-device debugging of iOS applications. This will generate the following record:

2. Click Configure on the right:

3. Click Configure after the Development Push SSL Certificate line:
4. Click Continue:
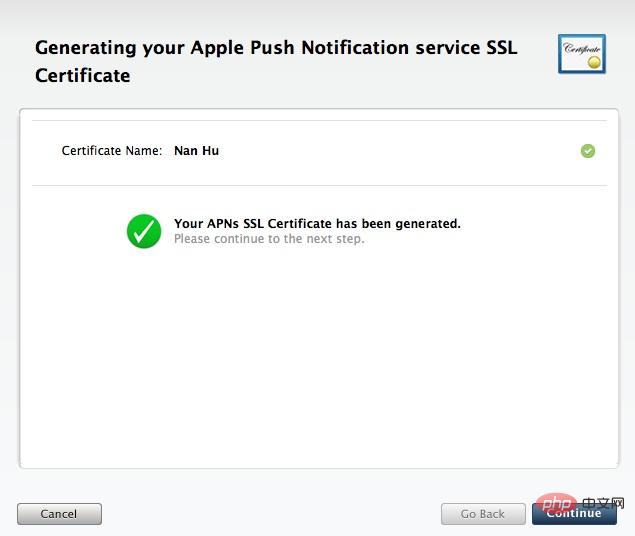

So far, we have generated three files:
1, Push.certSigningRequest
2, Push.p12
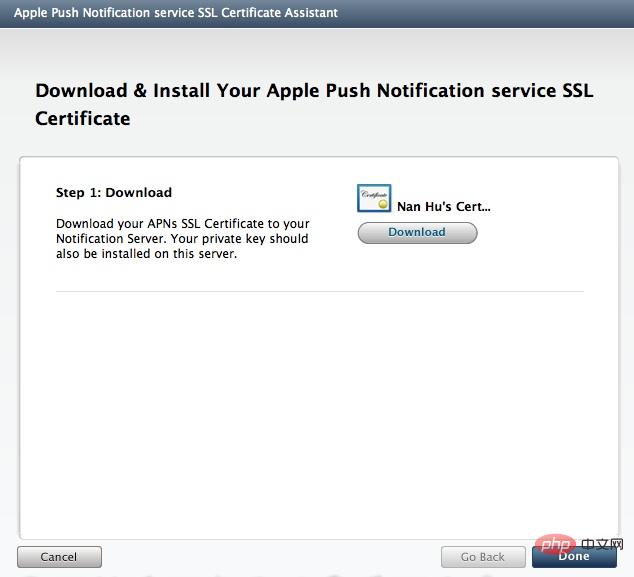
3. aps_developer_identity.cer
Double-click aps_developer_dientity.cer to register it in your keychain, so that there will be

in your keychain . Prepare the profile certificate. Because push messages can only be tested on real machines, you need to create a profile certificate.
Click "new profile" to create a profile for the newly created APP ID above. After success Download *_Dev_Profile.mobileprovision
Double-click to add it to the Provisioning Profiles of xcode.One thing to note here is that before adding this to xcode, if it has been added before, be sure to delete it. , an error will occur if there are more than one.
3. Project code
The certificate has been prepared here. Next, we create a new test project in xcode. Pay attention to setting up the project The Bundle Identifier must be the same as the one in the APP ID built above
Add some code to didFinishLaunchingWithOptions
- (BOOL)application:(UIApplication *)application didFinishLaunchingWithOptions:(NSDictionary *)launchOptions
{

[self.window makeKeyAndVisible];
    [[UIApplication sharedApplication] registerForRemoteNotificationTypes: UIRemoteNotificationTypeBadge | UIRemoteNotificationTypeSound | UIRemoteNotificationTypeAlert];
    return YES;

}


- (void)application:(UIApplication *)application didRegisterForRemoteNotificationsWithDeviceToken:(NSData *)pToken {
    NSLog(@"regisger success:%@", pToken);

    //注册成功,将deviceToken保存到应用服务器数据库中

}

- (void)application:(UIApplication *)application didReceiveRemoteNotification:(NSDictionary *)userInfo{
    // 处理推送消息
    UIAlertView *alert=[[UIAlertView alloc]initWithTitle:@"通知" message:@"我的信息" delegate:selfcancelButtonTitle:@"取消" otherButtonTitles:nil, nil];
    [alert show];
    [alert release];
NSLog(@"%@", userInfo);
}
- (void)application:(UIApplication *)application didFailToRegisterForRemoteNotificationsWithError:(NSError *)error {
    NSLog(@"Regist fail%@",error);


}If everything goes well here, we can run it on the real machine. If the registration is successful, we will get the deviceToken of the iPhone,
My token is:
<740f4707 bebcf74f 9b7c25d4 8e335894 5f6aa01d a5ddb387 462c7eaf 61bb78ad>
4. Use PHP to push the message to APNS on the application server,
1. PHP also requires a certificate to connect to APNS. Do you remember the certificates we obtained above? Open the terminal and process the above certificate as follows,
cd and enter the directory where the certificate is located
Convert the .cer file into a .pem file:
$ openssl x509 -in aps_developer_identity.cer -inform der
-out PushChatCert.pem
Convert the private key Push.p12 file into a .pem file:
$ openssl pkcs12 -nocerts -out PushChatKey.pem -in Push.p12
Enter Import Password:
MAC verified OK
Enter PEM pass phrase:
Verifying – Enter PEM pass phrase:
你首先需要为.p12文件输入passphrase密码短语,这样OpenSSL可以读它。然后你需要键入一个新的密码短语来加密PEM文件。还是使用”pushchat”来作为PEM的密码短语。你需要选择一些更安全的密码短语。
注意:如果你没有键入一个PEM passphrase,OpenSSL将不会返回一个错误信息,但是产生的.pem文件里面将不会含有私钥。
最后。把私钥和证书整合到一个.pem文件里:
$ cat PushChatCert.pem PushChatKey.pem > ck.pem
为了测试证书是否工作,执行下面的命令:
$ telnet gateway.sandbox.push.apple.com 2195
Trying 17.172.232.226…
Connected to gateway.sandbox.push-apple.com.akadns.net.
Escape character is ‘^]’.
它将尝试发送一个规则的,不加密的连接到APNS服务。如果你看到上面的反馈,那说明你的MAC能够到达APNS。按下Ctrl+C 关闭连接。如果得到一个错误信息,那么你需要确保你的防火墙允许2195端口。
然后再次连接,这次用我们的SSL证书和私钥来设置一个安全的连接:
$ openssl s_client -connect gateway.sandbox.push.apple.com:2195
-cert PushChatCert.pem -key PushChatKey.pem
Enter pass phrase for PushChatKey.pem:
你会看到一个完整的输出,让你明白OpenSSL在后台做什么。如果连接是成功的,你可以键入一些字符。当你按下回车后,服务就会断开连接。如果在建立连接时有问题,OpenSSL将会给你一个错误消息
ck.pem文件就是我们需要得到php连接APNS 的文件,将ck.pem和push.php放入同一目录上传到服务器,push.php的代码如下:
<?php
// 这里是我们上面得到的deviceToken,直接复制过来(记得去掉空格)
$deviceToken = '740f4707bebcf74f 9b7c25d4 8e3358945f6aa01da5ddb387462c7eaf 61bb78ad';
// Put your private key's passphrase here:
$passphrase = 'abc123456';
// Put your alert message here:
$message = 'My first push test!';
$ctx = stream_context_create();
stream_context_set_option($ctx, 'ssl', 'local_cert', 'ck.pem');
stream_context_set_option($ctx, 'ssl', 'passphrase', $passphrase);
// Open a connection to the APNS server
//这个为正是的发布地址
//$fp = stream_socket_client(“ssl://gateway.push.apple.com:2195“, $err, $errstr, 60, //STREAM_CLIENT_CONNECT, $ctx);
//这个是沙盒测试地址,发布到appstore后记得修改哦
$fp = stream_socket_client(
'ssl://gateway.sandbox.push.apple.com:2195', $err,
$errstr, 60, STREAM_CLIENT_CONNECT|STREAM_CLIENT_PERSISTENT, $ctx);
if (!$fp)
exit("Failed to connect: $err $errstr" . PHP_EOL);
echo 'Connected to APNS' . PHP_EOL;
// Create the payload body
$body['aps'] = array(
'alert' => $message,
'sound' => 'default'
);
// Encode the payload as JSON
$payload = json_encode($body);
// Build the binary notification
$msg = chr(0) . pack('n', 32) . pack('H*', $deviceToken) . pack('n',
strlen($payload)) . $payload;
// Send it to the server
$result = fwrite($fp, $msg, strlen($msg));
if (!$result)
echo 'Message not delivered' . PHP_EOL;
else
echo 'Message successfully delivered' . PHP_EOL;
// Close the connection to the server
fclose($fp);
?>接下来我们访问http://localhost/push/push.php
iphone就会接收到一条推送消息了,如果有问题的话就检查上面的操作步骤,特别是加红的部分
另外去除标记的方法为,在viewDidApper中加入
int badge = [UIApplication sharedApplication].applicationIconBadgeNumber;
    if(badge > 0)
    {
        badge--;
        [UIApplication sharedApplication].applicationIconBadgeNumber = badge;
}The above is the detailed content of How to implement ios push in php. For more information, please follow other related articles on the PHP Chinese website!


![[Web front-end] Node.js quick start](https://img.php.cn/upload/course/000/000/067/662b5d34ba7c0227.png)


