Dokumen manual Cina WordPress
/ WordPress 主机转移
WordPress 主机转移
在本章中,我们将研究如何将WordPress转移到新的托管平台。
在这里,我们使用Hostinger web托管将WordPress网站转移到另一个主机。
只需按照下面给出的简单步骤将您的WordPress网站转移到另一个主机。
步骤(1) - 保留WordPress文件的备份并导出数据库。 我们将在 WordPress - Backup& 恢复
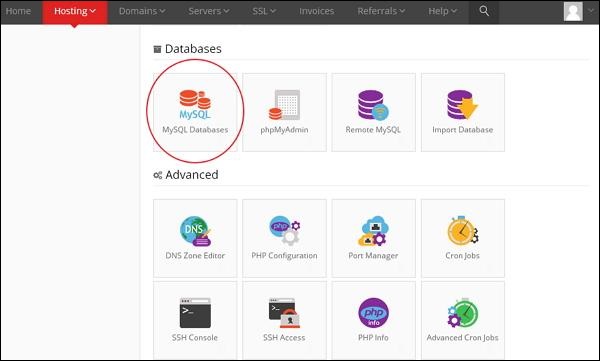
步骤(2) - 登录到cPanel,然后点击 MySQL数据库,如下所示。
步骤(3) - 创建一个新的数据库和MySQL用户,如下面的屏幕所示。 该页面有以下字段
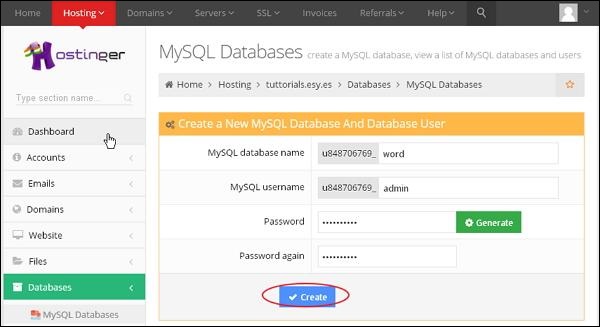
MySQL Database Name - 输入您的数据库名称。
MySQL Username- 输入您的用户名。
Password - 设置数据库的密码。
Password again- 再次设置与之前验证相同的密码。
填写所有字段后,单击创建按钮。
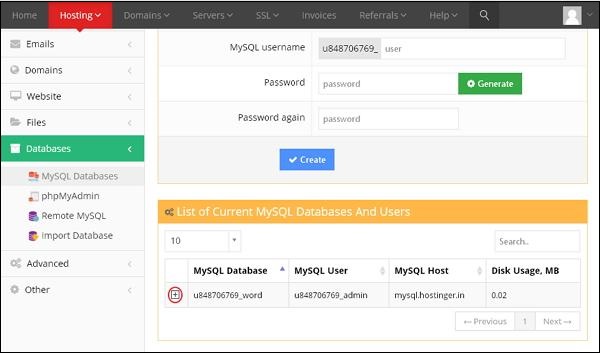
步骤(4) - 您可以查看创建的 MySQL数据库,用户和主机,如下面的屏幕所示。
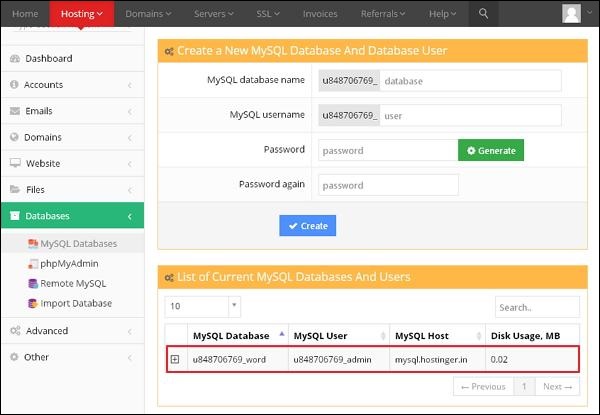
步骤(5) - 点击“+"符号。
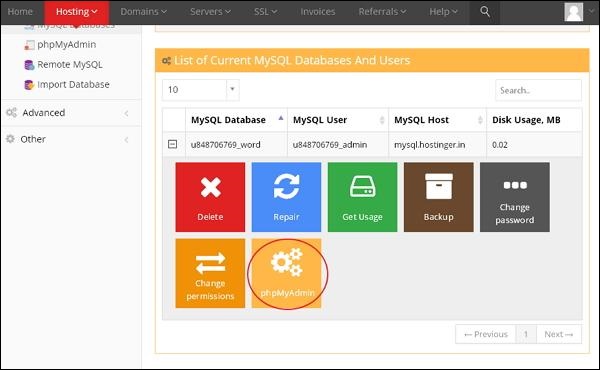
步骤(6) - 点击 phpMyAdmin 。
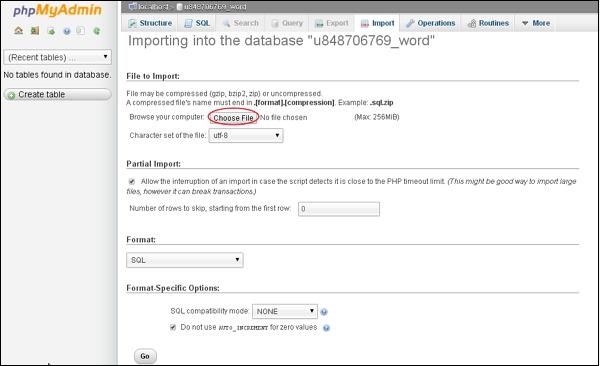
步骤(7) - 点击phpMyAdmin页面上的Import标签。

步骤(8) - 点击Choose File按钮从系统中选择备份文件,然后点击Go 按钮。
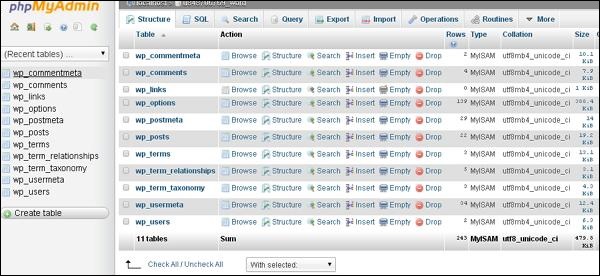
步骤(9) - 您可以查看上传的数据库表,如下面的屏幕所示。
步骤(11) - 编辑wp-config.php文件。
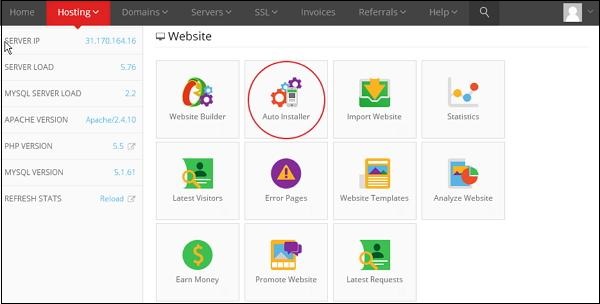
步骤(12) - 在hostinger的网站部分,单击自动安装程序。
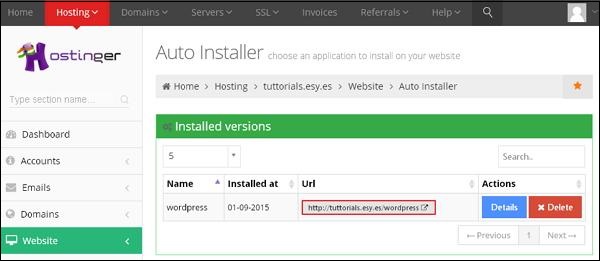
步骤(13) - 您可以查看上传的WordPress文件。 单击URL链接,如下面的屏幕所示。
步骤(14) - 您可以查看WordPress的登录页面。
