

使用Spring Session和Redis解决分布式Session跨域共享问题
现象阐述:
在项目中前后端代码未做分离,在两台实例的情况下服务正常运行偶尔会弹出类似需要重新登录的提示,后台报错信息

这是处理器异常 原因并不明显
增加机器实例后,在访问前端页面的时候,一直重复访问登录页面,导致页面302,种种迹象表明是登录配置的问题引起的。
相关专题推荐:php session (包含图文、视频、案例)
问题引入:Session不能共享导致不同机器之间轮询要求登录导致最终的服务异常
解决方案:使用Spring Session和Redis解决分布式Session跨域共享问题
解决配置:
1 )添加依赖
<dependency>
  <groupId>org.springframework.session</groupId>
  <artifactId>spring-session-data-redis</artifactId>
  <version>1.2.0.RELEASE</version>
</dependency>
<dependency>
  <groupId>org.apache.velocity</groupId>
  <artifactId>velocity</artifactId>
  <version>1.7</version>
</dependency>
2 )web.xml配置文件添加:
<!-- 分布式Session共享Filter -->
<filter>
  <filter-name>springSessionRepositoryFilter</filter-name>
  <filter-class>org.springframework.web.filter.DelegatingFilterProxy</filter-class>
</filter>
<filter-mapping>
  <filter-name>springSessionRepositoryFilter</filter-name>
  <url-pattern>/*</url-pattern>
</filter-mapping>
3) Spring.xml的配置
<!-- 将session放入redis -->
<context:annotation-config/>
<bean id="redisHttpSessionConfiguration"   class="org.springframework.session.data.redis.config.annotation.web.http.RedisHttpSessionConfiguration">
   <property name="maxInactiveIntervalInSeconds" value="120" />
</bean>
<bean class="org.springframework.data.redis.connection.jedis.JedisConnectionFactory">
   <!-- redis 配置 -->
   <property name="hostName" value="192.168.0.48" />
   <property name="port" value="6379" />
</bean>
解析:
1、web中DelegatingFilterProxy 类:属于代理fiter,它会在tomcat启动后开始加载web.xml中的filter时将filter的管理交给spring中的bean 也就是第三步的配置 引入RedisHttpSessionConfiguration
2、RedisHttpSessionConfiguration继承了SpringHttpSessionConfiguration这个类,这个类很重要,SpringHttpSessionConfiguration通过@Bean的方式将springSessionRepositoryFilter注入到容器中


3、SessionRepositoryFilter这个过滤器就是前边DelegatingFilterProxy查找的过滤器SessionRepositoryFilter是关键,具体怎么关联起来的呢?
如果未指定init-param参数的话,DelegatingFilterProxy就会把filter-name作为要查找的Bean对象,这也是DelegatingFilterProxy类的作用。可以看出每一个请求都会经过该filter,经过该filter的请求也会相应的经过springSessionRepositoryFilter这个过滤器,那么我们就接着看一下springSessionRepositoryFilter这个过滤器
4、SessionRepositoryFilter的作用就是替换容器默认的javax.servlet.http.HttpSession支持为org.springframework.session.Session。
SessionRepositoryFilter的主要方法和属性如下:
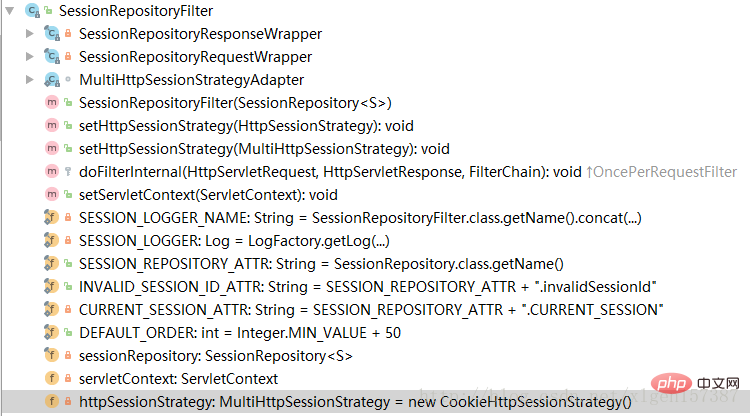
5、其中SessionRepositoryResponseWrapper、SessionRepositoryRequestWrapper、HttpSessionWrapper为内部类,这个也是很关键的。例如SessionRepositoryRequestWrapper类
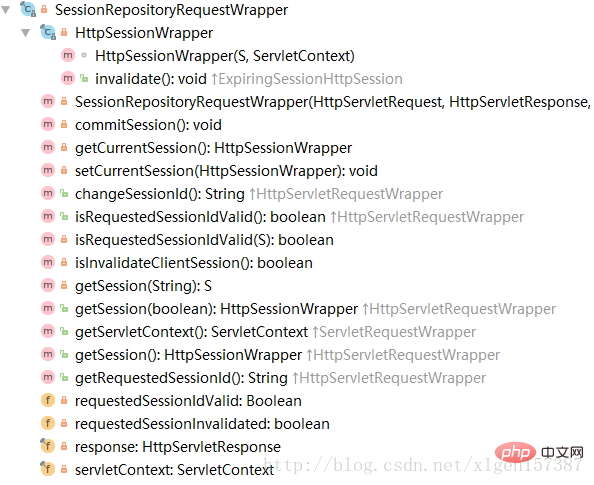
可以看出SessionRepositoryRequestWrapper继承了javax.servlet.http.HttpServletRequestWrapper这个类,我们知道HttpServletRequest接口的默认实现是有HttpServletRequestWrapper的,如下
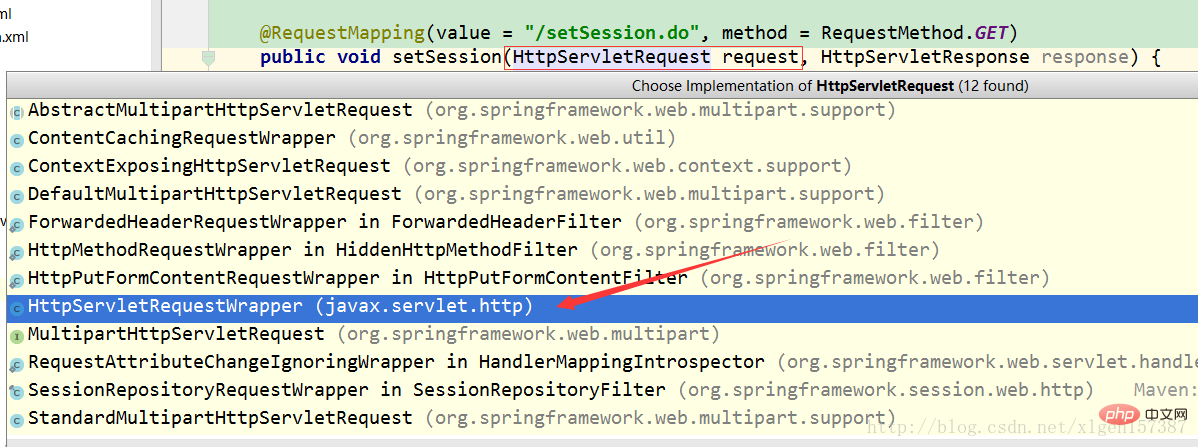
6、因为SessionRepositoryRequestWrapper继承了HttpServletRequestWrapper,而HttpServletRequestWrapper实现了HttpServletRequest接口,在SessionRepositoryRequestWrapper又重写了HttpServletRequest接口中的一些方法,所以才会有:getSession、changeSessionId等这些方法。 到此,我们应该大致明白了,原有的request请求和response都被重新进行了包装。我们也就明白了原有的HttpSeesion是如何被Spring Session替换掉的。
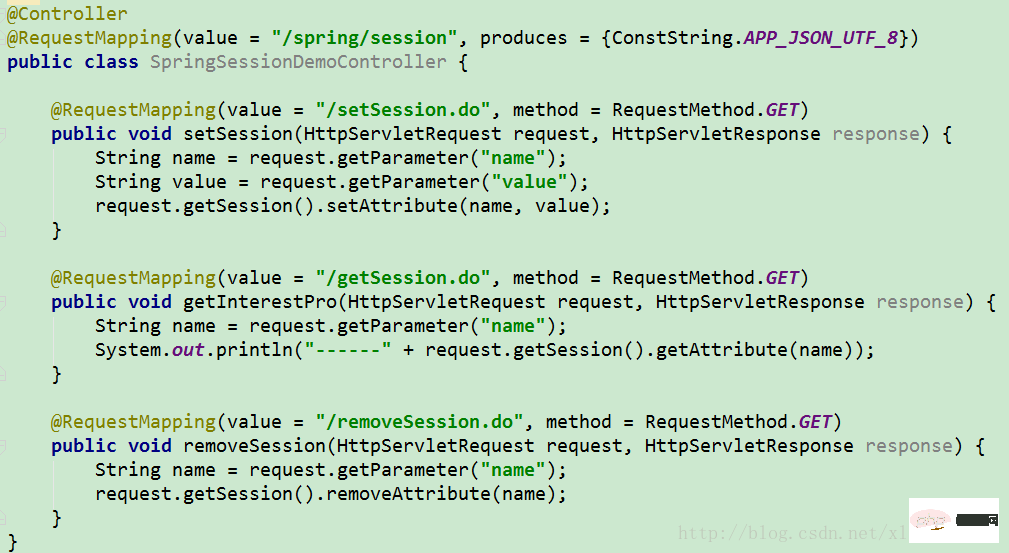

我们通过快捷键查看request.getSession() 的具体实现,就可以看出已经有了SessionRepositoryRequestWrapper 重写的方法。 上述有两个默认的实现,一个是原始的,一个是Spring Session实现的,具体选用哪一种作为实现,这就是我们上边说的DelegatingFilterProxy 代理的作用了,他会将每一个请求过滤,经过DelegatingFilterProxy的每一个请求也会经过springSessionRepositoryFilter过滤器,springSessionRepositoryFilter过滤器就实现了将原有request到SessionRepositoryRequestWrapper的转换,这就是实现了具体的流程!
request.getSession().setAttribute(name, value)的实现: 追踪代码,可以到达下边内容
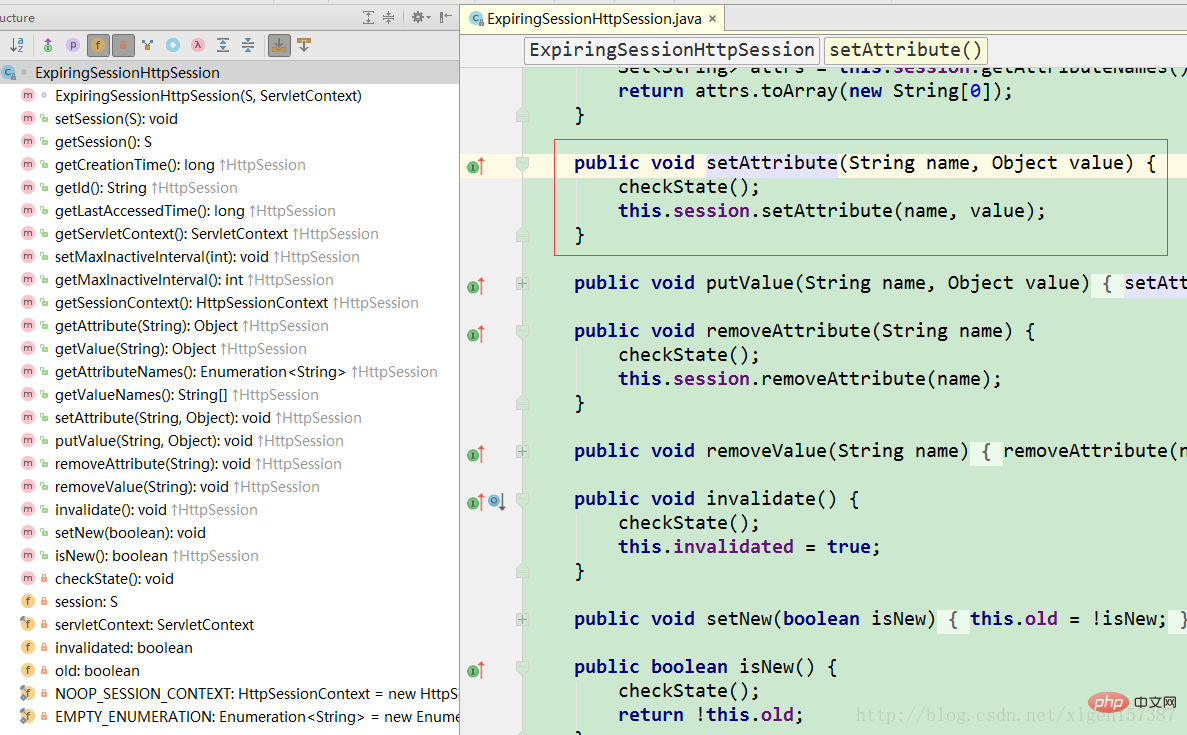 可以看到有Redis相关的操作! 至此,我们应该清楚了,Spring Session的工作原理了!虽然下边的过程没有再去介绍,但是已经很清楚的理解了。
相关学习推荐:redis视频教程
Atas ialah kandungan terperinci 学习Spring Session和Redis解决分布式Session跨域共享问题. Untuk maklumat lanjut, sila ikut artikel berkaitan lain di laman web China PHP!
 Sebab kegagalan sesi
 Penyelesaian kegagalan sesi
 Perisian pangkalan data yang biasa digunakan
 Apakah pangkalan data dalam memori?
 Yang manakah mempunyai kelajuan bacaan yang lebih pantas, mongodb atau redis?
 Cara menggunakan redis sebagai pelayan cache
 Bagaimana redis menyelesaikan ketekalan data
 Bagaimanakah mysql dan redis memastikan konsistensi penulisan dua kali?