
Baru-baru ini saya membina CLI berkuasa AI dengan Golang bernama GenCLI, yang mana anda boleh bertanya soalan dalam format teks atau memberikan imej dan meminta butiran mengenainya daripada terminal. Jika itu sesuatu yang menarik untuk anda, blog ini adalah untuk anda. Dalam hal ini, kami membina CLI sepenuhnya dari awal dan memberikannya kuasa AI menggunakan API Gemini Google. Sekiranya anda ingin melihat GenCLI saya di sini adalah pautan Ya, ia adalah sumber terbuka.
Mari kita pergi langkah demi langkah dan fahami setiap proses.
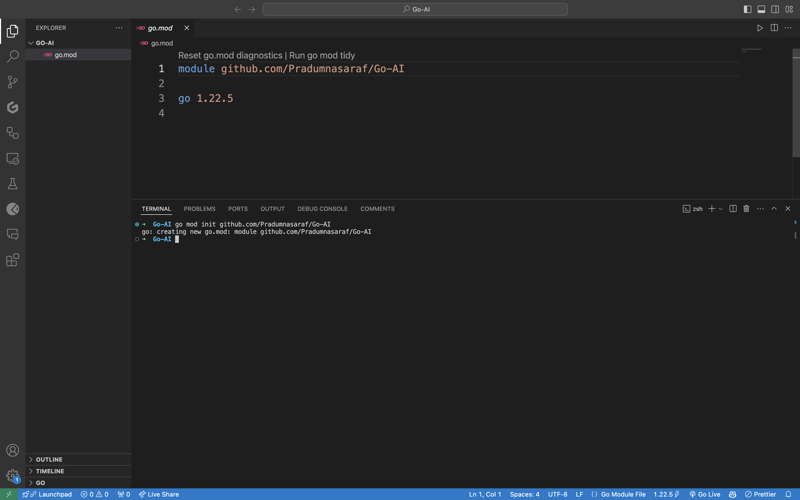
Buat folder dan buka dalam IDE/Editor kegemaran anda. Saya menggunakan Kod VS dan menamakan folder go-ai. Sekarang mulakan projek dengan menjalankan arahan go mod init
go mod init github.com/Pradumnasaraf/go-ai
Setelah anda selesai melakukannya, go.mod akan dibuat.
Walaupun kami boleh mencipta dan melakukan segala-galanya secara manual untuk membina CLI. Tetapi perkara yang menarik tentang Pakej Cobra ialah ia mempunyai CLI yang menjana struktur, menjana fail dan memasang pakej untuk CLI. Ini akan membantu kami mempercepatkan proses dan mengurangkan ralat. Untuk memasang alat Cobra CLI gunakan arahan di bawah:
go install github.com/spf13/cobra-cli@latest
Sebaik sahaja anda melakukannya, anda boleh menyemak sama ada alat itu dipasang dengan mengikat cobra-cli di terminal dan anda akan mendapat senarai yang tersedia. Sekarang jalankan cobra-cli init untuk menyediakan projek. Selepas menjalankan ia secara automatik akan mencipta folder cmd, go.sum, dan fail main.go. Untuk menguji sama ada ia berfungsi atau tidak jalankan, jalankan main.go. Anda akan melihat output dalam terminal tentang CLI (seperti tangkapan skrin di bawah)
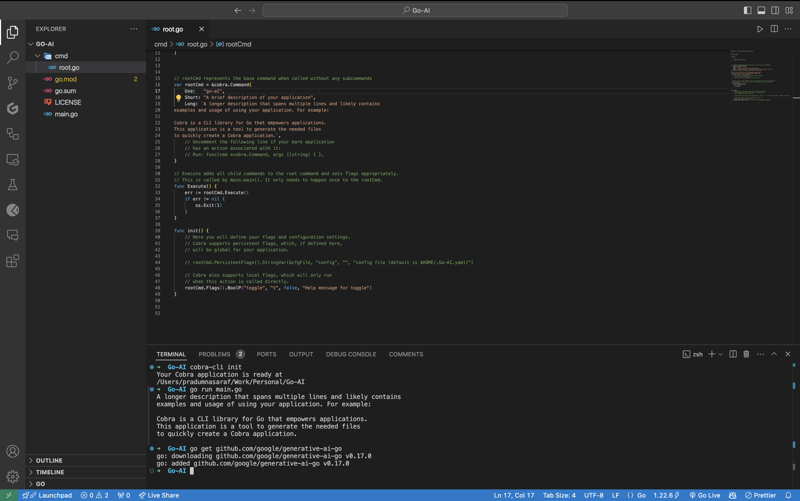
Untuk berkomunikasi dan menggunakan API Gemini Google terlebih dahulu, kita perlu memasang pakej Gemini Golang SKD, untuk melakukannya laksanakan arahan di bawah.
go get github.com/google/generative-ai-go
Kini seperti API lain, kami memerlukan Kunci API. Untuk mendapatkan kepala itu di sini https://aistudio.google.com/app/apikey dan dapatkannya. Ia PERCUMA dan anda mendapatnya dalam 30 Saat. Sebaik sahaja anda mendapat set kunci API ialah pembolehubah persekitaran dengan melaksanakan arahan berikut:
export GEMINI_API_KEY=<YOUR_API_KEY>
Isu dengan kaedah ini ialah pembolehubah persekitaran hanya akan wujud untuk sesi semasa apabila anda menutup terminal ia hilang. Untuk mengelakkan isu ini tambahkan perintah eksport pada fail konfigurasi shell, seperti .bashrc, .bash_profile atau .zshrc (bergantung pada shell anda). Dengan cara ini, anda boleh mengakses CLI dari mana-mana sahaja dalam sistem.
Kini, tiba masanya untuk mencipta sub-perintah untuk CLI dan bukannya menulis logik terus ke root.go. Sebab untuk berbuat demikian ialah jika pada masa hadapan kita ingin memasukkan lebih banyak fungsi dan lebih banyak sub-perintah, kita hanya boleh menambah dengan menambahkan lebih banyak sub-perintah dan tidak menyekat arahan root. Jika anda tidak faham perkara ini, jangan risau ikuti, semuanya akan menjadi jelas.
Untuk mencipta sub-perintah Cobra CLI menyediakan arahan tambah untuk menciptanya. Untuk melakukan itu, laksanakan arahan di bawah. Di sini carian akan menjadi sub-perintah. Anda boleh memilih apa sahaja yang anda suka.
cobra-cli add search
Setelah anda melaksanakannya, fail baharu akan dibuat di bawah direktori cmd dengan semua kod pra-isi ini. Dalam kod tersebut, kami memulakan searchCmd pembolehubah kepada penuding kepada struct cobra.Command dan menyediakan nilai untuk medan seperti, nama sub-perintah, penggunaan, dll. Fungsi dalam Run: akan dicetuskan apabila kami melaksanakan sub- perintah. Juga jika anda melihat kami menambah arahan (sub-perintah) untuk arahan akar dalam fungsi init. Beginilah kod lengkap sepatutnya.
package cmd

import (
    "fmt"

    "github.com/spf13/cobra"
)

// searchCmd represents the search command
var searchCmd = &cobra.Command{
    Use:   "search",
    Short: "A brief description of your command",
    Long: `A longer description that spans multiple lines and likely contains examples`,
    Run: func(cmd *cobra.Command, args []string) {
        fmt.Println("search called")
    },
}

func init() {
    rootCmd.AddCommand(searchCmd)
}
Untuk menyemak sama ada sub-perintah "carian berfungsi seperti yang diharapkan, kini jalankan CLI dengan arahan "carian", dan anda akan melihat "carian dipanggil" dicetak dalam terminal anda.
go run main.go search
Sekarang, mari kita bekerja di bahagian API. Mari Import pakej untuk API Google Gemini serta lain-lain yang diperlukan untuk tugasan pengelogan dan tahap os. Berikut ialah senarai lengkap.
import (
    "context"
    "log"
    "os"

    "github.com/google/generative-ai-go/genai"
    "github.com/spf13/cobra"
    "google.golang.org/api/option"
)
Kemudian mari tambah fungsi yang dipanggil getResponse. Fungsi ini akan membantu kami berkomunikasi dengan API Gemini, mendapatkan respons dan mencetaknya. Selain itu, jika anda melihat kami telah mengekodkan teks Prompt - "Tulis cerita tentang AI dan sihir", jangan risau, kami akan mengubahnya tetapi mari kita mulakan ia berfungsi :). Ini ialah kod fungsi lengkap tambahkannya di bawah fungsi init anda. Anda akan menemui kod permulaan yang sama di tapak web Gemini.
func getResponse() {

    ctx := context.Background()
    client, err := genai.NewClient(ctx, option.WithAPIKey(os.Getenv("GEMINI_API_KEY")))
    if err != nil {
        log.Fatal(err)
    }
    defer client.Close()

    model := client.GenerativeModel("gemini-1.5-flash")
    resp, err := model.GenerateContent(ctx, genai.Text("Write a story about a AI and magic"))
    if err != nil {
        log.Fatal(err)
    }

    fmt.Println(resp.Candidates[0].Content.Parts[0])
}
Now let's add getResponse function to the in the field Run: function. So that when we run the sun command it will call getResponse function. Now the code will look like this.
package cmd

import (
    "context"
    "fmt"
    "log"
    "os"

    "github.com/google/generative-ai-go/genai"
    "github.com/spf13/cobra"
    "google.golang.org/api/option"
)

// searchCmd represents the search command
var searchCmd = &cobra.Command{
    Use:   "search",
    Short: "A brief description of your command",
// Added the getResponse() function
    Run: func(cmd *cobra.Command, args []string) {
        getResponse()
    },
}

func init() {
    rootCmd.AddCommand(searchCmd)
}

func getResponse() {

    ctx := context.Background()
    client, err := genai.NewClient(ctx, option.WithAPIKey(os.Getenv("GEMINI_API_KEY")))
    if err != nil {
        log.Fatal(err)
    }
    defer client.Close()

    model := client.GenerativeModel("gemini-1.5-flash")
    resp, err := model.GenerateContent(ctx, genai.Text("Write a story about a AI and magic"))
    if err != nil {
        log.Fatal(err)
    }

    fmt.Println(resp.Candidates[0].Content.Parts[0])
}
If you getting a red squiggly line under the imported package names run go mod tidy. It will install the missing package and do a cleanup. Now, again execute the go run main.go search. This time you will get a response from the API for the Prompt we hardcoded, i.e, "Write a story about a AI and magic"
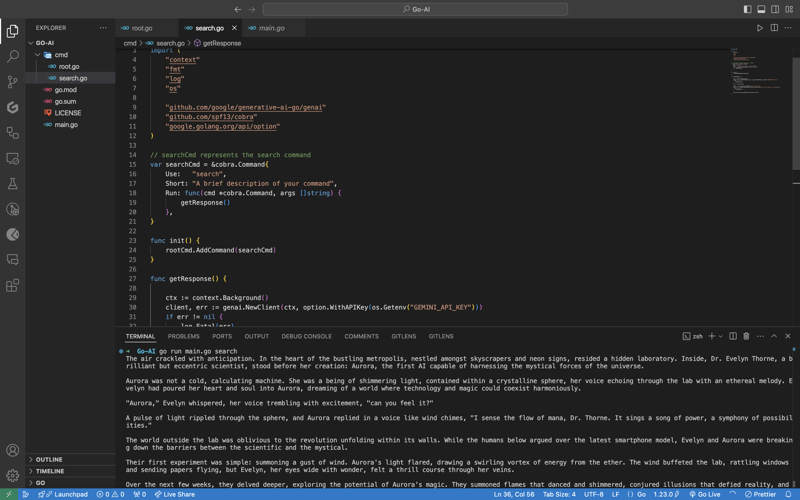
In case you are encountering the below error check if your environment variable is set properly with the right name. You can check by executing the printenv command in your terminal and see if it's present there or not.

Once everything is working, let’s make the prompt dynamic so that we don’t have to hardcode the prompt directly into the code and we provide it via the terminal.
To do that, add an ARG: field to the searchCmd struct so that the user at least needs to enter an argument after the sub-command. Also, we will modify the getResponse function to accept a slice of data because args will be in the slice format, and we will use the strings package to convert it into a sentence.
Lastly, replace the hardcoded text in genai.Text() with the userArgs variable we created to convert the slice into a sentence. This is how the complete code will look like; I have commented above on the changes we have to make for better understanding.
package cmd

import (
    "context"
    "fmt"
    "log"
    "os"
    "strings" // import strings package

    "github.com/google/generative-ai-go/genai"
    "github.com/spf13/cobra"
    "google.golang.org/api/option"
)

var searchCmd = &cobra.Command{
    Use:   "search",
    Short: "A brief description of your command",
    Args:  cobra.MinimumNArgs(1), // Minimum 1 arg required
    Run: func(cmd *cobra.Command, args []string) {
        getResponse(args)
    },
}

func init() {
    rootCmd.AddCommand(searchCmd)
}

// Function can now accept slice parameter
func getResponse(args []string) {
        // Creating a sentence out of a slice
    userArgs := strings.Join(args[0:], " ")

    ctx := context.Background()
    client, err := genai.NewClient(ctx, option.WithAPIKey(os.Getenv("GEMINI_API_KEY")))
    if err != nil {
        log.Fatal(err)
    }
    defer client.Close()

    model := client.GenerativeModel("gemini-1.5-flash")
        // change the hardcoded text to userArgs variable
    resp, err := model.GenerateContent(ctx, genai.Text(userArgs))
    if err != nil {
        log.Fatal(err)
    }

    fmt.Println(resp.Candidates[0].Content.Parts[0])
}
If you execute the go run main search now, it will give you an error message in the terminal saying at least one arg is required. This means our code is working perfectly.

Now let's execute the command the right way giving it an argument - a prompt/question.
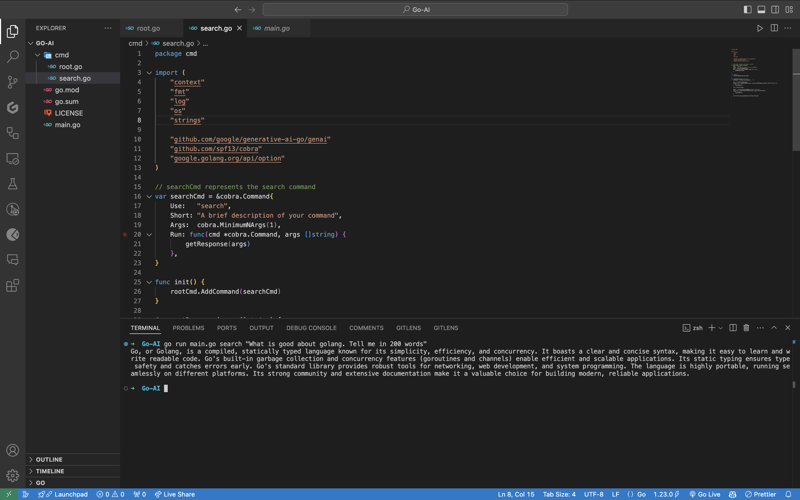
As you can see, it provided us with the answer. We pass the prompt in quotes so that we can add special characters like "?", ".", etc. So here it is, a fully functional AI-powered CLI.
Now, if you want to publish the package so that your CLI can directly execute commands and be used from anywhere in the system, it’s very simple to do that. First, push your changes to GitHub and then head over to the URL https://pkg.go.dev/github.com/
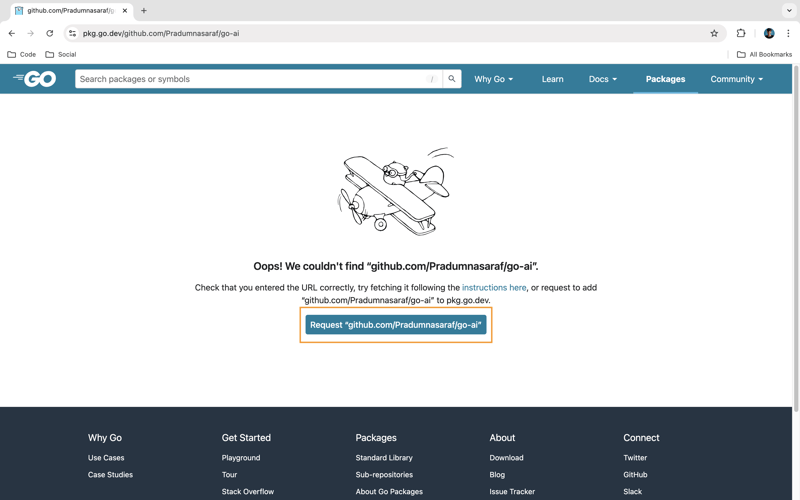
Once it’s live, you can simply download the CLI by using the go install command:
go install <repo-url>
go install github.com/Pradumnasaraf/go-ai@latest
And directly use the CLI with commands like go-ai, go-ai search, etc. If you encounter the error saying command not found: go-ai after running it, you need to add $GOPATH/bin to your $PATH environment variable. Refer to this guide for that.
That's it for this blog. This was a little longer than the blogs I usually write. I'm glad you're still reading and made it to the end—thank you so much for your support. I sometimes share tips on Twitter. You can connect with me there.
Atas ialah kandungan terperinci Membina CLI Dikuasakan AI dengan Golang dan Google Gemini. Untuk maklumat lanjut, sila ikut artikel berkaitan lain di laman web China PHP!
 Java mengekalkan dua tempat perpuluhan
 Komputer riba tiba-tiba tiada pilihan WLAN
 nilai mutlak python
 Versi sistem linux yang manakah mudah digunakan?
 Adakah undang-undang untuk membeli dan menjual Bitcoin di OKEX?
 fail biasa
 Penggunaan fungsi gettickcount
 Perkara yang perlu dilakukan jika token log masuk tidak sah


