Maison >interface Web >js tutoriel >Introduction à l'utilisation de JavaScript pour créer un changement d'image
Cet article présente principalement JavaScript pour obtenir un effet de changement d'image et l'application d'attributs personnalisés en détail. Il a une certaine valeur de référence. Les amis intéressés peuvent s'y référer
Les exemples de cet article sont destinés à tout le monde. l'application de JavaScript pour obtenir un effet de changement d'image et des attributs personnalisés pour votre référence. Le contenu spécifique est le suivant
<!DOCTYPE html>
<html>
<head>
<meta charset="UTF-8">
<title>图片切换实例</title>
<style>
body{
background-color: #A9A9A9;
margin:0px;
}
ul{
padding: 0;
margin: 0;
}
li{
list-style: none;
}
#pic{
width:670px;
height: 420px;
position:relative;
margin: 0 auto;/*整个p放到页面中间的位置*/
background:url(img/loading.png) no-repeat center;
background-color:#fff;
}
#pic img{
width:670px;
height: 420px;
}
#pic ul{
position: absolute;
top: 0px;
right: -50px;
}
#pic li{
width:40px;
height:40px;
margin-bottom: 4px;
background:#666;
}
#pic .active{
background: cadetblue;
}
#pic span{
top:0px;
}
#pic p{
bottom:0px;
margin:0;
}
#pic p,#pic span{
width: 670px;
height: 30px;
line-height: 30px;
text-align: center;
position:absolute;
left:0px;
color:#fff;
background-color:#333;
}
</style>
<script>
window.onload = function(){
var op = document.getElementById("pic");
var oImg = document.getElementsByTagName("img")[0];//有tag标签的地方就得有数组[0],否则不提示错误,但却会加载不出来需要的内容。
var oP = document.getElementsByTagName("p")[0];
var oNum = document.getElementsByTagName("span")[0];
var oUl = document.getElementsByTagName("ul")[0];
var aLi = oUl.getElementsByTagName("li");//通过父标签找到的子标签,这里不能加数组[0]
var arrUrl = ["img/1.jpg","img/2.jpg","img/3.jpg","img/4.jpg","img/5.png"];
var arrText = ["中原工学院图书馆","中工宿舍楼","玫瑰花","小猫咪","绿色盆栽"];
for(var i=0;i<arrUrl.length;i++){
oUl.innerHTML += "<li></li>";//添加用“+=”,该写用“=”
}
//初始化
//有数组的地方,大部分都有一个数字在静静的等待.数组配合数字以便找到需要的内容。
var num = 0;
oImg.src = arrUrl[num];
oP.innerHTML = arrText[num];
oNum.innerHTML = 1+num+'/'+arrUrl.length;
//在ul中添加li,根据数组的长度,为ul添加li的数量
aLi[num].className = "active";//为标签添加class属性,需要用到className
for(i=0;i<aLi.length;i++){
aLi[i].index = i;//索引值,需要添加对应关系,就要想到添加索引值
//定义的有数组,就不能忘记加[0]
aLi[i].onclick = function(){
//点击按钮,找到与之对应的图片
oImg.src = arrUrl[this.index];
oP.innerHTML = arrText[this.index];
oNum.innerHTML = 1+this.index+'/'+arrUrl.length;
//添加对应的点击时,li的图标发生变化,两种思路
//思路1:清空当前所有active样式,为当前添加此class属性(扩展性好,但是运行速度可能不好)
for(var i=0; i<aLi.length; i++){
aLi[i].className = "";
}
this.className = "active";
//思路2:清空前一个点击li的样式,为当前添加class属性(定点清除)
}
}
}
</script>
</head>
<body>
<p id="pic" >
<img src=""/>
<span>数量正在加载中......</span>
<p>文字说明正在加载中......</p>
<ul>
</ul>
</p>
</body>
</html>L'extrait de code JavaScript peut être simplifié comme suit :
<script>
window.onload = function(){
var op = document.getElementById("pic");
var oImg = document.getElementsByTagName("img")[0];
var oP = document.getElementsByTagName("p")[0];
var oNum = document.getElementsByTagName("span")[0];
var oUl = document.getElementsByTagName("ul")[0];
var aLi = oUl.getElementsByTagName("li");
var arrUrl = ["img/1.jpg","img/2.jpg","img/3.jpg","img/4.jpg","img/5.png"];
var arrText = ["中原工学院图书馆","中工宿舍楼","玫瑰花","小猫咪","绿色盆栽"];
for(var i=0;i<arrUrl.length;i++){
oUl.innerHTML += "<li></li>";
}
//初始化
var num = 0;
function fnTab(){
oImg.src = arrUrl[num];
oP.innerHTML = arrText[num];
oNum.innerHTML = 1+num+'/'+arrUrl.length;
aLi[num].className = "";
}
fnTab();
for(i=0;i<aLi.length;i++){
aLi[i].index = i;
aLi[i].onclick = function(){
num = this.index;
fnTab();
}
aLi[num].className = "active";
}
}
}
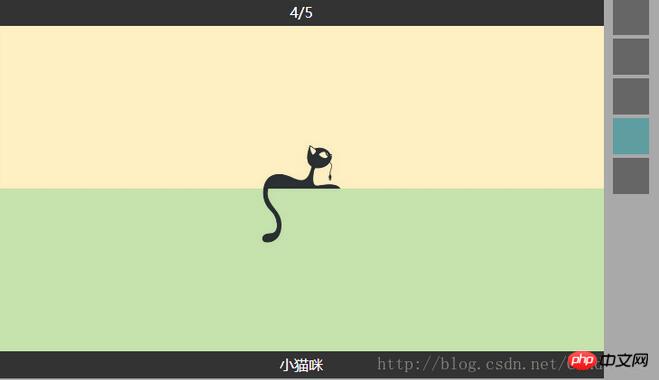
</script>Rendu :

Ce qui précède est le contenu détaillé de. pour plus d'informations, suivez d'autres articles connexes sur le site Web de PHP en chinois!