Network sharing allows users to transfer and receive files with other users on the local network. It's perfect for people with multiple devices in the office or at home. However, many users have reported that network sharing does not work properly after upgrading to Windows 11.
This can be due to a number of reasons, including an issue with the operating system installer version. In addition to this, misconfigured settings, missing critical services, or missing permissions can cause network shares to not work in Windows 11.
Many people who use both Windows 10 and Windows 11 devices on their local network have noticed that while the device running Windows 11 is able to access the Windows 10 PC, the reverse is not true. This is where upgrading all your devices to Windows 11 might work.
So, now let us introduce you to the most effective fixes.
What should I do if network sharing doesn’t work in Windows 11?
1. Update Windows 11
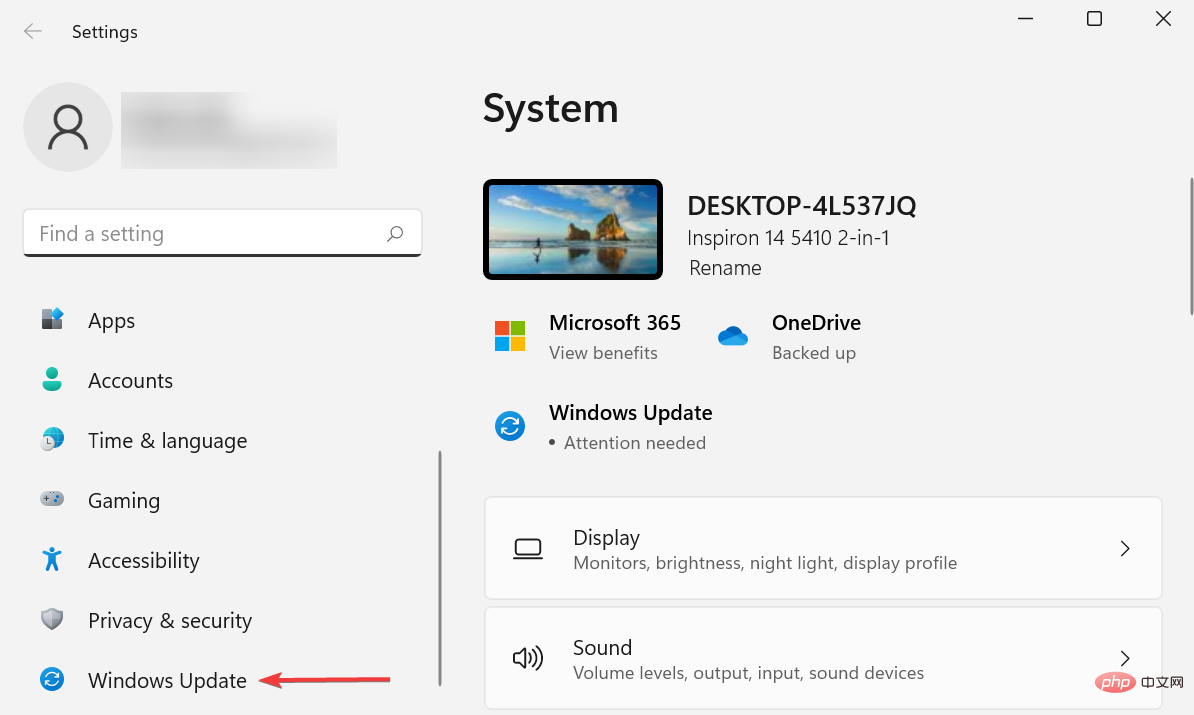
- PressWindowsILaunch theSettingsapp, then click on the left SelectWindows Update from the tabs listed in the navigation pane.
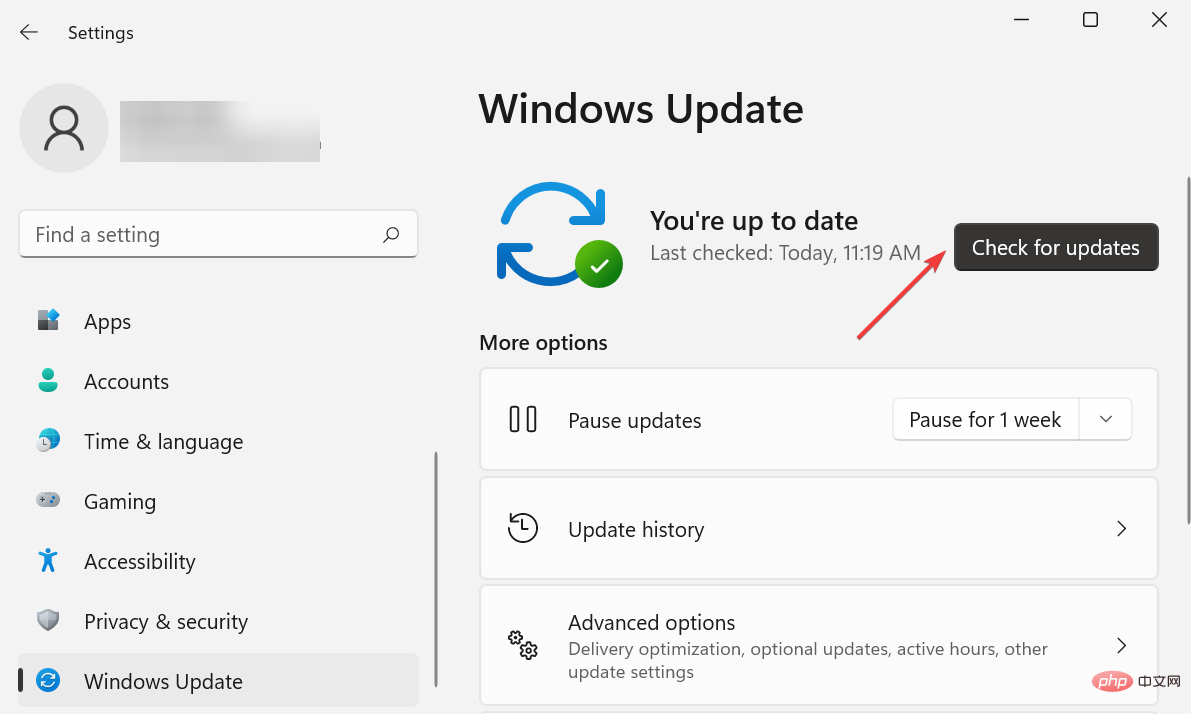
- Click theCheck for Updates button on the right to scan for any newer versions available.
- If any are listed after scanning, clickDownload and Installto get them.
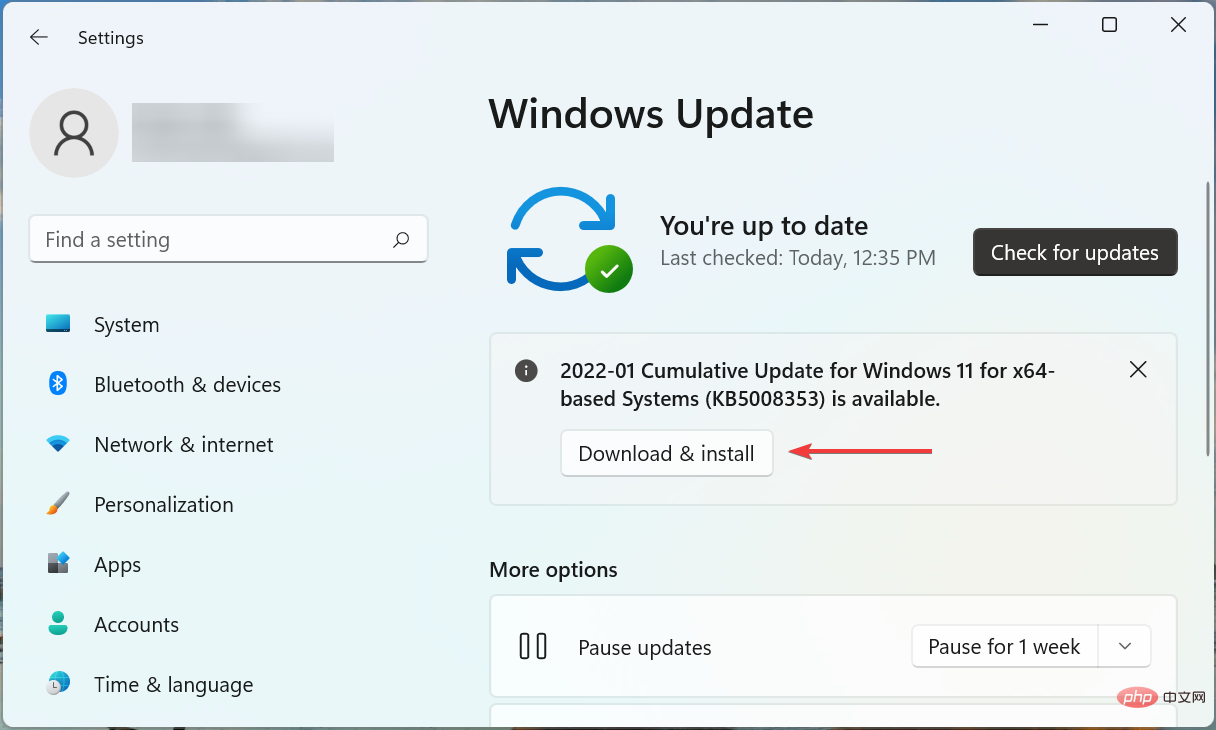
Often, the current version of Windows 11 can be an issue that causes network sharing not to work in Windows 11. If this is the case, updating the operating system should fix the error.
2. Run key services
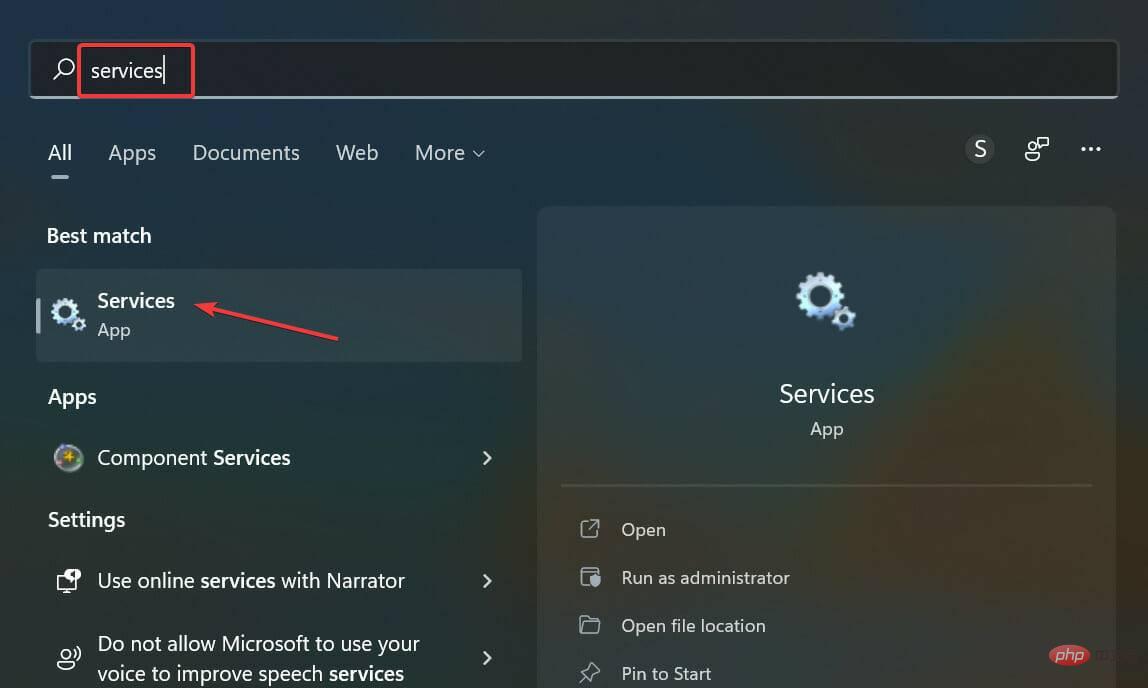
- PressWindowsSStart the "Search"menu at the top Enter "Services" in the text field and click on the relevant search results that appear.
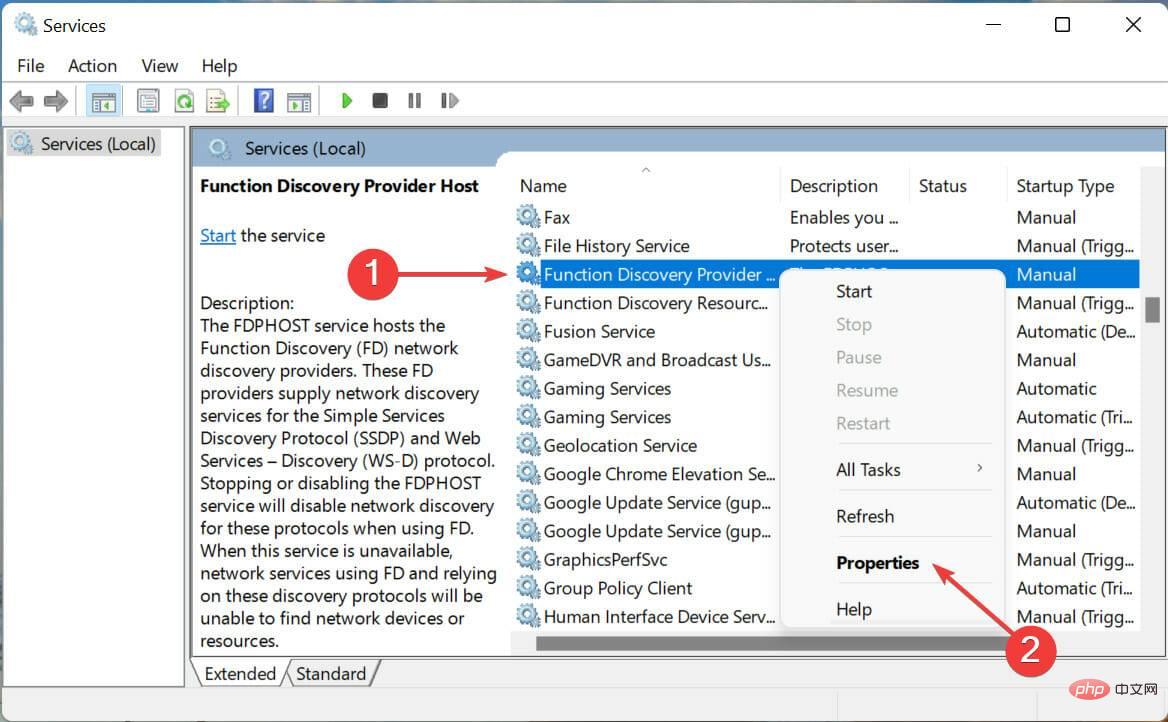
- Locate theFunction Discovery Provider Hostservice, right-click it and selectProperties from the context menu.
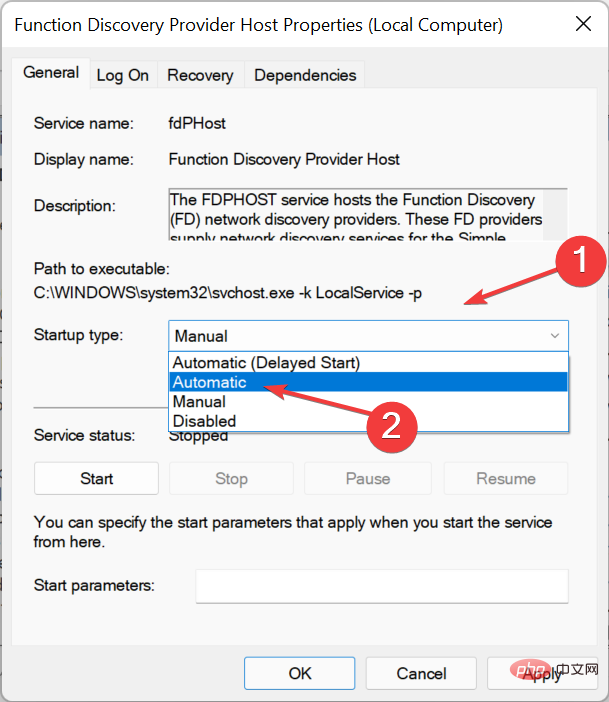
- Now, click on theStartup typedrop-down menu and selectAutomaticfrom the list of options.
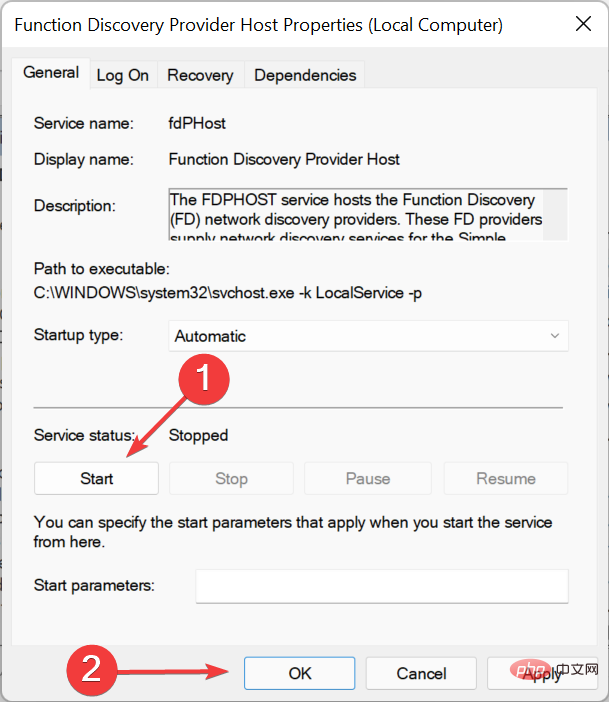
- If the service is not running, click the "Start" button and then click "OK" at the bottom to save the changes.
- Similarly, setFunction Discovery Resource PublicationtoAutomaticand run the service.
Once completed, check if the network sharing not working issue in Windows 11 has been fixed.
3. Reconfigure sharing settings
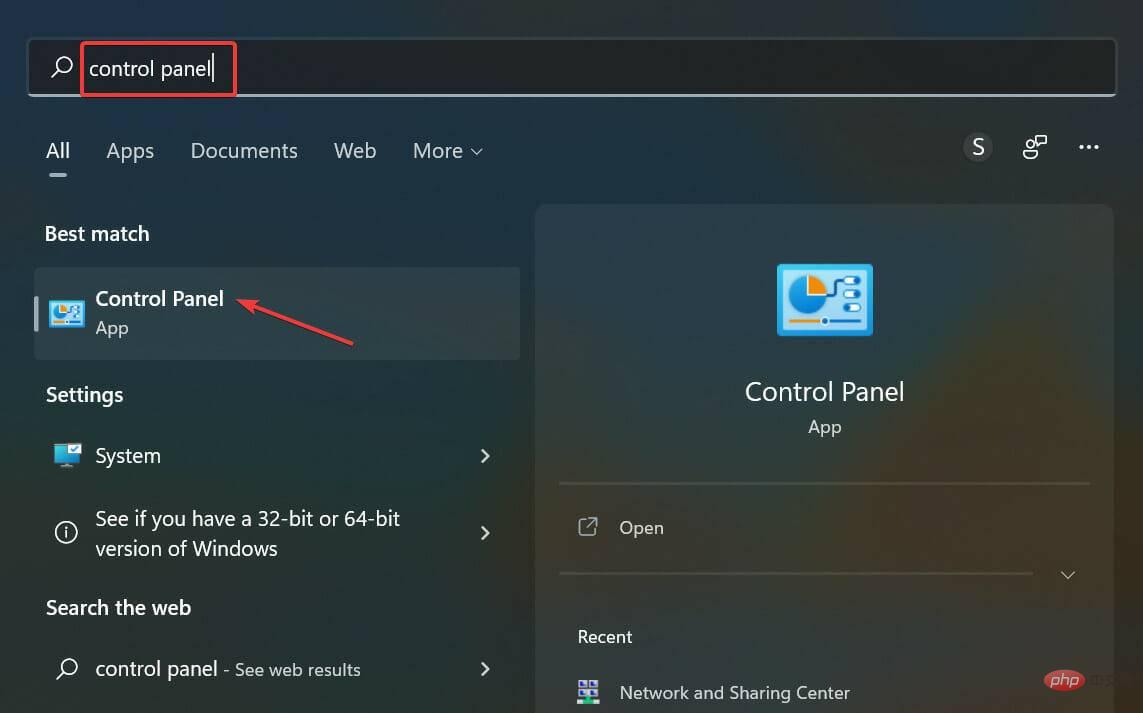
- PressWindowsSStart the "Search"menu, in the text Enter "Control Panel" into the field and click on the relevant search results that appear.
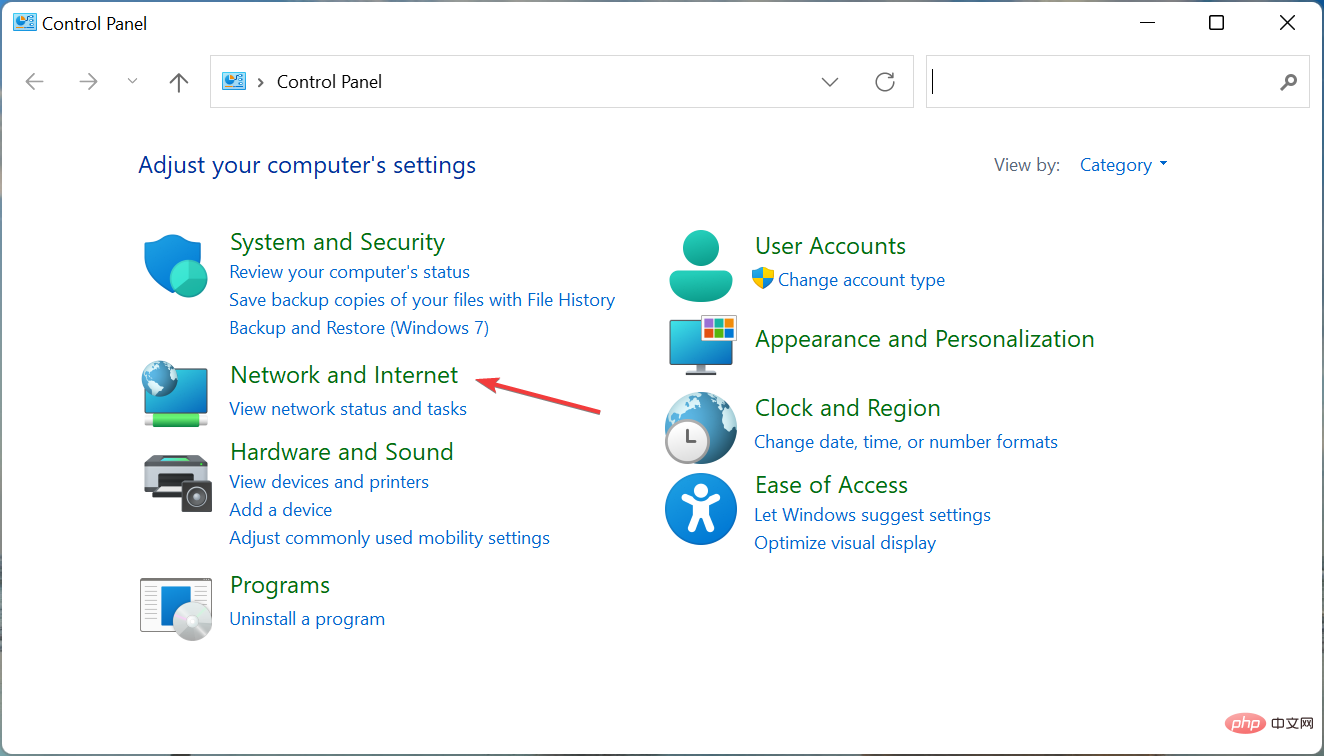
- Click onNetwork and Internet.
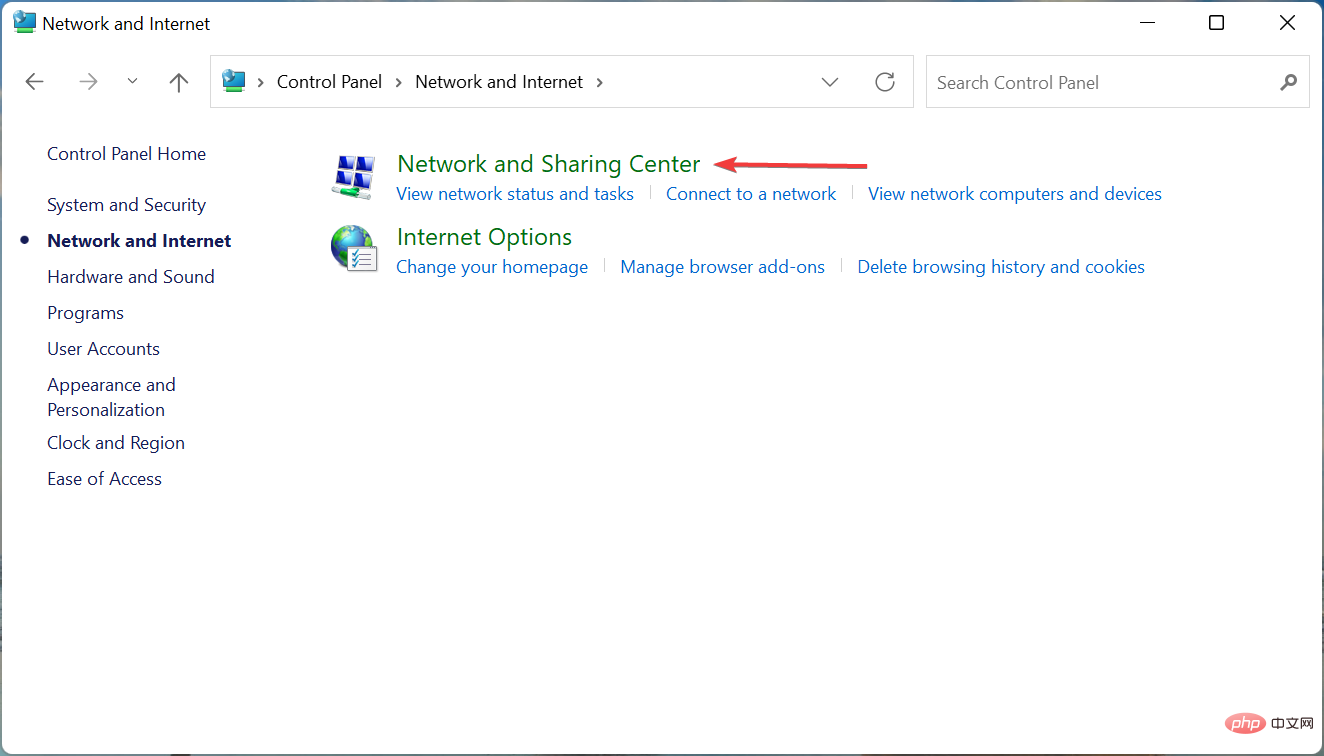
- Next, clickNetwork and Sharing Center.
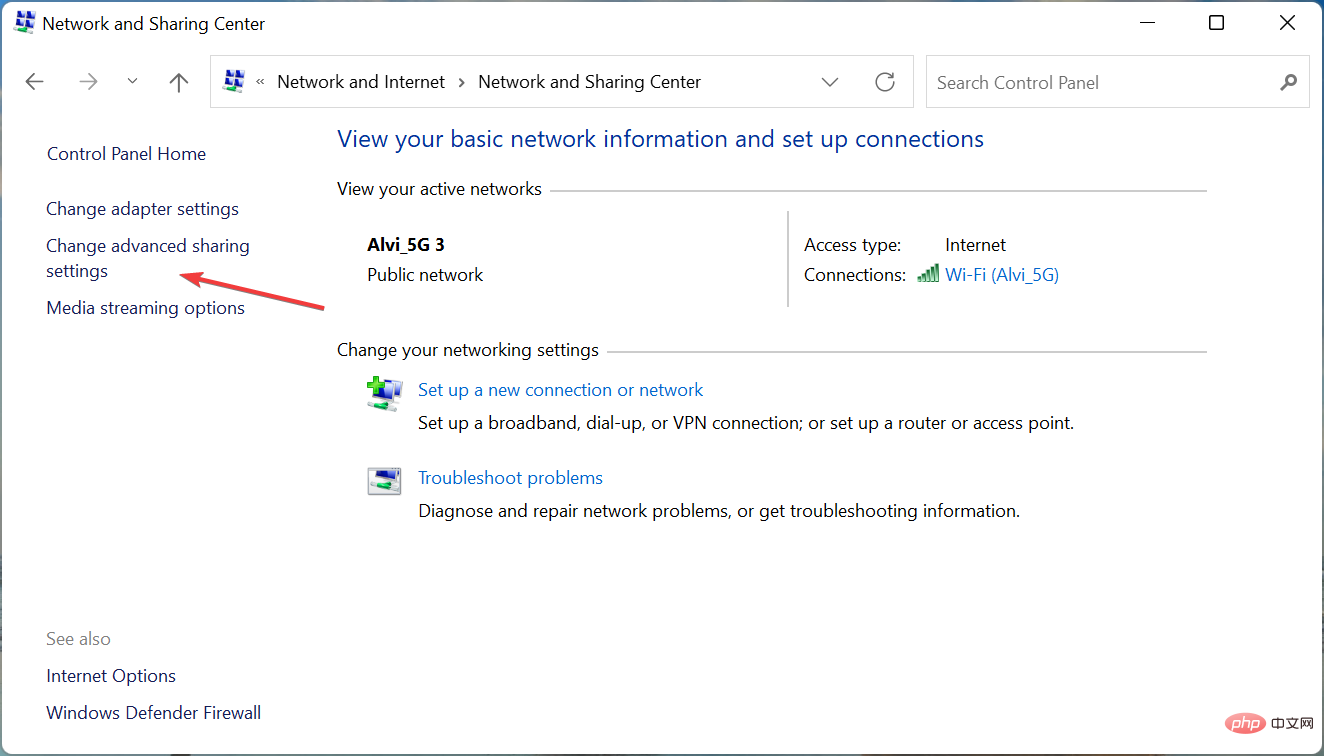
- ClickChange advanced sharing settings from the options listed on the left.
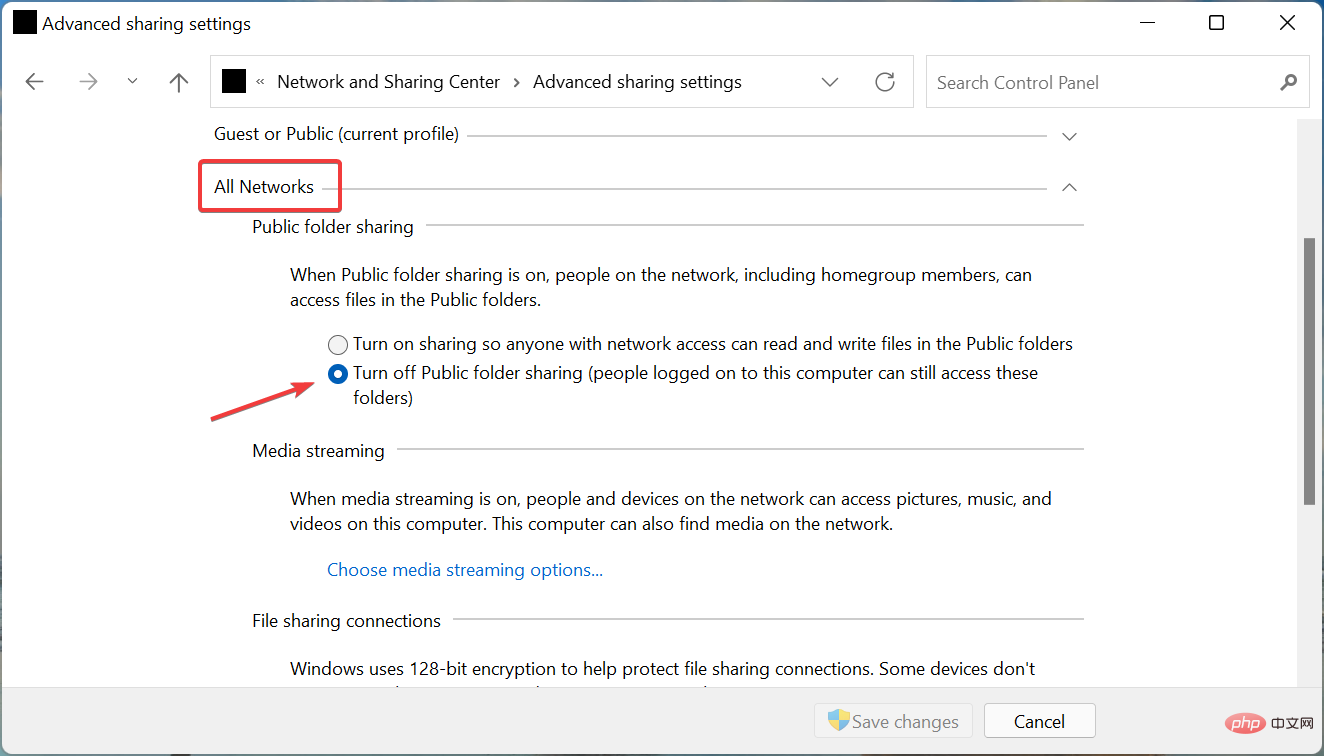
- Now, clickAll Networksand under Public Folder Sharing select Turn offPublic Folder Sharing (people logged into this computer can still Access these folders).
- Now, scroll down and selectTurn Password Protection offSharingunder Password Protected Sharing and clickat the bottom to save changes.
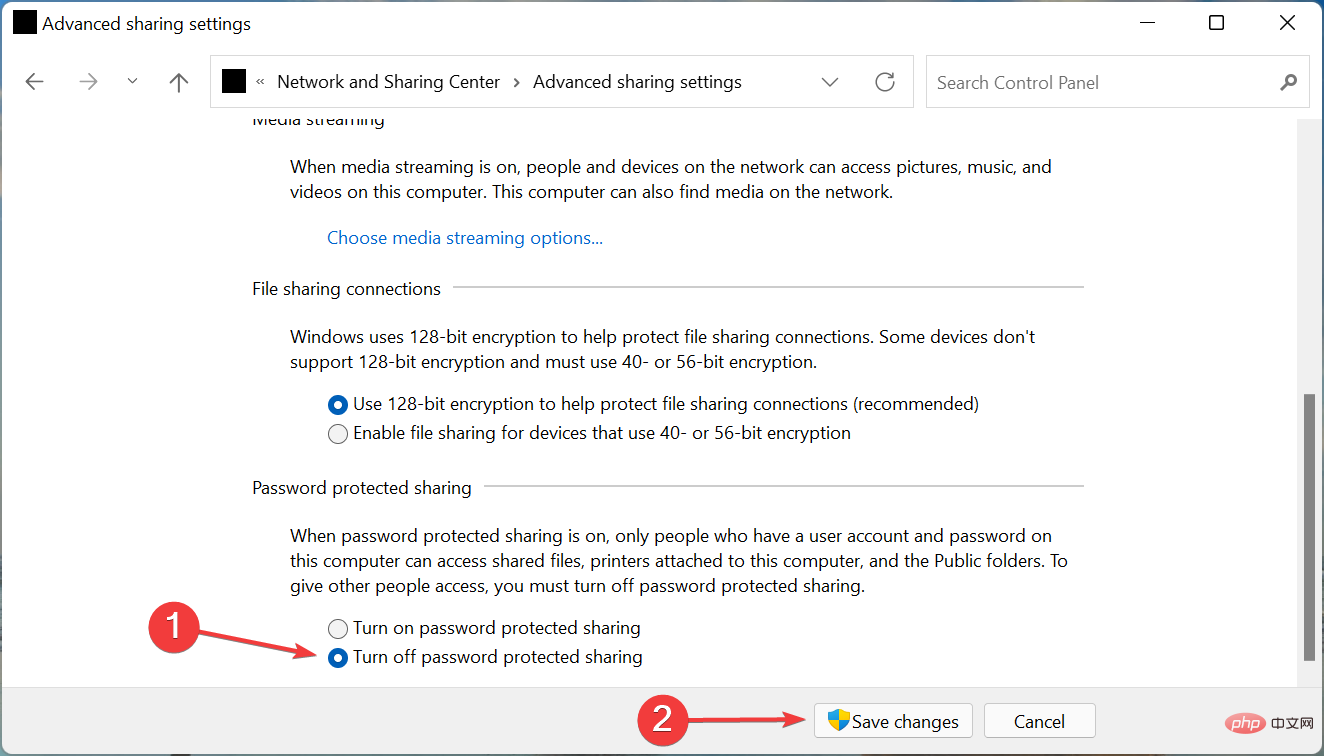
Once completed, restart your computer for the changes to take effect and verify that the network share now starts running in Windows 11.
4. Provide the necessary permissions
- PressWindowsEStartFile Explorerand find the file you encounter when sharing Go to the problem's folder, right-click on it and selectProperties from the context menu.
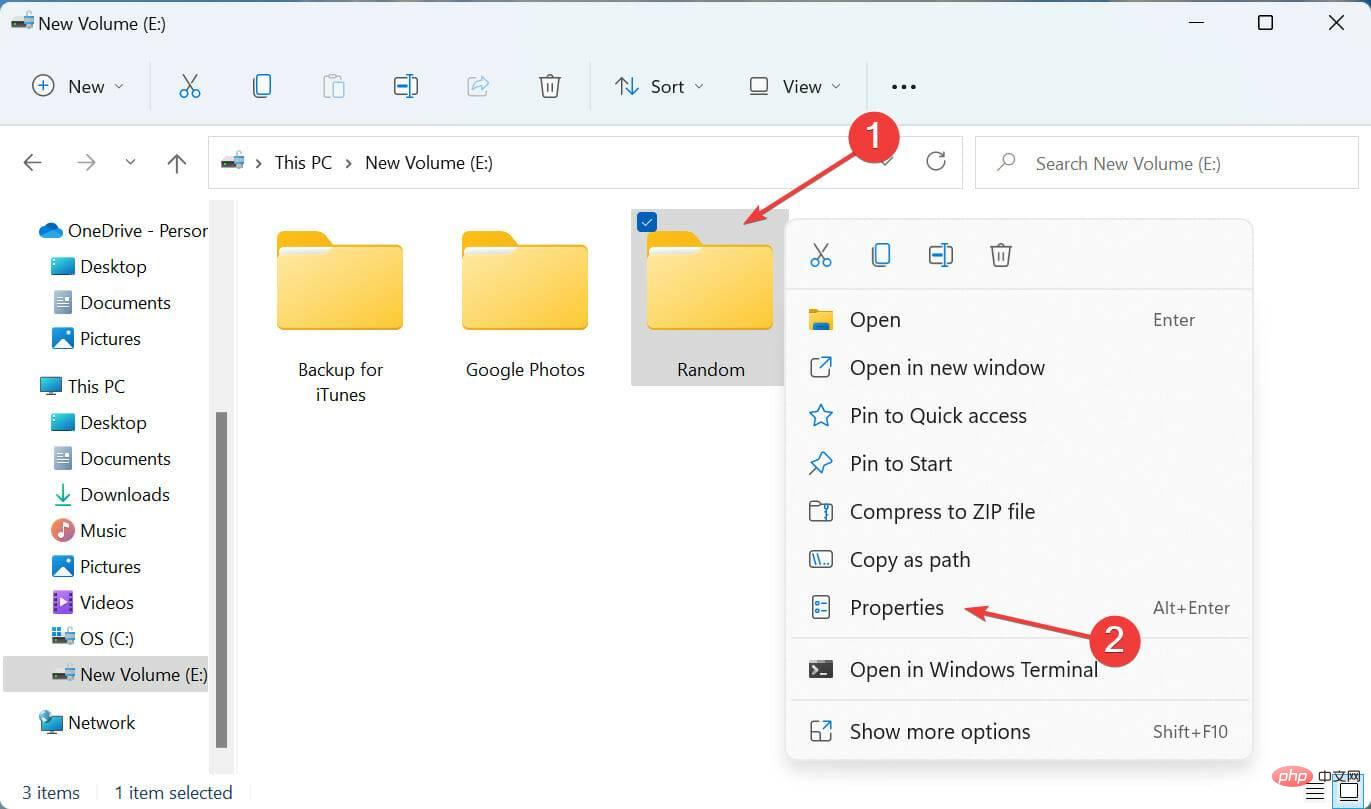
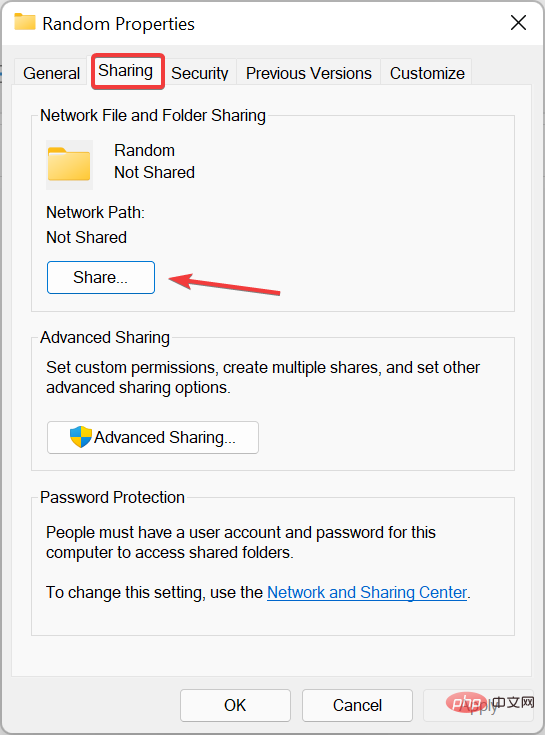
- Navigate to theSharetab and click theSharebutton.
- Click the drop-down menu, selectEveryonefrom the list of options, and clickShare at the bottom.
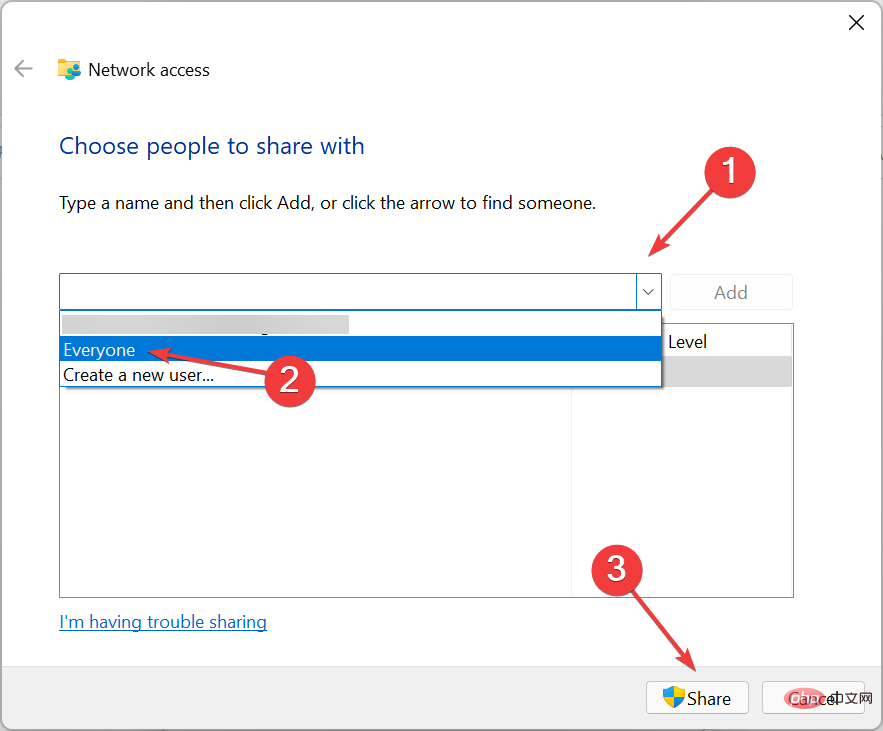
- Clickon the next window to finish.
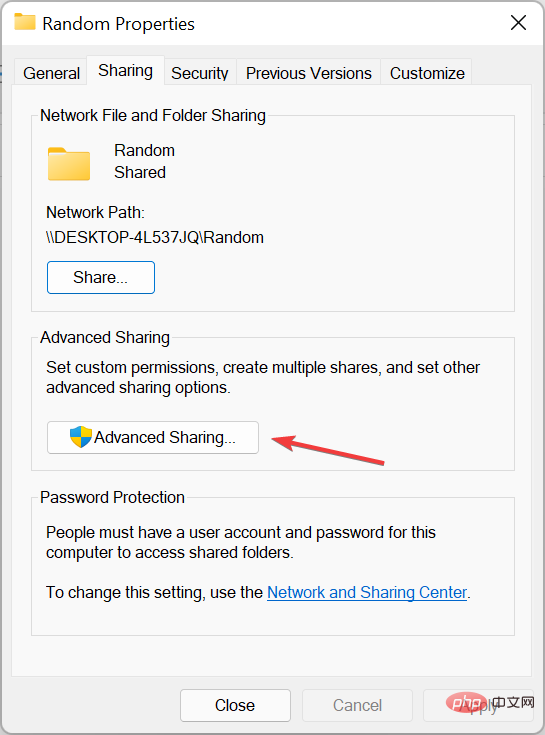
- Now, click on theAdvancedSharebutton in the Share tab.
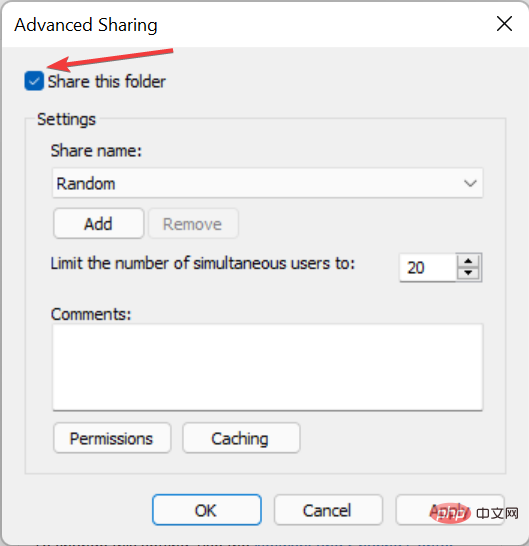
- Check theShare this foldercheckbox.
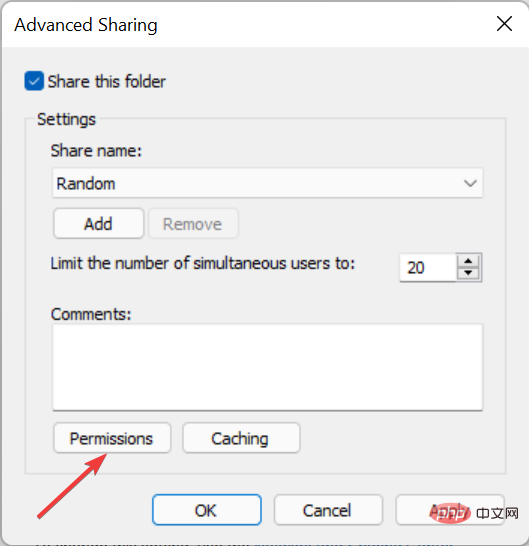
- Click thePermissionsbutton.
- Make sure the "Everyone"option is selected and the relevant permissions are granted. When finished, click OK at the bottom to save changes.
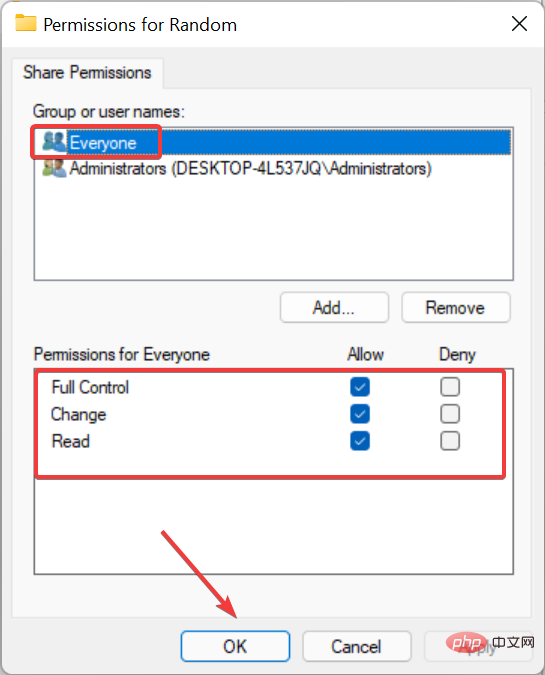
Save changes on all subsequent windows, then restart your computer for these to take effect.
Once completed, the network sharing not working issue in Windows 11 should be fixed and you can start sharing files with other devices on your local network.
Also, if you can’t access shared folders in Windows 11, learn what to do as many reports have also encountered this issue.
The above is the detailed content of Network sharing not working in Windows 11? Apply these fixes. For more information, please follow other related articles on the PHP Chinese website!


