Home >Operation and Maintenance >Windows Operation and Maintenance >How to change dns in win10
The method to change dns in win10 is: first open the control panel and enter the [Network and Internet] option; then open the [Network and Sharing Center] and click the name of the currently connected network; finally open the Internet Protocol Version 4 properties panel , check [Use the following DNS server address] and enter the DNS address.

#The operating environment of this article: windows10 system, thinkpad t480 computer.
The specific method is as follows:
First right-click "This Computer" and then select "Properties". After entering the Windows system interface, select the "Control Panel Home" option on the left, as shown below

Click the "Network and Network" option in the Control Panel, as shown below display;

Then select "Network and Sharing Center" as shown below;

In the Network and Sharing Center interface, click the name of the currently connected network, as shown below:

Then select "Properties" in the pop-up window, as shown below;

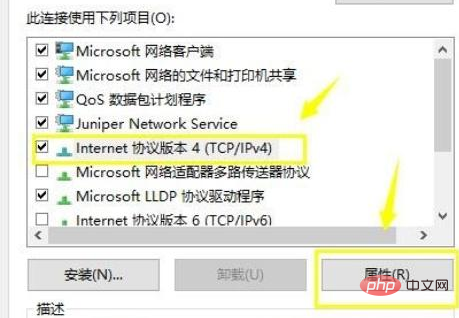
Next, find and check "IPv4 Protocol" in the network properties, and then click "Properties", as shown in the figure below

Select the following DNS Server, enter the required address, click the [OK] button, the DNS setting is successful, as shown in the figure below;

Free learning video sharing:php tutorial
The above is the detailed content of How to change dns in win10. For more information, please follow other related articles on the PHP Chinese website!