Home >Operation and Maintenance >Windows Operation and Maintenance >How to migrate the system in win10 using the built-in migration tool?
How to migrate the system using the built-in migration tool in win10: first open the system [Backup and Restore] function; then select the location to save the backup and select the backup content; finally restart and click [Select other files to restore] Backup (N)] and select the previous backup file to restore.

How to migrate the system in win10 using the built-in migration tool:
Step 1: Back up the system
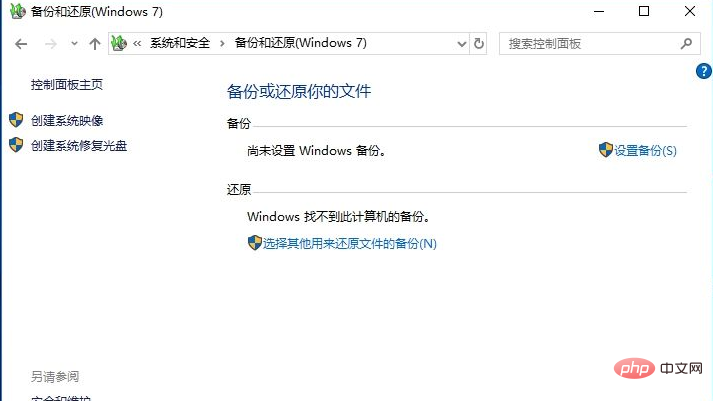
1. Open the system [Backup and Restore (Windows 7)] function
[Control Panel] → [System and Security] → [Backup and Restore (Windows 7)], as shown in the figure below: 
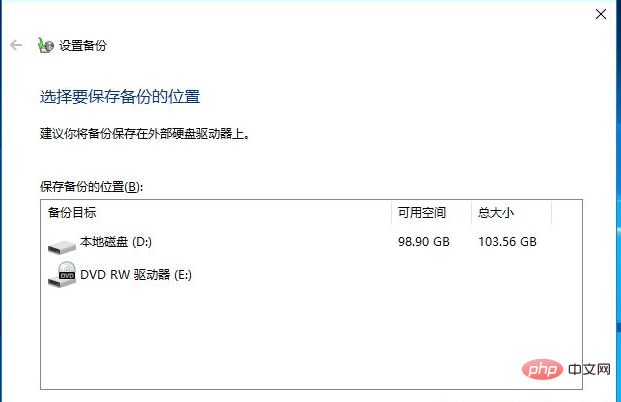
2. Select the location to save the backup
In the interface of step 1, select [Set Backup] to enter the page to select the location to save the backup. On this page, select your external mobile hard drive to facilitate subsequent system restoration. The capacity of the mobile hard disk must be larger than the capacity occupied by all the files in your system. 
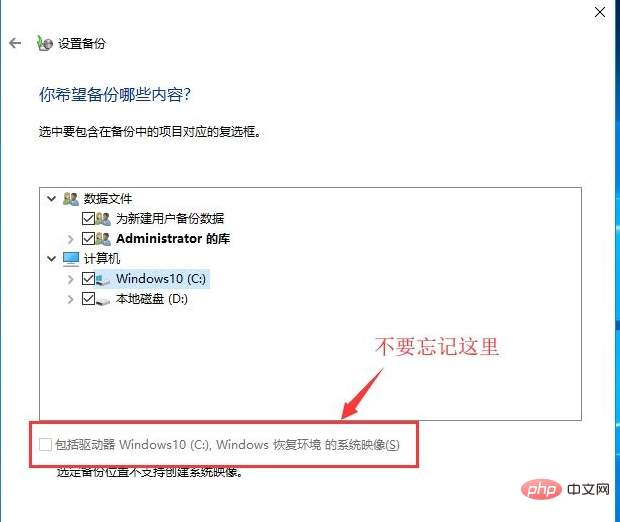
3. Choose what content to back up
After selecting the location to save the backup, click Next to select what content you want to back up. Here we select the [Let me choose] option and click Next. Select all the drive letters and data files that need to be migrated, and select the [Include drive Windows 10 (C:), system image (S) of the Windows recovery environment] option below. 
4. Start backup
After selecting the content to be backed up, click Next to start the backup. The operation time varies depending on the size of the backup content, and generally lasts 30-90 minutes. This step takes about half of the entire migration process.
Step 2: Restore system (migration)
Restore is divided into two situations. The first situation is that the target machine system can start normally. In this case, open For the backup and restore function, click [Select other backups to restore files (N)], and then select the previous backup file to restore.
The second situation is that the target machine system is damaged and cannot start normally. In this case, you need to make a system startup disk. You can use the [Create a Recovery Drive] function that comes with win10 to create a startup disk. After booting from the startup disk, select System Restore to restore your previously backed up system.
Related learning recommendations: windows server operation and maintenance tutorial
The above is the detailed content of How to migrate the system in win10 using the built-in migration tool?. For more information, please follow other related articles on the PHP Chinese website!