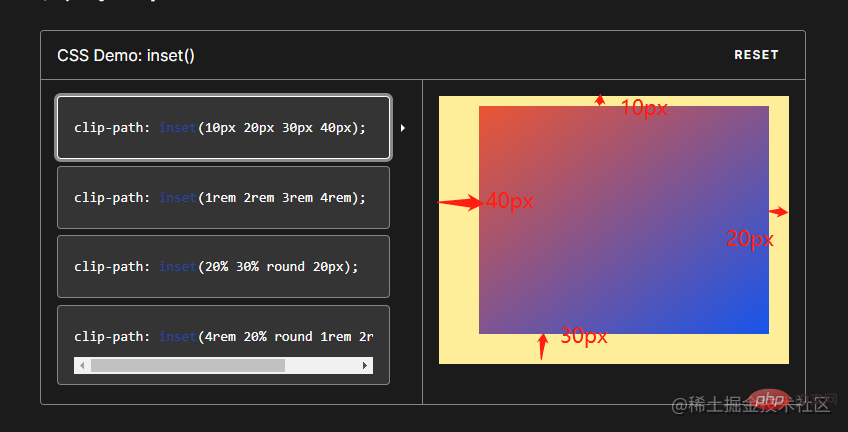
이 기사는 프런트 엔드 버튼에 대한 관련 지식을 제공합니다. 주로 클립 경로를 사용하여 버튼 흐름 테두리 애니메이션을 구현하는 방법에 대해 설명합니다. 관심 있는 친구는 아래를 살펴보는 것이 좋습니다.

<div>苏苏_icon</div>
div {
  position: relative;
  width: 220px;
  height: 64px;
  line-height: 64px;
  text-align: center;
  color: #fff;
  font-size: 20px;
  background: #55557f;
  cursor: pointer;
  border-radius: 10px;
}
div::after,
div::before {
   content: "";
   position: absolute;
   width: 240px;
   height: 84px;
   border: 2px solid #55557f;
   border-radius: 10px;
 }
div::before{
 border: 2px solid orange;
}clip-path

div::after,
div::before{
 + left: calc(110px - 120px);
 + top: calc(32px - 42px);
}설명:
border-radius 단축 구문을 사용하여 삽입 직사각형의 둥근 모서리를 정의하세요
div::after,
div::before{
 - left: calc(110px - 120px);
 - top: calc(32px - 42px);
 - inset: -10px;
}
로그인 후 복사
clip-path: inset(20px 50px 10px 0 round 50px);
div::after,
div::before{
  + clip-path: inset(0 0 98% 0);
}
로그인 후 복사
div::after,
div::before{
  + clip-path: inset(0 98% 0 0);
} 애니메이션 추가
div::after,
div::before{
  + clip-path: inset( 98% 0  0 0);
}div::after,
div::before{
+ clip-path: inset(0 0 0 98% ) ;
} 포스트 의사 요소에 애니메이션 지연을 추가하여 시차 효과 만들기

 animation- 지연
 CSS 속성은 다음을 지정합니다. 요소가 애니메이션을 시작하기 전에 기다려야 하는 시간입니다. 애니메이션은 나중에 시작할 수도 있고 처음부터 즉시 시작할 수도 있고 애니메이션 중간에 즉시 시작할 수도 있습니다.

div::after,
div::before{
  + animation: pathRotate 3s infinite linear;
}
@keyframes pathRotate {  0%,  100% {
    clip-path: inset(0 0 98% 0);
  }  25% {
    clip-path: inset(0 98% 0 0);
  }  50% {
    clip-path: inset(98% 0 0 0);
  }  75% {
    clip-path: inset(0 0 0 98%);
  }
}
로그인 후 복사div에 호버 이벤트를 추가하면 끝~
div:hover {
  filter: brightness(1.5);
}
로그인 후 복사div{ /* 添加过渡效果 */ transition: all 0.5s; }로그인 후 복사3.实现代码
위 내용은 버튼 흐르는 테두리 애니메이션을 구현하기 위한 클립 경로에 대한 자세한 그래픽 설명의 상세 내용입니다. 자세한 내용은 PHP 중국어 웹사이트의 기타 관련 기사를 참조하세요!