이 글에서는 주로 사용자에게 대기 프로세스를 제공할 수 있는 진행률 표시줄 효과를 달성하기 위한 Javascript+CSS3를 소개합니다.
진행률 표시줄은 다양한 웹에서 사용할 수 있습니다. 이 글에서는 진행률 표시줄의 효과를 소개합니다.
1: CSS2 속성 클립은 웹 페이지 진행률 표시줄을 구현합니다. 먼저 클립 속성을 소개하겠습니다. 이 속성은 CSS2.1에서 거의 사용되지 않으므로 이를 이해해야 합니다.
브라우저 지원: 모든 주류 브라우저는 클립 속성을 지원합니다.
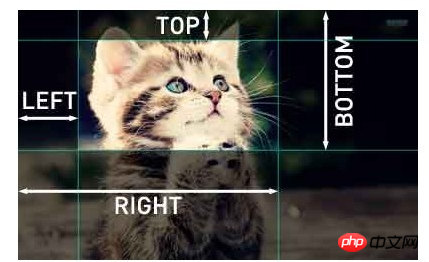
W3c 공식 웹사이트에는 Clip 속성이 다음과 같이 설명되어 있습니다. 요소의 가시 영역은 요소를 자르는 방식으로 제어됩니다. 기본적으로 요소는 자르지 않습니다.
클립 클리핑의 구문은 다음과 같습니다:.xx {clip:rect(, , , )}
간단한 데모를 다시 볼 수 있습니다.
p#one { clip: rect(5px, 40px, 45px, 5px); } p#two { clip: rect(5px, 55px, 45px, 5px); }
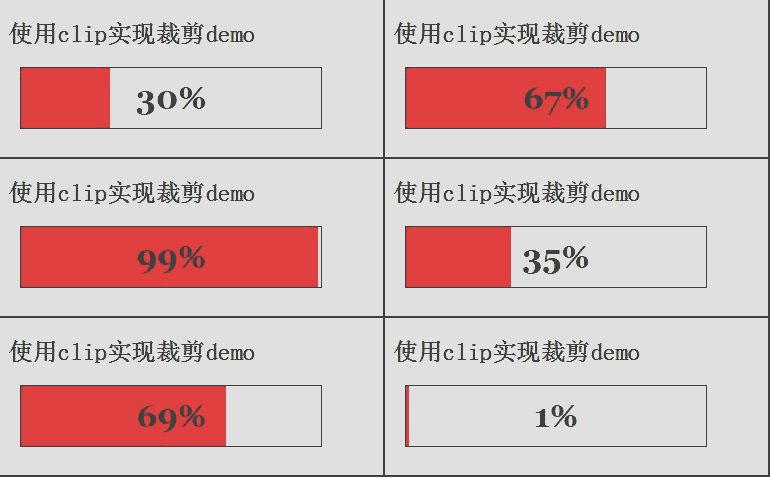
이제 진행률 표시줄의 데모를 볼 수 있습니다.
使用clip实现裁剪demo
0%
.progress-box{position:absolute;left:0;width:300px;height:60px;border:1px solid #000;margin-left:20px;} .progress-bar{position:absolute;left:0;top:0;width:300px;height:60px;clip:rect(0px,0px,60px,0px);background:red;} .progress-text{position:absolute;left:0;top:0;width:300px;height:60px;color:Black;text-align:center; line-height:60px; font-family:Georgia;font-size:2em;font-weight:bold;}
효과를 보여주기 위해서는 JS에서 진행률 표시줄의 효과를 보여주기 위한 간단한 setInterval 코드가 필요합니다. setInterval 코드는 다음과 같습니다.
var bar = document.getElementById("progress-bar"), text = document.getElementById("progress-text"); var cent = 0, max = 300; var timer = setInterval(progressFn, 30); function progressFn() { if(cent > max) { cent = 0; timer = setInterval(arguments.callee(), 30); }else { bar.style.clip = "rect(0px," + cent + "px,60px,0px)"; text.innerHTML = Math.ceil((cent / max) * 100) + "%"; cent++; } }
두 가지: 진행 이벤트(progress)를 사용하여 서버와 상호 작용하여 웹 페이지 진행률 표시줄을 구현합니다.
Progress 이벤트(progress): 클라이언트-서버 통신과 관련된 이벤트를 정의합니다. 진행 이벤트.
使用clip实现裁剪demo
0%

서버와 상호작용하는 코드는 다음과 같습니다.
var pbar = document.getElementById("progress-bar"), pText = document.getElementById("progress-text"); var cent = 0, max = 300; function createXHR(){ var xhr; if (window.XMLHttpRequest){// code for IE7+, Firefox, Chrome, Opera, Safari xhr=new XMLHttpRequest(); }else{ // code for IE6, IE5 xhr=new ActiveXObject("Microsoft.XMLHTTP"); } return xhr; } var xhr = createXHR(); xhr.onload = function() { if((xhr.status >= 200 && xhr.status < 300) || xhr.status == 304) { alert(xhr.responseText); }else { alert("Request was unsuccessful: " + xhr.status); } } xhr.onprogress = function(event) { var pStatus = document.getElementById("status"); if (event.lengthComputable) { pStatus.innerHTML = "Recived" + event.position + " of " + event.totalSize + " bytes"; console.log(event.target); var percentComplete = Math.round(event.loaded / event.total); // 其中的event.loaded表示当前加载了多少字节流,而event.total表示总共有多少字节流 得到这样一个百分比, console.log(event.loaded, event.total, 300 * percentComplete); progressFn(300 * percentComplete, max); } } xhr.open("get", "progress.php", true); xhr.send(null); function progressFn(cent,max) { if (cent < max) { pbar.style.clip = "rect(0px," + cent + "px,60px,0px)"; pText.innerHTML = Math.ceil((cent / max) * 100) + "%"; } }
PHP 캐주얼 시뮬레이션을 위한 코드 하나만 작성해 보세요. 물론 실제 사용에서는 절대 이렇지는 않을 것입니다!
3: CSS3 애니메이션과 선형 점진적 변경으로 진행률 표시줄 구현 데모
css 코드:
#loading-status {width:300px;border:1px solid #669CB8;-webkit-box-shadow: 0px 2px 2px #D0D4D6; -moz-box-shadow:0px 2px 2px #D0D4D6;border-radius: 10px;height:20px;padding: 1px;} #process {width: 80%;height: 100%;border-radius: 10px;background: -webkit-gradient(linear, 0 0, 0 100%, from(#7BC3FF), color-stop(0.5,#42A9FF), to(#7BC3FF));-webkit-animation: load 3s ease-out infinite;} @-webkit-keyframes load { 0% { width: 0%; } 100% { width: 80%; } }
CSS를 사용하여 그림자 효과가 있는 검은색 탐색 메뉴 효과를 얻는 방법
그라데이션 배경 효과를 구현하는 JS 및 CSS용 코드
위 내용은 CSS3 및 Javascript는 진행률 표시줄의 효과를 실현합니다.의 상세 내용입니다. 자세한 내용은 PHP 중국어 웹사이트의 기타 관련 기사를 참조하세요!