一,开篇分析
首先“Http”这个概念大家应该比较熟悉了,它不是基于特定语言的,是一个通用的应用层协议,不同语言有不同的实现细节,但是万变不离其宗,思想是相同的,
NodeJS作为一个宿主运行环境,以JavaScript为宿主语言,它也有自己实现的一套标准,这篇文章我们就一起来学习一下 “Http模块” 。但是作为前提来说,
希望大家可以先阅读一下官网提供的api,有一个前置了解,这样就方便多了,以下是Http部分的api概览:
HTTP
http.STATUS_CODES
http.createServer([requestListener])
http.createClient([port], [host])
Class: http.Server
事件 : 'request'
事件: 'connection'
事件: 'close'
Event: 'checkContinue'
事件: 'connect'
Event: 'upgrade'
Event: 'clientError'
server.listen(port, [hostname], [backlog], [callback])
server.listen(path, [callback])
server.listen(handle, [callback])
server.close([callback])
server.maxHeadersCount
server.setTimeout(msecs, callback)
server.timeout
Class: http.ServerResponse
事件: 'close'
response.writeContinue()
response.writeHead(statusCode, [reasonPhrase], [headers])
response.setTimeout(msecs, callback)
response.statusCode
response.setHeader(name, value)
response.headersSent
response.sendDate
response.getHeader(name)
response.removeHeader(name)
response.write(chunk, [encoding])
response.addTrailers(headers)
response.end([data], [encoding])
http.request(options, callback)
http.get(options, callback)
Class: http.Agent
new Agent([options])
agent.maxSockets
agent.maxFreeSockets
agent.sockets
agent.freeSockets
agent.requests
agent.destroy()
agent.getName(options)
http.globalAgent
Class: http.ClientRequest
Event 'response'
Event: 'socket'
事件: 'connect'
Event: 'upgrade'
Event: 'continue'
request.write(chunk, [encoding])
request.end([data], [encoding])
request.abort()
request.setTimeout(timeout, [callback])
request.setNoDelay([noDelay])
request.setSocketKeepAlive([enable], [initialDelay])
http.IncomingMessage
事件: 'close'
message.httpVersion
message.headers
message.rawHeaders
message.trailers
message.rawTrailers
message.setTimeout(msecs, callback)
message.method
message.url
message.statusCode
message.socket
让我们先从一个简单例子开始,创建一个叫server.js的文件,并写入以下代码:
var http = require('http') ;
var server = http.createServer(function(req,res){
res.writeHeader(200,{
'Content-Type' : 'text/plain;charset=utf-8' // 添加charset=utf-8
}) ;
res.end("Hello,大熊!") ;
}) ;
server.listen(8888) ;
console.log("http server running on port 8888 ...") ;
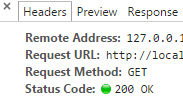
(node server.js)以下是运行结果:

二,细节分析实例
具体看一下这个小例子:
(1行):通过"require"引入NodeJS自带的"http"模块,并且把它赋值给http变量。
(2行):调用http模块提供的函数:"createServer" 。这个函数会返回一个新的web服务器对象。
参数 "requestListener" 是一个函数,它将会自动加入到 "request" 事件的监听队列。
当一个request到来时,Event-Loop会将这个Listener回调函数放入执行队列, node中所有的代码都是一个一个从执行队列中拿出来执行的。
这些执行都是在工作线程上(Event Loop本身可以认为在一个独立的线程中,我们一般不提这个线程,而将node称呼为一个单线程的执行环境),
所有的回调都是在一个工作线程上运行。
我们在再来看一下"requestListener"这个回调函数,它提供了两个参数(request,response),
每次收到一个请求时触发。注意每个连接又可能有多个请求(在keep-alive的连接中)。
"request"是http.IncomingMessage的一个实例。"response"是http.ServerResponse的一个实例。
一个http request对象是可读流,而http response对象则是可写流。
一个"IncomingMessage"对象是由http.Server或http.ClientRequest创建的,
并作为第一参数分别传递给"request"和"response"事件。
它也可以被用来访问应答的状态,头文件和数据。
它实现了 "Stream" 接口以及以下额外的事件,方法和属性。(具体参考api)。
(3行):“writeHeader”,使用 "response.writeHead()" 函数发送一个Http状态200和Http头的内容类型(content-type)。
向请求回复响应头。"statusCode"是一个三位是的HTTP状态码,例如 404 。最后一个参数,"headers",是响应头的内容。
举个栗子:
var body = 'hello world' ;
response.writeHead(200, {
'Content-Length': body.length,
'Content-Type': 'text/plain'
}) ;
注意:Content-Length 是以字节(byte)计算,而不是以字符(character)计算。
之前的例子原因是字符串 “Hello World !” 只包含了单字节的字符。
如果body包含了多字节编码的字符,就应当使用Buffer.byteLength()来确定在多字节字符编码情况下字符串的字节数。
需要进一步说明的是Node不检查Content-Lenth属性和已传输的body长度是否吻合。
statusCode是一个三位是的HTTP状态码, 例如:"404" 。这里要说的是 "http.STATUS_CODES" ,全部标准"Http"响应状态码的集合和简短描述都在里面。
如下是源码参考:
var STATUS_CODES = exports.STATUS_CODES = {
100 : 'Continue',
101 : 'Switching Protocols',
102 : 'Processing', // RFC 2518, obsoleted by RFC 4918
200 : 'OK',
201 : 'Created',
202 : 'Accepted',
203 : 'Non-Authoritative Information',
204 : 'No Content',
205 : 'Reset Content',
206 : 'Partial Content',
207 : 'Multi-Status', // RFC 4918
300 : 'Multiple Choices',
301 : 'Moved Permanently',
302 : 'Moved Temporarily',
303 : 'See Other',
304 : 'Not Modified',
305 : 'Use Proxy',
307 : 'Temporary Redirect',
400 : 'Bad Request',
401 : 'Unauthorized',
402 : 'Payment Required',
403 : 'Forbidden',
404 : 'Not Found',
405 : 'Method Not Allowed',
406 : 'Not Acceptable',
407 : 'Proxy Authentication Required',
408 : 'Request Time-out',
409 : 'Conflict',
410 : 'Gone',
411 : 'Length Required',
412 : 'Precondition Failed',
413 : 'Request Entity Too Large',
414 : 'Request-URI Too Large',
415 : 'Unsupported Media Type',
416 : 'Requested Range Not Satisfiable',
417 : 'Expectation Failed',
418 : 'I\'m a teapot', // RFC 2324
422 : 'Unprocessable Entity', // RFC 4918
423 : 'Locked', // RFC 4918
424 : 'Failed Dependency', // RFC 4918
425 : 'Unordered Collection', // RFC 4918
426 : 'Upgrade Required', // RFC 2817
500 : 'Internal Server Error',
501 : 'Not Implemented',
502 : 'Bad Gateway',
503 : 'Service Unavailable',
504 : 'Gateway Time-out',
505 : 'HTTP Version not supported',
506 : 'Variant Also Negotiates', // RFC 2295
507 : 'Insufficient Storage', // RFC 4918
509 : 'Bandwidth Limit Exceeded',
510 : 'Not Extended' // RFC 2774
};
节选自,Nodejs源码 ”http.js“ 143行开始。
其实从客户端应答结果也不难看出:
(6行):”response.end“------当所有的响应报头和报文被发送完成时这个方法将信号发送给服务器。服务器会认为这个消息完成了。
每次响应完成之后必须调用该方法。如果指定了参数 “data” ,就相当于先调用 “response.write(data, encoding) ” 之后再调用 “response.end()” 。
(8行):”server.listen(8888)“ ------ 服务器用指定的句柄接受连接,绑定在特定的端口。
以上就是一个比较详细的分析过程,希望有助于加深理解,代码虽然不多,但是重在理解一些细节机制,以便日后高效的开发NodeJS应用。
三,实例
除了可以使用"request"对象访问请求头数据外,还能把"request"对象当作一个只读数据流来访问请求体数据。
这是一个"POST"请求的例子:
http.createServer(function (request, response) {
var body = [];
console.log(request.method) ;
console.log(request.headers) ;
request.on('data', function (chunk) {
body.push(chunk);
}) ;
request.on('end', function () {
body = Buffer.concat(body) ;
console.log(body.toString()) ;
});
}).listen(8888) ;
下是一个完整的“Http”请求数据内容。
POST / HTTP/1.1
User-Agent: curl/7.26.0
Host: localhost
Accept: */*
Content-Length: 11
Content-Type: application/x-www-form-urlencoded
Hello World
四,总结一下
(1),理解 "Http" 概念。
(2),熟练使用 "Http" 相关的api。
(3),注意细节的把控,比如:“POST,GET” 之间的处理细节。
(4),"requestListener"的理解。
(5),强调一个概念:一个http request对象是可读流,而http response对象则是可写流 。


![[Web front-end] Node.js quick start](https://img.php.cn/upload/course/000/000/067/662b5d34ba7c0227.png)


