

This article mainly introduces the relevant information of Angular19 custom form controls. It is very good and has reference value. Friends in need can refer to it
1 Requirements
When developers need a specific form control, they need to develop a control similar to the default provided form control as a form control; custom form controls must consider the relationship between the model and the view How to interact with data
2 Official Document->Click to go
Angular The ControlValueAccessor interface is provided for developers to assist developers in building custom form controls. Developers only need to implement the methods in the ControlValueAccessor interface in the custom form control class to achieve data interaction between the model and the view
interface ControlValueAccessor { writeValue(obj: any): void registerOnChange(fn: any): void registerOnTouched(fn: any): void setDisabledState(isDisabled: boolean)?: void }
2.1 writeValue
writeValue(obj: any): void
This method is used to write values to elements in custom form controls;
This parameter value (obj) uses this The components of the custom form control are passed through the data binding of the template form or responsive form;
In the class of the custom form control, you only need to assign this value (obj) to a member variable. , the view of the custom form control will display this value through property binding
2.2 registerOnChange
registerOnChange(fn: any): void
registerOnChange will be triggered when the data of the custom form control changes Method, this method is used to handle changes in custom form control data;
The parameter (fn) received by the registerOnChange method is actually a method, which is responsible for processing the changed data
When since When the defined control data changes, the method executed by fn will be automatically called, but the usual approach is to customize a method propagateChange and let the custom method point to fn, so that when the data changes, you only need to call propagateChange to process the changed data
2.3 registerOnTouched
registerOnTouched(fn: any): void
The registerOnTouched method will be triggered when the form control is touched. The specific details will be updated...2018-1-31 11:18:33
2.4 setDisabledState
setDisabledState(isDisabled: boolean)?: void
To be updated...2018-1-31 11:19:30
3 Programming steps
3.1 Create a custom form control component
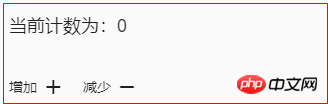
当前计数为:{{countNumber}}
HTML
import { Component, OnInit } from '@angular/core'; import { ControlValueAccessor } from '@angular/forms'; @Component({ selector: 'app-counter', templateUrl: './counter.component.html', styleUrls: ['./counter.component.scss'] }) export class CounterComponent implements OnInit { countNumber: number = 0; constructor() { } ngOnInit() { } onIncrease() { this.countNumber++; } onDecrease() { this.countNumber--; } }
3.1.1 Function description
When you click the increase button, the current count will increase by 1. When you click the decrease button, the current count will be cut by 1
3.1. 2 When used directly in other components, an error will be reported

The error message is as follows:

The error message is Say the component we use
3.2 How to turn the
3.2.1 Implement the ControlValueAccessor interface

export class CounterComponent implements OnInit, ControlValueAccessor { countNumber: number = 0; constructor() { } ngOnInit() { } onIncrease() { this.countNumber++; } onDecrease() { this.countNumber--; } /**将数据从模型传输到视图 */ writeValue(obj: any): void { } /**将数据从视图传播到模型 */ registerOnChange(fn: any): void { } registerOnTouched(fn: any): void { } setDisabledState?(isDisabled: boolean): void { } }
3.2.2 Specify dependency information providers

import { Component, OnInit, forwardRef } from '@angular/core'; import { ControlValueAccessor, NG_VALUE_ACCESSOR } from '@angular/forms'; @Component({ selector: 'app-counter', templateUrl: './counter.component.html', styleUrls: ['./counter.component.scss'], providers: [ { provide: NG_VALUE_ACCESSOR, useExisting: forwardRef(() => CounterComponent), multi: true } ] }) export class CounterComponent implements OnInit, ControlValueAccessor { countNumber: number = 0; constructor() { } ngOnInit() { } onIncrease() { this.countNumber++; } onDecrease() { this.countNumber--; } /**将数据从模型传输到视图 */ writeValue(obj: any): void { } /**将数据从视图传播到模型 */ registerOnChange(fn: any): void { } registerOnTouched(fn: any): void { } setDisabledState?(isDisabled: boolean): void { } }
3.2.3 Bug to be fixed
Although it can run normally, the elements in the form control cannot accept the form model passed in the component using the form control The data and the data changed by the form control cannot be returned to the form model in the component that uses the form control; in short, there is no data interaction between the model and the view
3.3 Practice the data interaction between the model and the view
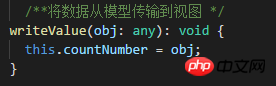
3.3.1 Model to view
Refactor the writeValue method in the custom form control class
Tip 01: The parameters in the writeValue method are passed in through the data binding of the form using the component that uses the custom form control
3.3.2 View Go to the model
》Customize a method to handle the changed data in the custom form control
propagateChange = (_: any) => {};
》Reconstruct the registerOnChange method in the custom form control class
/**将数据从视图传播到模型 */ registerOnChange(fn: any): void { this.propagateChange = fn; }
》Call the custom method where the data changes

3.4 Custom form control component code summary
当前计数为:{{countNumber}}
HTML
import { Component, OnInit, forwardRef } from '@angular/core'; import { ControlValueAccessor, NG_VALUE_ACCESSOR } from '@angular/forms'; @Component({ selector: 'app-counter', templateUrl: './counter.component.html', styleUrls: ['./counter.component.scss'], providers: [ { provide: NG_VALUE_ACCESSOR, useExisting: forwardRef(() => CounterComponent), multi: true } ] }) export class CounterComponent implements OnInit, ControlValueAccessor { countNumber: number = 0; propagateChange = (_: any) => {}; constructor() { } ngOnInit() { } onIncrease() { this.countNumber++; this.propagateChange(this.countNumber); } onDecrease() { this.countNumber--; this.propagateChange(this.countNumber); } /**将数据从模型传输到视图 */ writeValue(obj: any): void { this.countNumber = obj; } /**将数据从视图传播到模型 */ registerOnChange(fn: any): void { /**fn其实是一个函数,当视图中的数据改变时就会调用fn指向的这个函数,从而达到将数据传播到模型的目的 */ this.propagateChange = fn; // 将fn的指向赋值给this.propagateChange,在需要将改变的数据传到模型时只需要调用this.propagateChange方法即可 } registerOnTouched(fn: any): void { } setDisabledState?(isDisabled: boolean): void { } }
3.5 Code summary of the component that uses custom form controls
技巧01:如果自定义表单控件和使用自定义表单控件的组件都在不在同一个模块时需要对自定义表单控件对应组件进行导出和导入操作

面板模板
面板测试内容
自定义提取表单控件
提取表单控件
ngIf指令测试
RXJS使用
自定义验证器
响应式表单
利用响应式编程实现表单元素双向绑定
姓名为:{{name.value}}
-->
模板表单
md-chekbox的使用
md-tooltip的使用
鼠标放上去
md-select的使用
ngNonBindable指令的使用
使用了ngNonBindable的标签,会将该标签里面的元素内容全部都看做时纯文本
{{taskLists | json }} ← 这是{{taskLists | json }}渲染的内容
HTML

import { Component, OnInit, HostListener, Inject} from '@angular/core'; import { FormControl, FormGroup, FormBuilder, Validators } from '@angular/forms'; import { Http } from '@angular/http'; import { QuoteService } from '../../service/quote.service'; @Component({ selector: 'app-test01', templateUrl: './test01.component.html', styleUrls: ['./test01.component.scss'] }) export class Test01Component implements OnInit { countNumber: number = 9; outerCounterValue: number = 5; ngif = true; loginForm: FormGroup; testForm: FormGroup; data: any; name: FormControl = new FormControl(); desc: string = 'hello boy'; taskLists = [ {label: 1, name: '进行中'}, {label: 2, name: '已完成'} ]; constructor( private formBuilder: FormBuilder, private http: Http, @Inject('BASE_CONFIG') private baseConfig, private quoteService: QuoteService ) {} ngOnInit() { this.testForm = new FormGroup({ email: new FormControl('', [Validators.required, Validators.minLength(4)], []), password: new FormControl('', [Validators.required], []) }); this.name.valueChanges .debounceTime(500) .subscribe(value => alert(value)); this.loginForm = this.formBuilder.group({ username: ['', [Validators.required, Validators.minLength(4), this.myValidator], []], userpwd: ['', [Validators.required, Validators.minLength(6)], []] }); this.quoteService.test() .subscribe(resp => console.log(resp)); } onChangeNgifValue() { if (this.ngif == false) { this.ngif = true; } else { this.ngif = false; } } @HostListener('keyup.enter') onTestNgModelClick() { alert('提交'); } onTestClick() { // this.data = this.testForm.get('email').value; // console.log(this.testForm.getError); console.log(this.testForm.controls['email']); } onTestLogin() { console.log(this.loginForm.value); if (this.loginForm.valid) { console.log('登陆数据合法'); } else { console.log('登陆数据不合法'); console.log(this.loginForm.controls['username'].errors); console.log(this.loginForm.get('userpwd').errors); } } myValidator(fc: FormControl): {[key: string]: any} { const valid = fc.value === 'admin'; return valid ? null : {myValidator: {requiredUsername: 'admin', actualUsername: fc.value}}; } }
3.6 初始化效果展示

上面是我整理给大家的,希望今后会对大家有帮助。
相关文章:
JavaScript中Object基础内部方法图(图文教程)
The above is the detailed content of About the use of custom form controls in Angular19. For more information, please follow other related articles on the PHP Chinese website!


![[Web front-end] Node.js quick start](https://img.php.cn/upload/course/000/000/067/662b5d34ba7c0227.png)


