


在我们日常的项目开发中,处理滚动和轮播图是再常见不过的需求了,本文主要和大家介绍了关于vue利用better-scroll实现轮播图与页面滚动的相关资料,文中给出了详细的示例代码供大家参考学习,需要的朋友们下面来一起看看吧。
前言
better-scroll 也很强大,不仅可以做普通的滚动列表,还可以做轮播图、picker 等等...所以本文主要给大家介绍了关于vue用better-scroll实现轮播图与页面滚动的相关内容,分享出来供大家参考学习,下面话不多说了,来一起看看详细的介绍吧。
1.安装better-scroll
在根目录中package.json的dependencies中添加:
"better-scroll": "^0.1.15"
然后 npm i 安装。
2.封装代码
将better-scroll封装成两个基础组件slider和scroll放于src/base文件夹中。
slider.vue 代码
<template>
<p class="slider" ref="slider">
<p class="slider-group" ref="sliderGroup">
<slot>
</slot>
</p>
<p class="dots">
<span class="dot" :class="{active: currentPageIndex === index }" v-for="(item, index) in dots"></span>
</p>
</p>
</template>
<script>
import {addClass} from '../common/js/dom'
import BScroll from 'better-scroll'
export default{
data() {
return {
dots:[],
currentPageIndex: 0
}
},
props:{
loop:{
type:Boolean,
default:true
},
autoPlay:{
type:Boolean,
default:true
},
interval:{
type: Number,
default:4000
}
},
mounted() {
this._setSliderWidth()
setTimeout(() => {
// 在初始化slider前初始化dot
this._initDots()
this._initSlider()
if (this.autoPlay) {
this._play()
}
}, 20)
// 监听窗口大小改变时间
window.addEventListener('resize', () => {
if (!this.slider) {
return
}
this._setSliderWidth(true)
this.slider.refresh()
})
},
methods:{
_setSliderWidth(isResize) {
this.children = this.$refs.sliderGroup.children
let width = 0
// slider 可见宽度
let sliderWidth = this.$refs.slider.clientWidth
for (let i = 0; i < this.children.length; i++) {
let child = this.children[i]
// 设置每个子元素的样式及高度
addClass(child, 'slider-item')
child.style.width = sliderWidth + 'px'
// 计算总宽度
width += sliderWidth
}
// 循环播放首尾各加一个,因此总宽度还要加两倍的宽度
if (this.loop && !isResize) {
width += 2 * sliderWidth
}
this.$refs.sliderGroup.style.width = width + 'px'
},
_initSlider() {
this.slider = new BScroll(this.$refs.slider, {
scrollX: true,
scrollY: false,
momentum: false,
snap: true,
snapLoop: this.loop,
snapThreshold: 0.3,
snapSpeed: 400,
// click:true
})
// 监听滚动结束时间获取pageX
this.slider.on('scrollEnd', () => {
let pageIndex = this.slider.getCurrentPage().pageX
if (this.loop) {
// 由于bscroll循环播放首尾各加一个,因此索引-1
pageIndex -= 1
}
this.currentPageIndex = pageIndex
if (this.autoPlay) {
this._play()
}
})
this.slider.on('beforeScrollStart', () => {
if (this.autoPlay) {
clearTimeout(this.timer)
}
})
},
_initDots() {
// 长度为n的空数组
this.dots = new Array(this.children.length)
},
_play() {
// currentPageIndex为不含首尾副本的索引,因此若有循环要+2
let pageIndex = this.currentPageIndex + 1
if (this.loop) {
pageIndex += 1
}
this.timer = setTimeout(() => {
this.slider.goToPage(pageIndex, 0, 400)
}, this.interval)
}
},
// 生命周期destroyed销毁清除定时器,有利于内存释放
destroyed() {
clearTimeout(this.timer)
},
}
</script>
<style scoped>
.slider{
min-height: 1px;
position: relative;
}
.slider-group{
position: relative;
overflow: hidden;
white-space: nowrap;
}
.slider-item{
float: left;
box-sizing: border-box;
overflow: hidden;
text-align: center;
height: 150px;
overflow: hidden;
}
.slider-item a{
display: block;
width: 100%;
overflow: hidden;
text-decoration: none;
}
.slider-item img{
display: block;
width: 100%;
}
.dots{
position: absolute;
right: 0;
left: 0;
bottom: 12px;
text-align: center;
font-size: 0;
}
.dot{
display: inline-block;
margin: 0 4px;
width: 8px;
height: 8px;
border-radius: 50%;
background: red;
}
.active{
width: 20px;
border-radius: 5px;
}
</style>该代码引用common/js/dom.js中的addClass()方法为每个轮播图添加一个slider-item类,dom.js代码如下:
export function hasClass (el, className) {
 // 开始或空白字符+类名+空白字符或结束
 let reg = new RegExp('(^|\\s)' + className + '(\\s|$)')
 // 测试元素是否有该类名,返回布尔值
 return reg.test(el.className)
}

export function addClass (el, className) {
 if (hasClass(el, className)) {
 return
 }
// 以空白符为切割位置切割生成新数组
 let newClass = el.className.split(' ')
// 数组中加入新类名
 newClass.push(className)
// 将数组元素放入一个字符串,以空白符间隔
 el.className = newClass.join(' ')
}scroll.vue代码
<template>
<p ref="wrapper">
<slot></slot>
</p>
</template>
<script>
import BScroll from 'better-scroll'
export default {
props: {
probeType: {
type: Number,
default: 1
},
click: {
type: Boolean,
default: true
},
listenScroll: {
type: Boolean,
default: false
},
object: {
type: Object,
default: null
},
data: {
type: Array,
default: null
},
string: {
type: String,
default: ''
},
pullup: {
type: Boolean,
default: false
},
beforeScroll: {
type: Boolean,
default: false
},
refreshDelay: {
type: Number,
default: 20
}
},
mounted() {
setTimeout(() => {
this._initScroll()
}, 20)
},
methods: {
_initScroll() {
if (!this.$refs.wrapper) {
return
}
this.scroll = new BScroll(this.$refs.wrapper, {
probeType: this.probeType,
click: this.click
})
if (this.listenScroll) {
let me = this
// pos为位置参数
this.scroll.on('scroll', (pos) => {
me.$emit('scroll', pos)
})
}
if (this.pullup) {
this.scroll.on('scrollEnd', () => {
if (this.scroll.y <= (this.scroll.maxScrollY + 50)) {
this.$emit('scrollToEnd')
}
})
}
if (this.beforeScroll) {
this.scroll.on('beforeScrollStart', () => {
this.$emit('beforeScroll')
})
}
},
disable() {
this.scroll && this.scroll.disable()
},
enable() {
this.scroll && this.scroll.enable()
},
refresh() {
this.scroll && this.scroll.refresh()
},
scrollTo() {
this.scroll && this.scroll.scrollTo.apply(this.scroll, arguments)
},
scrollToElement() {
this.scroll && this.scroll.scrollToElement.apply(this.scroll, arguments)
}
},
watch: {
data() {
setTimeout(() => {
this.refresh()
}, this.refreshDelay)
},
string() {
setTimeout(() => {
this.refresh()
}, this.refreshDelay)
},
object() {
setTimeout(() => {
this.refresh()
}, this.refreshDelay)
}
}
}
</script>
<style>
</style>3.使用封装组件
使用这两个组件的页面组件home.vue 代码如下:
<template>
<p>
<scroll :data="su" class="scroll">
<p>
<p class="slider-wrapper">
<slider>
<p v-for='item in slider'>
<a href="">
<img :src="item.url" alt="">
</a>
</p>
</slider>
</p>
<ul v-for='item in su'>
<li>{{item}}</li>
</ul>
</p>
</scroll>
</p>
</template>
<script>
import Slider from '../base/slider'
import Scroll from '../base/scroll'
export default {
data () {
return {
slider: [
{url: 'http://upload-images.jianshu.io/upload_images/7932253-54c81df0beed405b.jpg?imageMogr2/auto-orient/strip%7CimageView2/2/w/1080/q/50'},
{url: 'https://y.gtimg.cn/music/photo_new/T003R720x288M000004ERTpn1UBu2f.jpg?max_age=2592000&max_age=2592000'},
{url: 'https://y.gtimg.cn/music/photo_new/T003R720x288M00000077s7P0HaZpc.jpg?max_age=2592000&max_age=2592000'},
{url: 'https://y.gtimg.cn/music/photo_new/T003R720x288M000001QL1Si05yMPq.jpg?max_age=2592000&max_age=2592000'},
{url: 'https://y.gtimg.cn/music/photo_new/T003R720x288M000002ke7OC3ooZ5g.jpg?max_age=2592000&max_age=2592000'},
],
su:[1,2,3,4,5,6,7,8,9,10,1,2,3,4,2,3,5,8,7,4,]
}
},
methods: {
},
components: {
Slider,
Scroll
}
}
</script>
<style>
.slider-wrapper{
width: 100%;
position: relative;
overflow: hidden;
}
.scroll{
height: 500px;
}
</style>注意点:
slider组件的父元素必须给他一个100%的宽度且定义overflow:hidden,否则整个页面会被撑开,整个页面都能横向滚动
scroll组件在引用时必须给他一个固定高度。只有拥有固定高度才会发生滚动。
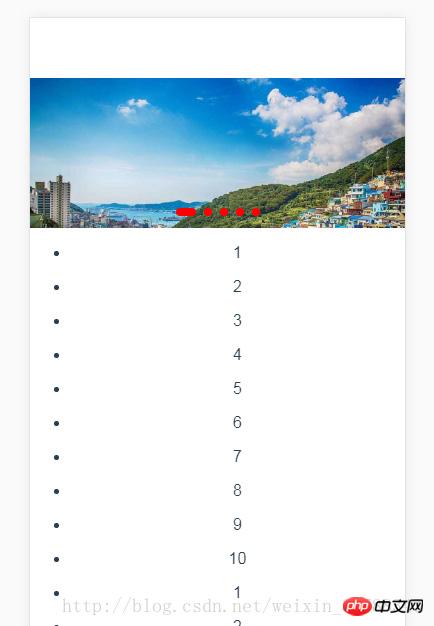
效果图如下:
相关推荐:
关于JQuery和html+css实现带小圆点和左右按钮的轮播图分享
The above is the detailed content of vue uses better-scroll to implement carousel images and page scrolling. For more information, please follow other related articles on the PHP Chinese website!


![[Web front-end] Node.js quick start](https://img.php.cn/upload/course/000/000/067/662b5d34ba7c0227.png)


