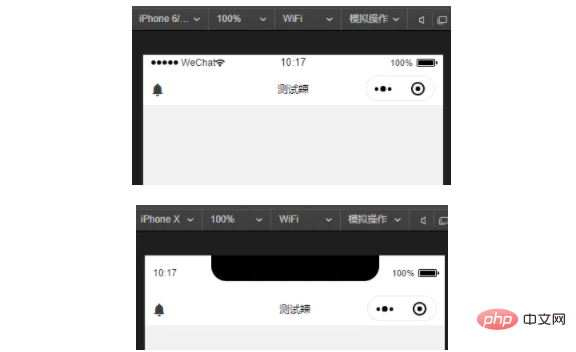
Uniapp はナビゲーション バーをカスタマイズするメソッドを実装します。ビューを使用するコードは [
, ]。

推奨 (無料): uni-app 開発チュートリアル
uniapp はカスタム ナビゲーション バーを実装します 方法:
単一ページのデフォルトのナビゲーション バーを閉じます"navigationStyle": "custom"


実装原則
ビューを使用し、padding-top=top;height=height;padding-bottom=ビューを与えます。 rpxの値 実装されたコード<template>
<view>
<view :style="'height:' + demo.height + 'px;' + 'padding-top:' + demo.top + 'px;padding-bottom:10rpx'">
<view :style="'top:' + demo.top + 'px'">
<view class="iconfont icon-xiaoxi"></view>
</view>
测试辣
</view>
</view>
</template>
<script>
export default {
data () {
return {
demo: {
top: 0,
height: 0
}
}
},
created () {
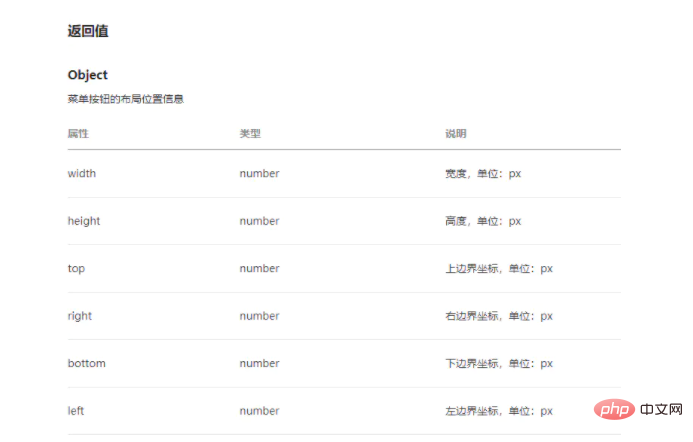
const demo = uni.getMenuButtonBoundingClientRect()
this.demo.top = demo.top
this.demo.height = demo.height
}
}
</script>
<style>
.demo{
position: relative;
display: flex;
align-items: center;
justify-content: center;
background: #fff;
font-size: 26rpx;
.left{
float: left;
position: absolute;
width: max-content;
height: max-content;
top: 0;
bottom: 0;
left: 20rpx;
margin: auto;
.iconfont{
color: #3C3C3C;
}
}
}
</style>
phpプログラミング# # #(ビデオ)#########
以上がuniapp にカスタム ナビゲーション バーを実装する方法の詳細内容です。詳細については、PHP 中国語 Web サイトの他の関連記事を参照してください。