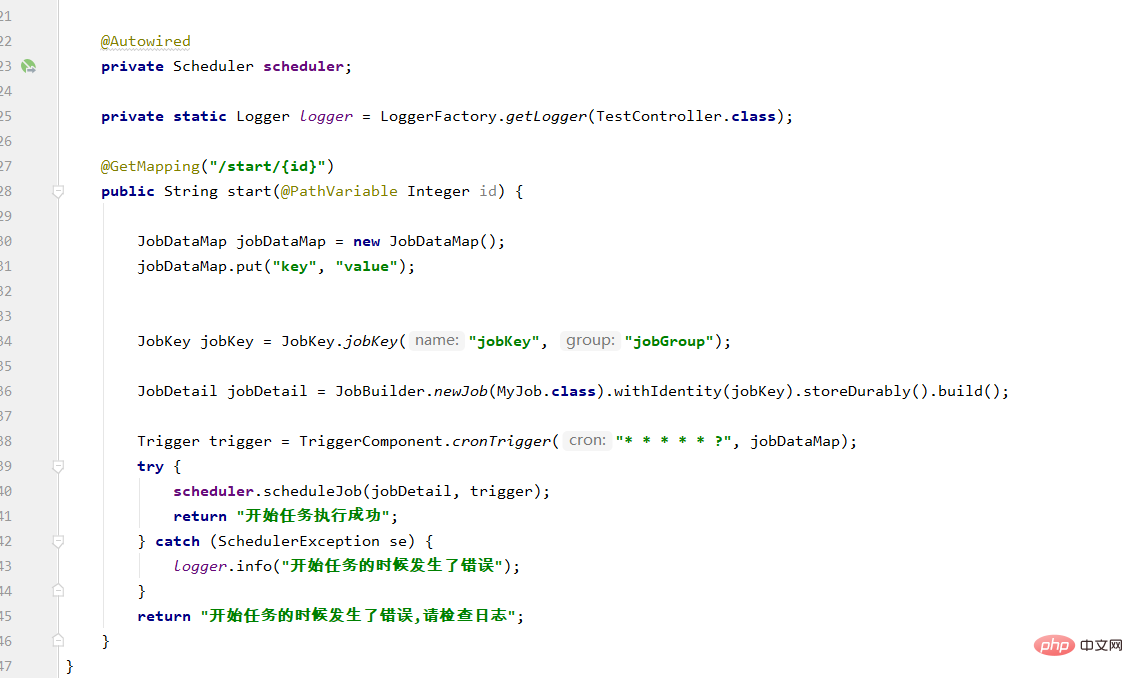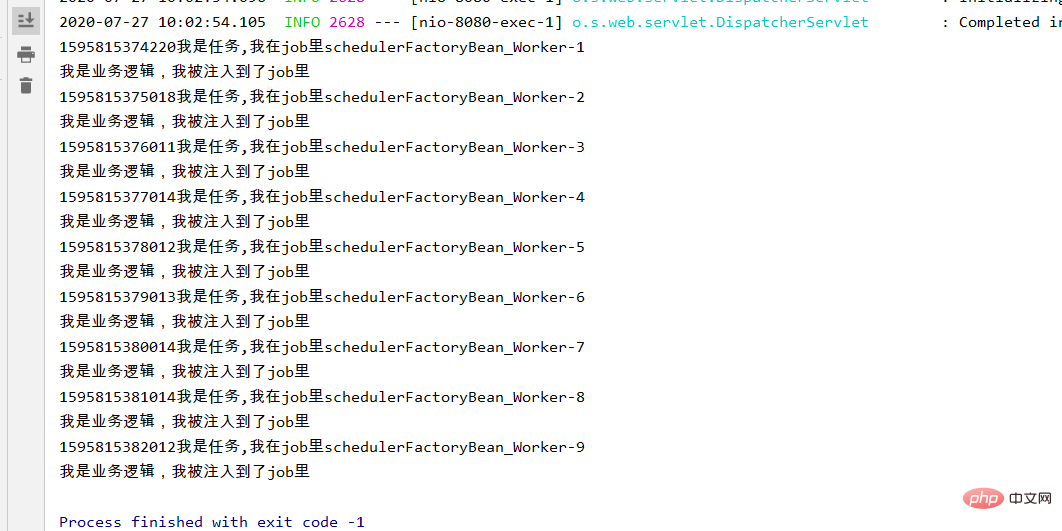
この記事では、スケジュールされたタスクを永続的に実装する Springboot Quartz を紹介します。詳細は次のとおりです。最終的な答え: スケジュールされたタスクを実行するために Quartz を使用するのはこれが初めてです。不備があったことをお詫びします。
まず第一に、Springboot プロジェクトでスケジュールされたタスクを実行するのは比較的簡単です。これを実装する最も簡単な方法は、 **@Scheduled アノテーション。次に、アプリケーション起動クラスで @EnableScheduling** を使用して、スケジュールされたタスクを有効にします。
例
@SpringBootApplication
@EnableScheduling
public class Application {

 public static void main(String[] args) {
 SpringApplication.run(Application.class, args);
 }
 // cron为每秒执行一次
 @Scheduled(cron = "* * * * * ?")
 public void print(){
 System.out.println("执行定时任务");
 }

}結果
スケジュールされたタスクの実行
スケジュールされたタスクの実行
スケジュールされたタスクの実行
スケジュールされたタスクの実行task Task
スケジュールされたタスクの実行
スケジュールされたタスクの実行
スケジュールされたタスクの実行
スケジュールされたタスクの実行
単純なスケジュールされたタスクは、cron 式の方法で実行できます。結果は次のようになります。タスクの実行間隔。
ただし、
実際の開発では、多くのタスクがあり、追加などの個別/すべてのタスクを手動で操作する必要があります。開く、停止、続行、その他の操作。すると「Qianniu Class B…」のBGMとともにクォーツが登場。
quartz
統合
 <dependency>
 <groupId>org.springframework.boot</groupId>
 <artifactId>spring-boot-starter-quartz</artifactId>
 </dependency>
クォーツの 3 つの要素
は、ジョブ (タスク) のトリガー条件、トリガー時間、トリガー間隔、終了時間などを定義するために使用されます。
##タスクジョブ
実行する特定のタスクの内容使用
Quartz を使用するには、構成ファイルが必要です。デフォルトの構成ファイルquartz.propertiesは、quartz jarパッケージのorg.quartzパッケージの下にあります。quartz.properties# Default Properties file for use by StdSchedulerFactory # to create a Quartz Scheduler Instance, if a different # properties file is not explicitly specified. # # 名字 org.quartz.scheduler.instanceName: DefaultQuartzScheduler org.quartz.scheduler.rmi.export: false org.quartz.scheduler.rmi.proxy: false org.quartz.scheduler.wrapJobExecutionInUserTransaction: false # 实例化ThreadPool时,使用的线程类为SimpleThreadPool org.quartz.threadPool.class: org.quartz.simpl.SimpleThreadPool # 线程总个数 org.quartz.threadPool.threadCount: 10 # 线程的优先级 org.quartz.threadPool.threadPriority: 5 org.quartz.threadPool.threadsInheritContextClassLoaderOfInitializingThread: true org.quartz.jobStore.misfireThreshold: 60000 # 持久化方式,默认持久化在内存中,后面我们使用db的方式 org.quartz.jobStore.class: org.quartz.simpl.RAMJobStore
# 实例化ThreadPool时,使用的线程类为SimpleThreadPool
org.quartz.threadPool.class=org.quartz.simpl.SimpleThreadPool
# threadCount和threadPriority将以setter的形式注入ThreadPool实例
# 并发个数
org.quartz.threadPool.threadCount=10
# 优先级
org.quartz.threadPool.threadPriority=5
org.quartz.threadPool.threadsInheritContextClassLoaderOfInitializingThread=true
org.quartz.jobStore.misfireThreshold=5000
#持久化使用的类
org.quartz.jobStore.class=org.quartz.impl.jdbcjobstore.JobStoreTX
#数据库中表的前缀
org.quartz.jobStore.tablePrefix=QRTZ_
#数据源命名
org.quartz.jobStore.dataSource=qzDS
#qzDS 数据源,我们使用hikaricp,默认的是c3p0
org.quartz.dataSource.qzDS.provider=hikaricp
org.quartz.dataSource.qzDS.driver=com.mysql.cj.jdbc.Driver
org.quartz.dataSource.qzDS.URL=jdbc:mysql://localhost:3306/quartz?useUnicode=true&characterEncoding=UTF-8&serverTimezone=GMT%2B8
org.quartz.dataSource.qzDS.user=root
org.quartz.dataSource.qzDS.password=123456
org.quartz.dataSource.qzDS.maxConnections=10
public interface PoolingConnectionProvider extends ConnectionProvider {

 /** The pooling provider. */
 String POOLING_PROVIDER = "provider";

 /** The c3p0 pooling provider. */
 String POOLING_PROVIDER_C3P0 = "c3p0";

 /** The Hikari pooling provider. */
 String POOLING_PROVIDER_HIKARICP = "hikaricp";

}if(poolingProvider != null && poolingProvider.equals(PoolingConnectionProvider.POOLING_PROVIDER_HIKARICP)) {
cpClass = "org.quartz.utils.HikariCpPoolingConnectionProvider";
}
else {
cpClass = "org.quartz.utils.C3p0PoolingConnectionProvider";
}spring: datasource: driver-class-name: com.mysql.cj.jdbc.Driver password: 123456 url: jdbc:mysql://localhost:3306/quartz?characterEncoding=UTF8&useSSL=false&serverTimezone=GMT%2B8 username: root quartz: jdbc: initialize-schema: always job-store-type: jdbc
/**
 * @author: taoym
 * @date: 2020/6/4 11:32
 * @desc: 一定要自定义JobFactory重写SpringBeanJobFactory的createJobInstance方法,否则在job中是获取不到spring容器中的bean的
 */
@Component
public class JobFactory extends SpringBeanJobFactory {

 @Autowired
 private AutowireCapableBeanFactory beanFactory;

 /**
 * 这里覆盖了super的createJobInstance方法,对其创建出来的类再进行autowire
 */
 @Override
 protected Object createJobInstance(TriggerFiredBundle bundle) throws Exception {
 Object jobInstance = super.createJobInstance(bundle);
 beanFactory.autowireBean(jobInstance);
 return jobInstance;
 }
}@Configuration
public class QuartzConfig {
@Autowired
private JobFactory jobFactory;
/**
* 读取quartz.properties 文件
* 将值初始化
*
* @return
*/
@Bean
public Properties quartzProperties() throws IOException {
PropertiesFactoryBean propertiesFactoryBean = new PropertiesFactoryBean();
propertiesFactoryBean.setLocation(new ClassPathResource("/quartz.properties"));
propertiesFactoryBean.afterPropertiesSet();
return propertiesFactoryBean.getObject();
}
@Bean
public SchedulerFactoryBean schedulerFactoryBean() throws IOException {
SchedulerFactoryBean schedulerFactoryBean = new SchedulerFactoryBean();
schedulerFactoryBean.setJobFactory(jobFactory);
schedulerFactoryBean.setQuartzProperties(quartzProperties());
return schedulerFactoryBean;
}
/**
* 初始化监听器
*
* @return
*/
@Bean
public QuartzInitializerListener executorListener() {
return new QuartzInitializerListener();
}
@Bean(name = "scheduler")
public Scheduler scheduler() throws IOException {
return schedulerFactoryBean().getScheduler();
}
}public class TriggerComponent {
/**
* @author: taoym
* @date: 2020/6/1 10:35
* @desc: 构建cron触发器
*/
public static Trigger cronTrigger(String cron) {
CronTrigger cronTrigger = TriggerBuilder.newTrigger()
.withSchedule(CronScheduleBuilder.cronSchedule(cron).withMisfireHandlingInstructionDoNothing())
.build();
return cronTrigger;
}
public static Trigger cronTrigger(String cron, JobDataMap jobDataMap) {
CronTrigger cronTrigger = TriggerBuilder.newTrigger()
.withSchedule(CronScheduleBuilder.cronSchedule(cron).withMisfireHandlingInstructionDoNothing())
.usingJobData(jobDataMap)
.build();
return cronTrigger;
}
}@DisallowConcurrentExecution
public class TestJob extends QuartzJobBean {
@Override
protected void executeInternal(JobExecutionContext jobExecutionContext) throws JobExecutionException {
}
}CREATE TABLE `quartz_job` ( `id` int(11) NOT NULL AUTO_INCREMENT COMMENT '编号', `job_name` varchar(50) DEFAULT '' COMMENT '任务名', `job_group` varchar(50) DEFAULT '' COMMENT '任务组名称', `job_desc` varchar(255) DEFAULT '' COMMENT 'job描述', `cron` varchar(50) DEFAULT '' COMMENT 'cron表达式', `status` tinyint(1) DEFAULT '0' COMMENT '状态', `url` varchar(255) DEFAULT '' COMMENT '请求地址', `param` varchar(255) DEFAULT '' COMMENT '参数', PRIMARY KEY (`id`) ) ENGINE=InnoDB AUTO_INCREMENT=31 DEFAULT CHARSET=utf8;
@Resource
 private QuartzJobMapper quartzJobMapper;
 @Autowired
 private Scheduler scheduler;


 @Override
 public String start(Integer id) {

		JobDataMap jobDataMap = new JobDataMap();
 jobDataMap.put(k,v);

 QuartzJob quartzJob = quartzJobMapper.selectByPrimaryKey(id);

 JobKey jobKey = JobKey.jobKey(quartzJob.getJobName(), quartzJob.getJobGroup());

 jobDetail = JobBuilder.newJob(TestJob.class).withIdentity(jobKey).storeDurably().build();

 Trigger trigger = TriggerComponent.cronTrigger(quartzJob.getCron(), jobDataMap);
 try {
 scheduler.scheduleJob(jobDetail, trigger);
 quartzJobMapper.updateStatus(true, id);
 return "开始任务执行成功";
 } catch (SchedulerException se) {
 log.info("开始任务的时候发生了错误");
 }
 return "开始任务的时候发生了错误,请检查日志";
 }

#


推奨チュートリアル: 「PHP」
以上がspringboot+quartz はスケジュールされたタスクを永続的な方法で実装しますの詳細内容です。詳細については、PHP 中国語 Web サイトの他の関連記事を参照してください。