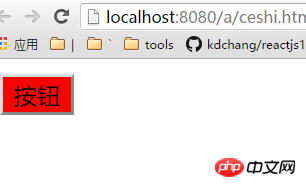
今回はangularのscopel命令の使い方について詳しく解説します。angularのscopel命令を使う際の注意点は何ですか?実際の事例を見てみましょう。
カスタムコマンドを作成してみましょう
<!DOCTYPE html><html lang="en"><head>
<meta charset="UTF-8">
<title>Document</title>
<style>
.primary{ background: red;
} </style></head><body ng-app="myApp">
<div ng-controller="mainCtrl">
<my-btn></my-btn>
</div>
<script src="node_modules/angular/angular.min.js"></script>
<script>
var myApp = angular.module('myApp',[]);
myApp.controller('mainCtrl',['$scope',function($scope){
$scope.myClass = 'primary';
}]);
myApp.directive('myBtn',function(){ return {
template:'<input type="button" value="按钮" class="{{myClass}}">'
}
}); </script></body></html>
上記のようなカスタムコマンドを使うのはとても良いのですが、各コマンドで描画されるボタンをカスタマイズしたい場合は次のようにすることはできないようですこのカスタム コマンドを大量に作成します。見た目はまったく同じです:
<!DOCTYPE html><html lang="en"><head>
<meta charset="UTF-8">
<title>Document</title>
<style>
.primary{ background: red;
} </style></head><body ng-app="myApp">
<div ng-controller="mainCtrl">
<my-btn></my-btn>
<my-btn></my-btn>
<my-btn></my-btn>
<my-btn></my-btn>
</div>
<script src="node_modules/angular/angular.min.js"></script>
<script>
var myApp = angular.module('myApp',[]);
myApp.controller('mainCtrl',['$scope',function($scope){
$scope.myClass = 'primary';
}]);
myApp.directive('myBtn',function(){ return {
template:'<input type="button" value="按钮" class="{{myClass}}">'
}
}); </script></body></html>
1 つのアイデアは、これらのカスタム コマンド ボタンを異なるコントローラーに配置し、コントローラーで $scope を使用することです。コンテキストは異なる値を渡します:
<!DOCTYPE html><html><head>
<meta charset="UTF-8">
<title>Document</title>
<style>
.primary{ background: red;
} .success{ background: green;
} .default{ background: gray;
} </style></head><body ng-app="myApp">
<div ng-controller="aCtrl">
<my-btn></my-btn>
</div>
<div ng-controller="bCtrl">
<my-btn></my-btn>
</div>
<div ng-controller="cCtrl">
<my-btn></my-btn>
</div>
<script src="node_modules/angular/angular.min.js"></script>
<script>
var myApp = angular.module('myApp',[]);
myApp.controller('aCtrl',['$scope',function($scope){
$scope.myClass = 'primary';
}]);
myApp.controller('bCtrl',['$scope',function($scope){
$scope.myClass = 'success';
}]);
myApp.controller('cCtrl',['$scope',function($scope){
$scope.myClass = 'default';
}]);
myApp.directive('myBtn',function(){ return {
template:'<input type="button" value="按钮" class="{{myClass}}">'
}
}); </script></body></html>これを書くのは面倒なので、Angularではカスタム命令にscopeという設定項目を用意しているので、以下のように書くことができます:
<!DOCTYPE html><html lang="en"><head>
<meta charset="UTF-8">
<title>Document</title>
<style>
.primary{ background: red;
} .success{ background: green;
} .default{ background: gray;
} </style></head><body ng-app="myApp">
<div ng-controller="Controller">
<my-btn b="className1"></my-btn>
<my-btn b="className2"></my-btn>
<my-btn b="className3"></my-btn>
</div>
<script src="node_modules/angular/angular.min.js"></script>
<script>
var myApp = angular.module('myApp',[]);
myApp
.controller('Controller', ['$scope', function($scope) {
$scope.className1 = 'primary';
$scope.className2 = 'success';
$scope.className3 = 'default';
}])
.directive('myBtn',function(){ return {
scope:{
a:'=b'
},
template:'<input type="button" value="按钮" class="{{a}}">'
}
}); </script></body></html>上記を理解するには、2つの点に注意するだけです。 :
ここでの独立スコープの a は、テンプレート内のモデル a を表します
=b は、Angular がビュー内の現在の命令を見つけるために必要な属性 b を表します
b の値は、外部スコープ
命令スコープ内でバインドしたいモデルの名前が、外部で使用するときの属性名と同じ場合は、省略して次のように記述できます:
<!DOCTYPE html><html lang="en"><head>
<meta charset="UTF-8">
<title>Document</title>
<style>
.primary{ background: red;
} .success{ background: green;
} .default{ background: gray;
} </style></head><body ng-app="myApp">
<div ng-controller="Controller">
<my-btn a="className1"></my-btn>
<my-btn a="className2"></my-btn>
<my-btn a="className3"></my-btn>
</div>
<script src="node_modules/angular/angular.min.js"></script>
<script>
var myApp = angular.module('myApp',[]);
myApp
.controller('Controller', ['$scope', function($scope) {
$scope.className1 = 'primary';
$scope.className2 = 'success';
$scope.className3 = 'default';
}])
.directive('myBtn',function(){ return {
scope:{
a:'='
},
template:'<input type="button" value="按钮" class="{{a}}">'
}
}); </script></body></html>もちろん、上記 = 数値双方向のデータ バインディングです:
<!DOCTYPE html><html lang="en"><head>
<meta charset="UTF-8">
<title>Document</title>
<style>
.primary{ background: red;
} .success{ background: green;
} .default{ background: gray;
} </style></head><body ng-app="myApp">
<div ng-controller="Controller">
<my-btn a="abc"></my-btn>
</div>
<script src="node_modules/angular/angular.min.js"></script>
<script>
var myApp = angular.module('myApp',[]);
myApp
.controller('Controller', ['$scope', function($scope) {
$scope.abc = '我是初始内容';
}])
.directive('myBtn',function(){ return {
scope:{
a:'='
},
template:'<input type="text" ng-model="a"><span>{{a}}</span>'
}
}); </script></body></html>一方向のデータ通信のみが必要な場合は、@ 記号を使用できます:
<!DOCTYPE html><html lang="en"><head>
<meta charset="UTF-8">
<title>Document</title>
<style>
.primary{ background: red;
} .success{ background: red;
} .default{ background: red;
} </style></head><body ng-app="myApp">
<div ng-controller="Controller">
<my-btn a="primary"></my-btn>
</div>
<script src="node_modules/angular/angular.min.js"></script>
<script>
var myApp = angular.module('myApp',[]);
myApp
.controller('Controller', ['$scope', function($scope) {
$scope.mm = 'primary';
}])
.directive('myBtn',function(){ return {
scope:{
a:'@'
},
template:'<input type="button" value="按钮" class="{{a}}">'
}
}); </script></body></html>ng クラスを使用したい場合は、それも可能です:
<!DOCTYPE html><html lang="en"><head>
<meta charset="UTF-8">
<title>Document</title>
<style>
.primary{ background: red;
} .success{ background: red;
} .default{ background: red;
} </style></head><body ng-app="myApp">
<div ng-controller="Controller">
<my-btn a="primary"></my-btn>
</div>
<script src="node_modules/angular/angular.min.js"></script>
<script>
var myApp = angular.module('myApp',[]);
myApp
.controller('Controller', ['$scope', function($scope) {
$scope.mm = true;
}])
.directive('myBtn',function(){ return {
scope:{
a:'@'
},
template:'<input type="button" value="按钮" ng-class="{primary:a}">'
}
}); </script></body></html>最後に、は設定可能なスコープです 外部スコープを参照する方法
<!DOCTYPE html><html lang="en"><head>
<meta charset="UTF-8">
<title>Document</title>
<style>
.primary{ background: red;
} .success{ background: red;
} .default{ background: red;
} </style></head><body ng-app="myApp">
<div ng-controller="Controller">
<my-btn fn2="fn()"></my-btn>
</div>
<script src="node_modules/angular/angular.min.js"></script>
<script>
var myApp = angular.module('myApp',[]);
myApp
.controller('Controller', ['$scope', function($scope) {
$scope.fn = function(){
alert(11);
}
}])
.directive('myBtn',function(){ return {
scope:{
fn1:'&fn2'
},
template:'<input type="button" value="按钮" ng-click="fn1()">'
}
}); </script></body></html>この記事の事例を読んで方法をマスターしたと思います。さらに興味深い情報については、PHP 中国語 Web サイトの他の関連記事に注目してください。
推奨読書:
以上がAngular のscopel ディレクティブの使用方法の詳細な説明の詳細内容です。詳細については、PHP 中国語 Web サイトの他の関連記事を参照してください。