
Android システムに付属のボタン ボタンに加えて、アイコン付きのボタン ImageButton も提供されます
アイコン付きのボタンを作成するには、まずレイアウト ファイルで ImageButton を定義し、次にアイコンを次のように設定します。 setImageDrawable メソッドを通じて表示されます。
注:
android:src="@drawable/icon1" のように、レイアウト ファイルにボタンのアイコンを直接設定できます
プログラムでカスタム アイコンを設定することもできます
imgbtn3.setImageDrawable (getResources ().getDrawable(R.drawable.icon2));
システム独自のアイコンを使用することもできます
imgbtn4.setImageDrawable(getResources().getDrawable(android.R.drawable.sym_call_incoming));
button アイコンの後に、イベントをキャプチャして処理するためのボタンのリスナー setOnClickListener を設定する必要があります。次の例では、4 つのアイコン ボタンで構成されるレイアウトを説明し、4 番目のボタンのアイコンをカスタマイズします。ボタン 1 をクリックすると、ダイアログが表示され、[OK] をクリックすると、ボタン 2 のアイコンがボタン 3 のアイコンに変更されます。 , ボタン 3 のアイコンが に変わります。 ボタン 4 をクリックしてプロンプトダイアログを表示します
ImageButtonTest.java ソースコード
package org.loulijun.imagebutton;

import android.app.Activity;
import android.app.AlertDialog;
import android.app.Dialog;
import android.content.DialogInterface;
import android.os.Bundle;
import android.view.View;
import android.widget.Button;
import android.widget.ImageButton;
import android.widget.TextView;

public class ImageButtonTest extends Activity {
    /** Called when the activity is first created. */
        TextView textview;
        ImageButton imgbtn1;
        ImageButton imgbtn2;
        ImageButton imgbtn3;
        ImageButton imgbtn4;
    @Override
    public void onCreate(Bundle savedInstanceState) {
        super.onCreate(savedInstanceState);
        setContentView(R.layout.main);

        textview=(TextView)findViewById(R.id.textview);
        //分别取得4个ImageButton对象
        imgbtn1=(ImageButton)findViewById(R.id.imagebutton1);
        imgbtn2=(ImageButton)findViewById(R.id.imagebutton2);
        imgbtn3=(ImageButton)findViewById(R.id.imagebutton3);
        imgbtn4=(ImageButton)findViewById(R.id.imagebutton4);

        //分别为ImageButton设置图标
        //imgbtn1已经在main.xml布局中设置了图标,所以就不在这里设置了(设置图标即可在程序中设置,也可在布局文件中设置)
        imgbtn2.setImageDrawable(getResources().getDrawable(R.drawable.icon));//在程序中设置图标
        imgbtn3.setImageDrawable(getResources().getDrawable(R.drawable.icon2));
        imgbtn4.setImageDrawable(getResources().getDrawable(android.R.drawable.sym_call_incoming));//设置系统图标

        //下面为各个按钮设置事件监听
        imgbtn1.setOnClickListener(new Button.OnClickListener()
        {
                        @Override
                        public void onClick(View v) {
                                // TODO Auto-generated method stub
                                Dialog dialog=new AlertDialog.Builder(ImageButtonTest.this)
                                .setTitle("提示")
                                .setMessage("我是ImageButton1")
                                .setPositiveButton("确定",new DialogInterface.OnClickListener() {

                                        @Override
                                        public void onClick(DialogInterface dialog, int which) {
                                                // TODO Auto-generated method stub
                                                //相应的处理操作
                                        }
                                }).create();
                                dialog.show();
                        }

        });

        imgbtn2.setOnClickListener(new Button.OnClickListener()
        {
                        @Override
                        public void onClick(View v) {
                                // TODO Auto-generated method stub
                                Dialog dialog=new AlertDialog.Builder(ImageButtonTest.this)
                                .setTitle("提示")
                                .setMessage("我是ImageButton2,我要使用ImageButton3的图标")
                                .setPositiveButton("确定",new DialogInterface.OnClickListener() {

                                        @Override
                                        public void onClick(DialogInterface dialog, int which) {
                                                // TODO Auto-generated method stub
                                                imgbtn2.setImageDrawable(getResources().getDrawable(R.drawable.icon2));
                                        }
                                }).create();
                                dialog.show();
                        }

        });

        imgbtn3.setOnClickListener(new Button.OnClickListener()
        {
                        @Override
                        public void onClick(View v) {
                                // TODO Auto-generated method stub
                                Dialog dialog=new AlertDialog.Builder(ImageButtonTest.this)
                                .setTitle("提示")
                                .setMessage("我是ImageButton3,我想使用系统打电话的图标")
                                .setPositiveButton("确定",new DialogInterface.OnClickListener() {

                                        @Override
                                        public void onClick(DialogInterface dialog, int which) {
                                                // TODO Auto-generated method stub
                                                imgbtn3.setImageDrawable(getResources().getDrawable(android.R.drawable.sym_action_call));
                                        }
                                }).create();
                                dialog.show();
                        }

        });

        imgbtn4.setOnClickListener(new Button.OnClickListener()
        {
                        @Override
                        public void onClick(View v) {
                                // TODO Auto-generated method stub
                                Dialog dialog=new AlertDialog.Builder(ImageButtonTest.this)
                                .setTitle("提示")
                                .setMessage("我是使用的系统图标")
                                .setPositiveButton("确定",new DialogInterface.OnClickListener() {

                                        @Override
                                        public void onClick(DialogInterface dialog, int which) {
                                                // TODO Auto-generated method stub
                                                //相应的处理操作
                                        }
                                }).create();
                                dialog.show();
                        }

        });
    }
}<?xml version="1.0" encoding="utf-8"?>
<LinearLayout xmlns:android="http://schemas.android.com/apk/res/android"
android:orientation="vertical"
android:layout_width="fill_parent"
android:layout_height="fill_parent"
>
<TextView
android:id="@+id/textview"
android:layout_width="fill_parent"
android:layout_height="wrap_content"
android:text="ImageButton测试案例"
/>
<ImageButton
android:id="@+id/imagebutton1"
android:layout_width="wrap_content"
android:layout_height="wrap_content"
android:src="@drawable/icon1"
/>
<ImageButton
android:id="@+id/imagebutton2"
android:layout_width="wrap_content"
android:layout_height="wrap_content"
/>
<ImageButton
android:id="@+id/imagebutton3"
android:layout_width="wrap_content"
android:layout_height="wrap_content"
/>
<ImageButton
android:id="@+id/imagebutton4"
android:layout_width="wrap_content"
android:layout_height="wrap_content"
/>
</LinearLayout> 実行時の効果は次のとおりです:
最初のボタンをクリックした後、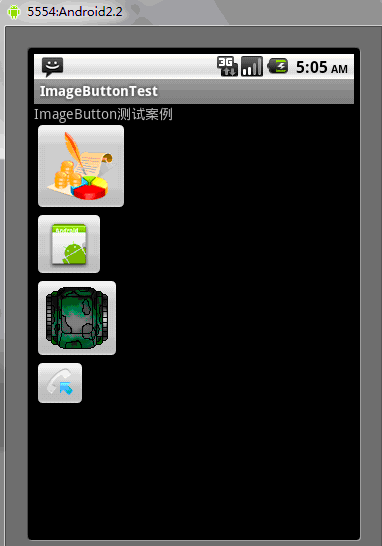
OKをクリックした後、2番目のボタンをクリックします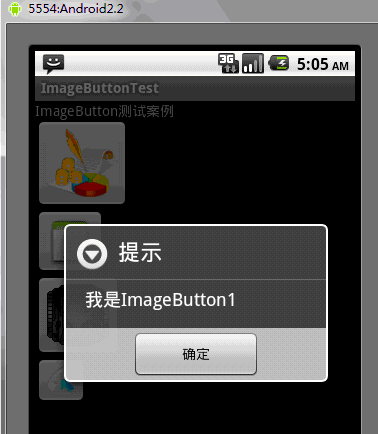
この時点で、ボタン2のアイコンプログラミングが同じであることがわかります。ボタン 3 のアイコンとして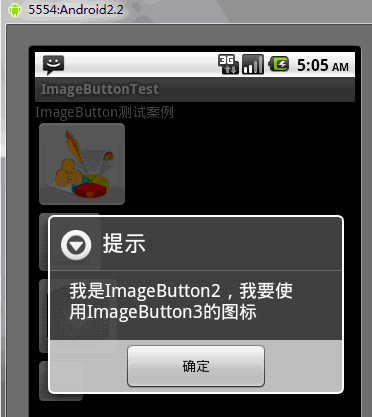
ボタン 3 をクリックします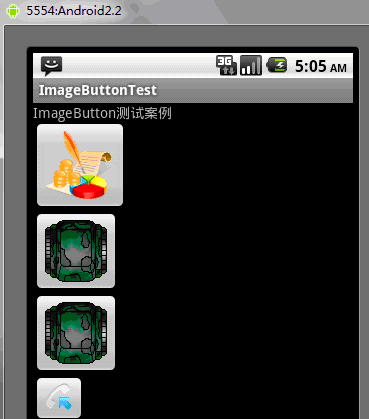
OK をクリックした後、ボタン 3 のアイコンがシステム電話のアイコンに変わっていることがわかります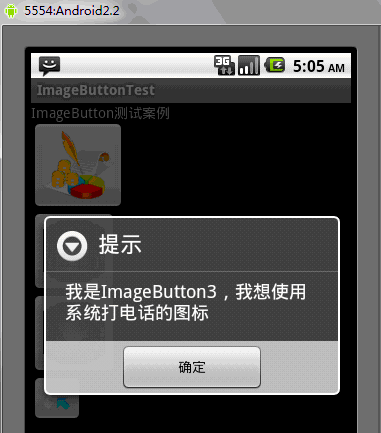
ボタン 4 をクリックします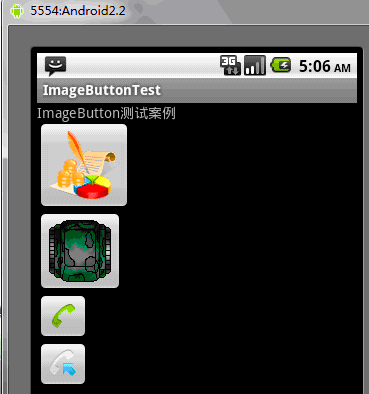
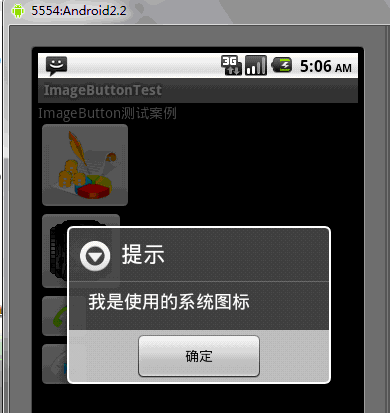
上記は Android UI コントロール シリーズ: ImageButton (アイコン付き) ボタン) です。その他の関連コンテンツについては、PHP 中国語 Web サイト (m.sbmmt.com) にご注意ください。