

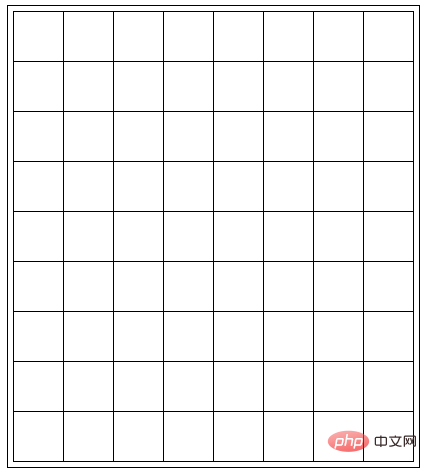
Récemment, un groupe d'amis m'a demandé que pour l'une de leurs missions, ils essayaient d'utiliser le moins de balises possible pour réaliser une telle disposition d'échecs :
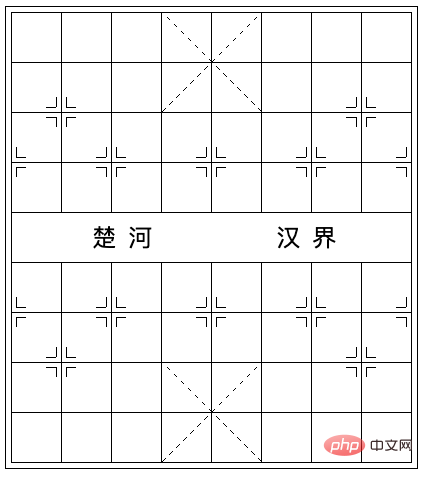
Il a utilisé plus de 60 balises, tandis que ses camarades de classe seulement, j'ai utilisé 6 et m'a demandé s'il existe un moyen d'utiliser le moins de balises possible pour obtenir cet effet de mise en page.
En fait, pour la mise en page d'une page, moins de balises n'est pas forcément une bonne chose Tout en considérant la consommation du DOM, il faut également faire attention à la lisibilité du code et à l'interaction ultérieure basée sur cette mise en page. . Difficulté, etc.
Bien sûr, du simple fait de compléter cette mise en page avec moins de balises, jusqu'à combien de balises pouvons-nous compresser ? (Sans tenir compte de <body> et <html>) <body> 和 <html>)
答案是 1 个。
本文就尝试使用一个标签完成这个效果,当然,这仅仅是探索 CSS 的极限,不代表我推荐在实际业务中这样去写。【推荐学习:css视频教程】
我们对整个布局进行一下拆分,大致可以分为三部分:网格 + 虚线交叉十字 + 特殊符号:
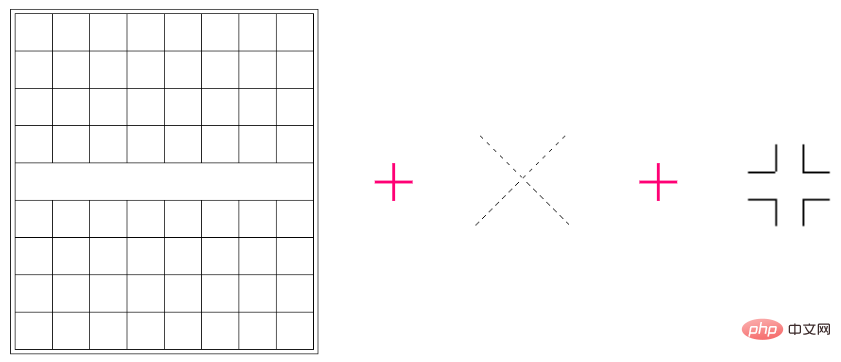
并且,像虚线交叉十字和特殊的符号都不止一个,这里必然会有一些技巧存在。
OK,首先,我们实现最简单的网格布局:
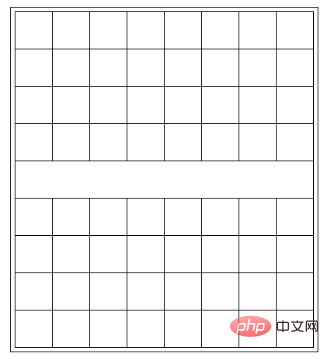
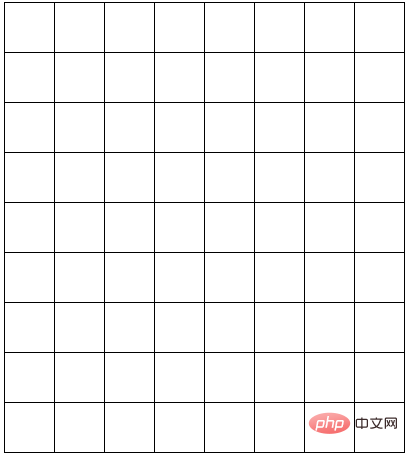
不考虑最外层的一圈边框,我们可以首先利用多重线性渐变实现一个网格布局:
<div class="g-grid"></div>
.g-grid {
    width: 401px;
    height: 451px;
    background:
        repeating-linear-gradient(#000, #000 1px, transparent 1px, transparent 50px),
        repeating-linear-gradient(90deg, #000, #000 1px, transparent 1px, transparent 50px);
    background-repeat: no-repeat;
    background-size: 100% 100%, 100% 100%;
    background-position: 0 0, 0 0;
}效果如下:
在最外层加一层边框有非常多办法,这里我们简单使用 outline 配合 outline-offset 即可:
.g-grid {
    width: 401px;
    height: 451px;
    background:
        repeating-linear-gradient(#000, #000 1px, transparent 1px, transparent 50px),
        repeating-linear-gradient(90deg, #000, #000 1px, transparent 1px, transparent 50px);
    background-repeat: no-repeat;
    background-size: 100% 100%, 100% 100%;
    background-position: 0 0, 0 0;
    outline: 1px solid #000;
    outline-offset: 5px;
}这样,一个架子就差不多了:
当然,棋盘中间的一行,是没有格子的。要将上述渐变代码处理一下,可以分成上下两块,利用 background-size 和 background-position
La réponse est 1
. Cet article tente d'utiliser une balise pour obtenir cet effet. Bien sûr, il s'agit simplement d'explorer les limites du CSS, et cela ne signifie pas que je recommande d'écrire ainsi dans les affaires réelles. [Apprentissage recommandé : tutoriel vidéo CSS]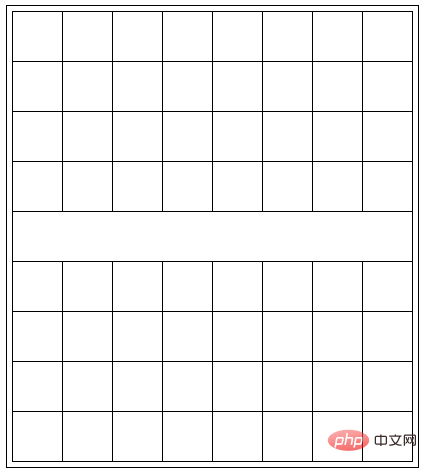 Démontons l'intégralité des points de mise en page, qui peut être grossièrement divisé en trois parties : grille + croix pointillée + symboles spéciaux :

Et il y a plus d'une croix en pointillés et de symboles spéciaux, donc il doit y avoir quelques astuces ici.
 OK, d'abord, nous implémentons la disposition de grille la plus simple :

Indépendamment du cercle de bordures le plus extérieur, nous pouvons d'abord utiliser
Dégradés linéaires multiplespour implémenter une disposition de grille :
.grid {
    // ...
    background:
        // 最上层叠加一层白色渐变
        linear-gradient(#fff, #fff),
        // 下面两个重复线性渐变实现网格
        repeating-linear-gradient(#000, #000 1px, transparent 1px, transparent 50px),
        repeating-linear-gradient(90deg, #000, #000 1px, transparent 1px, transparent 50px);
    background-repeat: no-repeat;
    background-size: calc(100% - 2px) 49px, 100% 100%, 100% 100%;
    background-position: 1px 201px, 0 0, 0 0;
}<div></div>
L'effet est le suivant : 
Il existe de nombreuses façons d'ajouter une bordure au calque le plus externe. Ici, nous utilisons simplement outline avec outline-offset : div {
position: relative;
margin: auto;
width: 100px;
height: 100px;
border: 1px solid #000;
background: linear-gradient(
45deg,
transparent 0, transparent calc(50% - 0.5px),
#000 calc(50% - 0.5px), #000 calc(50% + 0.5px),
transparent calc(50% + 0.5px), transparent 0);
}
 De Bien entendu, il n’y a pas de cases dans la rangée du milieu de l’échiquier. Pour traiter le code de dégradé ci-dessus, il peut être divisé en parties supérieure et inférieure et séparé par
 background-size et background-position.
Bien sûr, nous pouvons également empiler une autre couche de dégradé blanc pur directement sur la couche supérieure : 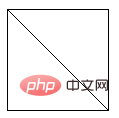
div {
    position: relative;
    margin: auto;
    width: 100px;
    height: 100px;
    border: 1px solid #000;
    background:
        // 渐变 1
        repeating-linear-gradient(-45deg, transparent 0, transparent 5px, #fff 5px, #fff 10px),
        // 渐变 2
        linear-gradient(45deg,
        transparent 0, transparent calc(50% - 0.5px),
        #000 calc(50% - 0.5px), #000 calc(50% + 0.5px),
        transparent calc(50% + 0.5px), transparent 0);
}.
Utiliser des dégradés Réaliser le croisement de lignes pointillées
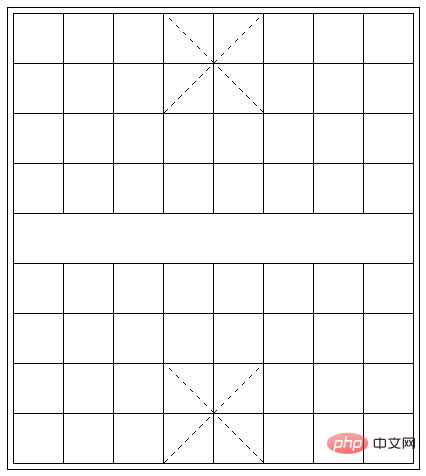
OK, continuons Sur la base de la base ci-dessus, nous devons obtenir deux croisements de lignes pointillées, comme ceci : 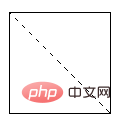
C'est en fait très difficile ici. Imaginez si on vous donnait un DIV pour en mettre en œuvre un, que feriez-vous ? Vous êtes frappé par la ligne pointillée unique en bordure ? Cela peut nécessiter que deux éléments soient définis avec une bordure en pointillés sur un seul côté, puis pivotés et croisés. (Peut être implémenté dans un DOM en utilisant deux pseudo-éléments de l'élément).
Bien sûr, dans ce cas, nos étiquettes ne suffiront pas. 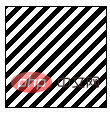
.g-grid {
    width: 401px;
    height: 451px;
    outline: 1px solid #000;
    outline-offset: 5px;
    background:
        // 最上层的白色块,挡住中间的网格
        linear-gradient(#fff, #fff),
        // 实现网格布局
        repeating-linear-gradient(#000, #000 1px, transparent 1px, transparent 50px),
        repeating-linear-gradient(90deg, #000, #000 1px, transparent 1px, transparent 50px),
        // 棋盘上方的虚线1
        repeating-linear-gradient(-45deg, transparent 0, transparent 5px, #fff 5px, #fff 10px),
        linear-gradient(45deg, transparent,
            transparent calc(50% - 0.5px),
            #000 calc(50% - 0.5px),
            #000 calc(50% + 0.5px),
            transparent calc(50% + 0.5px),
            transparent 0),
        // 棋盘上方的虚线2
        repeating-linear-gradient(45deg, transparent 0, transparent 5px, #fff 5px, #fff 10px),
        linear-gradient(-45deg, transparent,
            transparent calc(50% - 0.5px),
            #000 calc(50% - 0.5px),
            #000 calc(50% + 0.5px),
            transparent calc(50% + 0.5px),
            transparent 0),
        // 棋盘下方的虚线1
        repeating-linear-gradient(-45deg, transparent 0, transparent 5px, #fff 5px, #fff 10px),
        linear-gradient(45deg, transparent,
            transparent calc(50% - 0.5px),
            #000 calc(50% - 0.5px),
            #000 calc(50% + 0.5px),
            transparent calc(50% + 0.5px),
            transparent 0),
        // 棋盘下方的虚线2
        repeating-linear-gradient(45deg, transparent 0, transparent 5px, #fff 5px, #fff 10px),
        linear-gradient(-45deg, transparent,
            transparent calc(50% - 0.5px),
            #000 calc(50% - 0.5px),
            #000 calc(50% + 0.5px),
            transparent calc(50% + 0.5px),
            transparent 0);
    background-repeat: no-repeat;
    background-size:
        calc(100% - 2px) 49px, 100% 100%, 100% 100%,
        // 交叉虚线 1
        100px 100px, 100px 100px, 100px 100px, 100px 100px,
        // 交叉虚线 2
        100px 100px, 100px 100px, 100px 100px, 100px 100px;
    background-position:
        1px 201px, 0 0, 0 0,
        // 交叉虚线 1
        151px 0, 151px 0, 151px 0, 151px 0,
        // 交叉虚线 2
        151px 350px, 151px 350px, 151px 350px, 151px 350px;
}.g-grid {
// ...
&::before {
content: "";
position: absolute;
top: 95px;
left: 35px;
width: 10px;
height: 1px;
background: #000;
}
}.g-grid {
// ...
&::before {
content: "";
position: absolute;
top: 95px;
left: 35px;
width: 10px;
height: 1px;
background: #000;
box-shadow:
20px 0, 0 10px, 20px 10px,
300px 0, 320px 0, 300px 10px, 320px 10px,
-30px 50px, -30px 60px,
50px 50px, 50px 60px, 70px 50px, 70px 60px,
150px 50px, 150px 60px, 170px 50px, 170px 60px,
250px 50px, 250px 60px, 270px 50px, 270px 60px,
350px 50px, 350px 60px;
-webkit-box-reflect: below 259px;
}
}想象一下,上图的黑色部分,如果是透明的,就能透出原本的那条斜线没有被白色遮挡住的地方。
这里,需要提一下,在渐变中,越是先书写的渐变,层级越高。
好,有了上面的铺垫,我们基于上面的代码,再继续利用渐变,把上下两个交叉虚线十字补齐即可:
.g-grid {
width: 401px;
height: 451px;
outline: 1px solid #000;
outline-offset: 5px;
background:
// 最上层的白色块,挡住中间的网格
linear-gradient(#fff, #fff),
// 实现网格布局
repeating-linear-gradient(#000, #000 1px, transparent 1px, transparent 50px),
repeating-linear-gradient(90deg, #000, #000 1px, transparent 1px, transparent 50px),
// 棋盘上方的虚线1
repeating-linear-gradient(-45deg, transparent 0, transparent 5px, #fff 5px, #fff 10px),
linear-gradient(45deg, transparent,
transparent calc(50% - 0.5px),
#000 calc(50% - 0.5px),
#000 calc(50% + 0.5px),
transparent calc(50% + 0.5px),
transparent 0),
// 棋盘上方的虚线2
repeating-linear-gradient(45deg, transparent 0, transparent 5px, #fff 5px, #fff 10px),
linear-gradient(-45deg, transparent,
transparent calc(50% - 0.5px),
#000 calc(50% - 0.5px),
#000 calc(50% + 0.5px),
transparent calc(50% + 0.5px),
transparent 0),
// 棋盘下方的虚线1
repeating-linear-gradient(-45deg, transparent 0, transparent 5px, #fff 5px, #fff 10px),
linear-gradient(45deg, transparent,
transparent calc(50% - 0.5px),
#000 calc(50% - 0.5px),
#000 calc(50% + 0.5px),
transparent calc(50% + 0.5px),
transparent 0),
// 棋盘下方的虚线2
repeating-linear-gradient(45deg, transparent 0, transparent 5px, #fff 5px, #fff 10px),
linear-gradient(-45deg, transparent,
transparent calc(50% - 0.5px),
#000 calc(50% - 0.5px),
#000 calc(50% + 0.5px),
transparent calc(50% + 0.5px),
transparent 0);
background-repeat: no-repeat;
background-size:
calc(100% - 2px) 49px, 100% 100%, 100% 100%,
// 交叉虚线 1
100px 100px, 100px 100px, 100px 100px, 100px 100px,
// 交叉虚线 2
100px 100px, 100px 100px, 100px 100px, 100px 100px;
background-position:
1px 201px, 0 0, 0 0,
// 交叉虚线 1
151px 0, 151px 0, 151px 0, 151px 0,
// 交叉虚线 2
151px 350px, 151px 350px, 151px 350px, 151px 350px;
}嚯,这渐变代码确实复杂了点,但是其实每一块的作用都是很清晰的,这样,我们的棋盘就变成了这样:
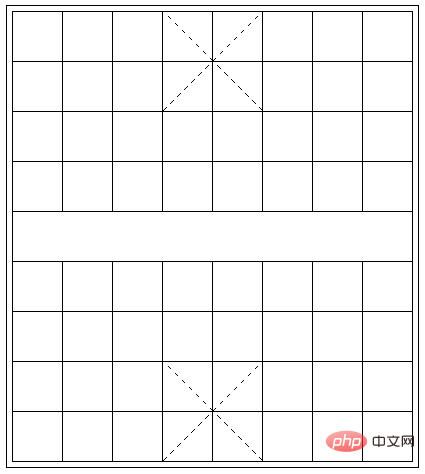
到这里,我们仅仅使用了元素本身,要知道,我们还有元素的两个伪元素没使用。要实现的只剩下多个的这个符合:

因为一共要实现 12 个这样的符号,有的符合还是不完整的,所有这些要在剩余的元素的两个伪元素中完成。可选的方法思来想去,也只有 box-shadow 了。
利用 box-shadow 能够非常好的复制自身。这个技巧其实也反复讲过非常多次了。
我们首先利用元素的一个伪元素,在这个位置,实现一个短横线:
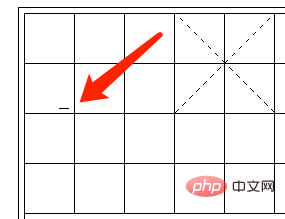
代码大致如下:
.g-grid {
    // ...
    &::before {
        content: "";
        position: absolute;
        top: 95px;
        left: 35px;
        width: 10px;
        height: 1px;
        background: #000;
    }
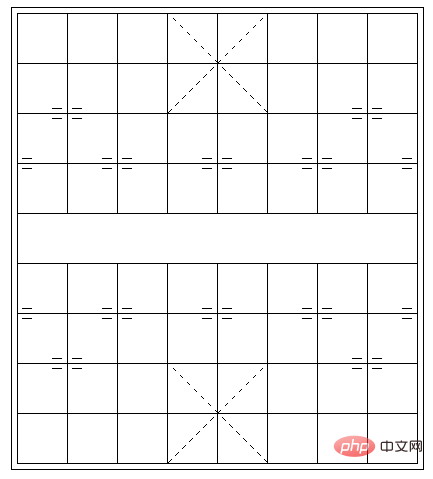
}我们利用 box-shadow 复制自身,可以完成一半横线效果。当然这里由于是个镜面布局,可以利用镜像 -webkit-box-reflect: below 减少一半的代码:
.g-grid {
    // ...
    &::before {
        content: "";
        position: absolute;
        top: 95px;
        left: 35px;
        width: 10px;
        height: 1px;
        background: #000;
        box-shadow:
            20px 0, 0 10px, 20px 10px,
            300px 0, 320px 0, 300px 10px, 320px 10px,
            -30px 50px, -30px 60px,
            50px 50px, 50px 60px, 70px 50px, 70px 60px,
            150px 50px, 150px 60px, 170px 50px, 170px 60px,
            250px 50px, 250px 60px, 270px 50px, 270px 60px,
            350px 50px, 350px 60px;
        -webkit-box-reflect: below 259px;
    }
}效果如下:
最后,利用另外一个伪元素,完成另外一半的竖向横线即可:
.g-grid {
    // ...
    &::before {
        // ...
    }
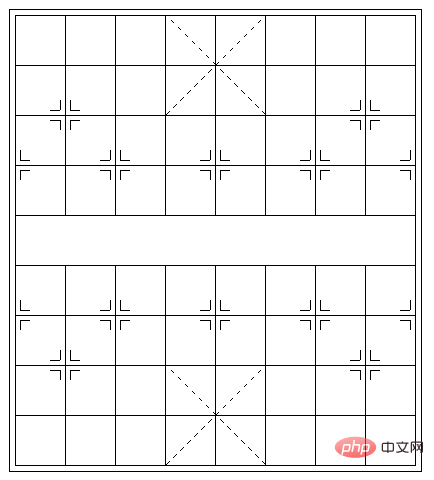
    &::after {
        // ...
        box-shadow:
            10px 0, 0 20px, 10px 20px,
            300px 0px, 300px 20px, 310px 0, 310px 20px,
            -40px 50px, -40px 70px,
            50px 50px, 50px 70px, 60px 50px, 60px 70px,
            150px 50px, 150px 70px, 160px 50px, 160px 70px,
            250px 50px, 250px 70px, 260px 50px, 260px 70px,
            350px 50px, 350px 70px;
        -webkit-box-reflect: below 260px;
    }
}这样,我们就在一个标签内,得到这样一个效果:
当然,还剩下楚河、汉界 4 个字,这个也简单直接加在 div 中即可,配合一些简单的 CSS 调整,整个效果就在一个标签内完成啦:
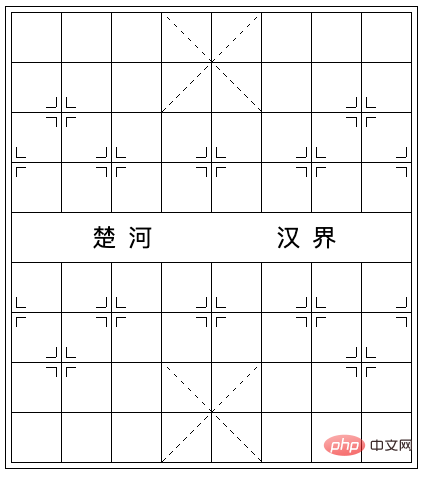
完整的代码你可以戳这里:CodePen Demo -- CSS Chess board
好,实际中我确实不太推荐这么去写,纯粹是为了实现而实现,少了很多代码可读性的考量。因此,本文更多的是给大家带来一些思路,当遇到类似的问题的使用能够有更多的灵感。
原文地址:https://www.cnblogs.com/coco1s/p/16710203.html
作者:ChokCoco
Ce qui précède est le contenu détaillé de. pour plus d'informations, suivez d'autres articles connexes sur le site Web de PHP en chinois!