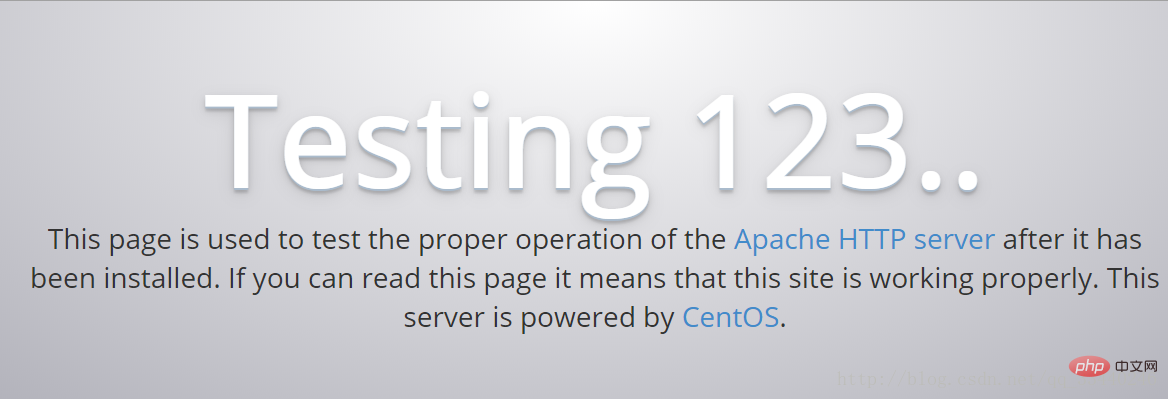

Méthode d'installation du package compressé
1. Téléchargez httpd-2.4.29.tar.gz
2. Téléchargez sur server/usr/local/software
tar -zxvf httpd-2.4.29.tar.gz
./configure --prefix=/usr/local/apache2/ # 设置apache安装目录
Si Apr n'a pas été installé, une erreur sera signalée :
checking for APR... no
configure: error: APR not found.  Please read the documentation.
3. premier téléchargement apr- 1.6.3.tar.gz
4. Télécharger sur serveur/usr/local/software
tar -zxvf apr-1.6.3.tar.gz
cd apr-1.6.3
.configure
make
make install
Une erreur sera à nouveau signalée :
checking for APR-util... no
configure: error: APR-util not found.  Please read the documentation.
5. . Téléchargez apr-util-1.6 .1.tar.gz
6. Téléchargez sur server/usr/local/software
tar -zxvf apr-util-1.6.1.tar.gz
cd apr-util-1.6.1
./configure --prefix=/usr/local/apr-util/ --with-apr=/usr/local/apr
À ce moment, une erreur sera signalée :
xml/apr_xml.c:35:19: 致命错误:expat.h:没有那个文件或目录
 #include <expat.h>
                   ^
编译中断。
make: *** [xml/apr_xml.lo] 错误 17. On suppose qu'expat pourrait manquer la bibliothèque de développement
yum install expat-devel # 中间会让你输入y
./configure --prefix=/usr/local/apr-util/ --with-apr=/usr/local/apr
make # 成功!
make install
8. À ce stade, revenez à l'installation d'Apache. Vous devez non seulement spécifier le chemin d'apr, mais également le chemin d'apache. apr-util
./configure --prefix=/usr/local/apache2/ --with-apr=/usr/local/apr/ --with-apr-util=/usr/local/apr-util/
Signale toujours des erreurs, de nombreuses personnes peuvent venir ici. Il s'est écrasé, mais cette erreur est similaire à celle rencontrée avant
checking for pcre-config... false
configure: error: pcre-config for libpcre not found. PCRE is required and available from http://pcre.org/
Télécharger pcre-8.41.tar.gz.
10. Télécharger sur server/usr/local/software
tar -zxvf pcre-8.41.tar.gz
./configure
a encore signalé une erreur, je vous promets que c'est la dernière fois
checking windows.h usability... no
checking windows.h presence... no
checking for windows.h... no
configure: error: You need a C++ compiler for C++ support.
Installez l'environnement C++
. 🎜>yum install -y gcc gcc-c++ # 错了那么多次,别忘了现在的位置,接下来还是要安装pcre ./configure make make install
11. D'accord, ça a été un grand cercle, et la prochaine étape est de l'installer sur Apache
cd ..
cd apache
./configure --prefix=/usr/local/apache2/  --with-apr=/usr/local/apr/ --with-apr-util=/usr/local/apr-util/
make
make install
Comme c'est misérable ! Lors de la dernière étape, une autre erreur a été signalée :
/usr/local/apr-util//lib/libaprutil-1.so: undefined reference to `XML_GetErrorCode'
/usr/local/apr-util//lib/libaprutil-1.so: undefined reference to `XML_SetEntityDeclHandler'
/usr/local/apr-util//lib/libaprutil-1.so: undefined reference to `XML_ParserCre
collect2: error: ld returned 1 exit status
make[2]: *** [htpasswd] 错误 1
make[2]: Leaving directory `/usr/local/software/apache/support'
make[1]: *** [all-recursive] 错误 1
make[1]: Leaving directory `/usr/local/software/apache/support'
Je n'avais jamais vu ce genre d'erreur auparavant, j'ai donc cherché en ligne et la réponse a été : la version apr est trop élevée
12 ; . J'ai donc téléchargé apr-util- 1.5 http://archive.apache.org/dist/apr/apr-util-1.5.2.tar.gz
13. software
tar -zxvf apr-util-1.5.2.tar.gz
cd apr-util-1.5.2
./configure --prefix=/usr/local/apr-util-1.5/ --with-apr=/usr/local/apr
make
make install
14. Répétez l'étape 11. La seule différence est que la configuration spécifie désormais : apr-util-1.5 C'est très important ! ! !
cd ..
cd apache
./configure --prefix=/usr/local/apache2/  --with-apr=/usr/local/apr/ --with-apr-util=/usr/local/apr-util-1.5/
make # make时间会比较长
make install
Fin parfaite :
Installing configuration files
mkdir /usr/local/apache2/conf
mkdir /usr/local/apache2/conf/extra
mkdir /usr/local/apache2/conf/original
mkdir /usr/local/apache2/conf/original/extra
Installing HTML documents
mkdir /usr/local/apache2/htdocs
Installing error documents
mkdir /usr/local/apache2/error
Installing icons
mkdir /usr/local/apache2/icons
mkdir /usr/local/apache2/logs
Installing CGIs
mkdir /usr/local/apache2/cgi-bin
Installing header files
mkdir /usr/local/apache2/include
Installing build system files
mkdir /usr/local/apache2/build
Installing man pages and online manual
mkdir /usr/local/apache2/man
mkdir /usr/local/apache2/man/man1
mkdir /usr/local/apache2/man/man8
mkdir /usr/local/apache2/manual
make[1]: Leaving directory `/usr/local/software/apache'
15. Entrez l'emplacement du fichier de configuration : /usr/local/apache2/conf
cp httpd.conf httpd.conf.bak    # 备份配置文件
vim httpd.conf
# 放掉191行的注释,修改为:
ServerName [你的IP]:80
:wq
16. Démarrez Apache
/usr/local/apache2/bin/apachectl start
# 或者
/usr/local/apache2//bin/httpd -k start
ps -ef|grep apache
/usr/local/apache2/bin/apachectl stop
# 或者
/usr/local/apache2//bin/httpd -k stop
# 没错,bin前面就是//
Méthode d'installation de la source yum
1. Installation de la source yum (nécessite un téléchargement sur Internet)首先关闭apache服务 yum install httpd # 中间过程中输入:y
Installé en tant que dépendance :
  apr.x86_64 0:1.4.8-3.el7_4.1
  apr-util.x86_64 0:1.5.2-6.el7
  httpd-tools.x86_64 0:2.4.6-67.el7.centos.6
  mailcap.noarch 0:2.1.41-2.el7
完毕!
cd /etc/httpd/conf
cp httpd.conf httpd.conf.bak
# 放掉95行的注释,修改为:
ServerName [你的IP]:80
:wq
systemctl start httpd.service
4. Fermez le service 
systemctl stop httpd.service
/usr/local/apache2/bin/apachectl start
Tutoriel Apache pour apprendre !
Ce qui précède est le contenu détaillé de. pour plus d'informations, suivez d'autres articles connexes sur le site Web de PHP en chinois!