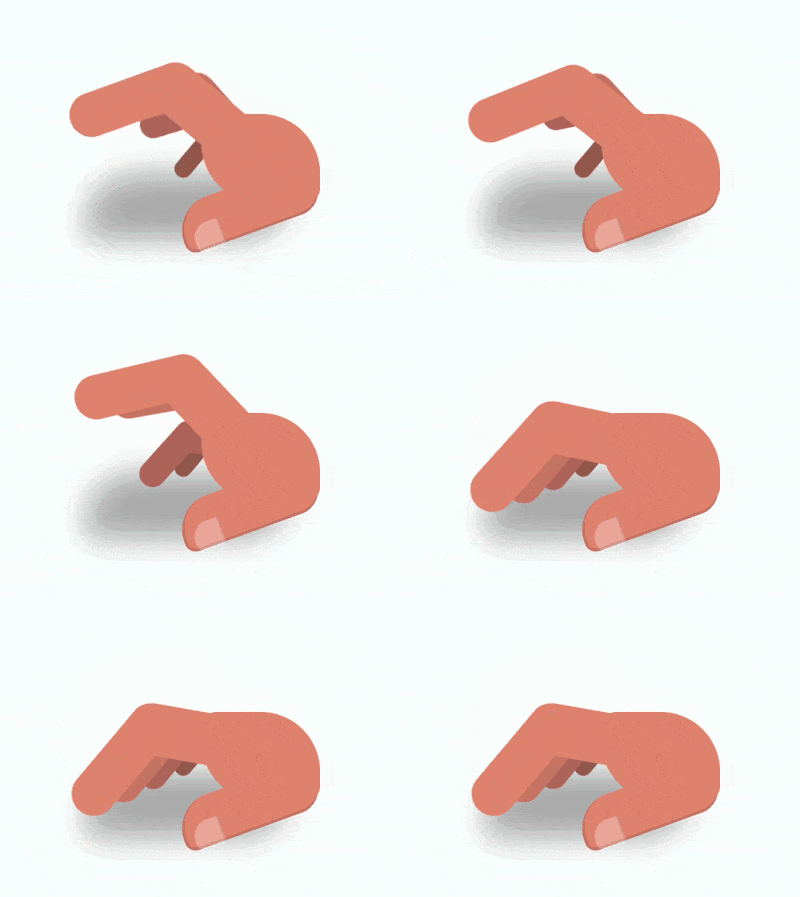
Le contenu de cet article explique comment utiliser du CSS pur pour réaliser une main en mouvement (code source ci-joint). Il a une certaine valeur de référence. Les amis dans le besoin peuvent s'y référer. vous aide.

https:/ /github.com/comehope/front-end-daily-challenges
Définissez dom, les 5 .finger éléments dans le conteneur représentent 5 doigts, et l'élément .thumb représente le Pouce, l'élément .palm représente la paume :
<div>
    <span></span>
    <span></span>
    <span></span>
    <span></span>
    <span></span>
    <span></span>
</div>
Affichage centré :
body {
    margin: 0;
    height: 100vh;
    display: flex;
    align-items: center;
    justify-content: center;
    background: radial-gradient(white, lightcyan);
}Définissez la taille du conteneur, où l'attribut outline est une ligne auxiliaire :
.hand {
    width: 16em;
    height: 8em;
    font-size: 10px;
    outline: 1px dashed black;
}Dessine la paume :
.hand {
    position: relative;
    color: darksalmon;
}

.palm {
    position: absolute;
    width: 8em;
    height: 6em;
    background-color: currentColor;
    border-radius: 1em 4em;
    right: 0;
}Dessine le contour du pouce :
.thumb {
    position: absolute;
    width: 9.6em;
    height: 3.2em;
    background-color: currentColor;
    border-radius: 3em 2em 2em 1em;
    right: 0;
    bottom: 1em;
    transform-origin: calc(100% - 2em) 2em;
    transform: rotate(-20deg);
    border-bottom: 0.2em solid rgba(0, 0, 0, 0.1);
    border-left: 0.2em solid rgba(0, 0, 0, 0.1);
}Dessine l'ongle du pouce :
.thumb::before {
    content: '';
    position: absolute;
    width: 1.9em;
    height: 1.9em;
    background-color: rgba(255, 255, 255, 0.3);
    border-radius: 60% 10% 10% 30%;
    bottom: -0.3em;
    left: 0.5em;
    border-right: 0.1em solid rgba(0, 0, 0, 0.1);
}Dessinez Dessinez la seconde moitié de l'index près de la paume :
.finger:not(:first-child) {
    position: absolute;
    width: 6.4em;
    height: 3.5em;
    background-color: currentColor;
    right: 5.2em;
    bottom: 4em;
    transform-origin: 100% 2em;
    transform: rotate(10deg);
}Dessinez la première moitié de l'index :
.finger:not(:first-child)::before {
    content: '';
    position: absolute;
    width: 9em;
    height: 3em;
    background-color: currentColor;
    right: 4.2em;
    top: 0.2em;
    border-radius: 2em;
    transform-origin: calc(100% - 2em) 2em;
    transform: rotate(-60deg);
}Définissez les variables d'indice pour l'autre 4 doigts sauf le pouce, en commençant par l'index Jusqu'à ce que l'auriculaire rétrécisse progressivement et que la couleur s'approfondisse :
.finger:not(:first-child) {
    --scale: calc(1 - (5 - var(--n)) * 0.2);
    transform: rotate(10deg) scale(var(--scale));
    filter: brightness(calc(100% - (5 - var(--n)) * 10%));
}

.finger:nth-child(2) { --n: 2; }
.finger:nth-child(3) { --n: 3; }
.finger:nth-child(4) { --n: 4; }
.finger:nth-child(5) { --n: 5; }Dessinez l'ombre de la main avec des pseudo éléments :
.hand::before {
    content: '';
    position: absolute;
    width: 14em;
    height: 4.5em;
    background-color: black;
    border-radius: 4em 1em;
    top: 4em;
    filter: blur(1em) opacity(0.3);
}Ajoutez l'effet d'animation du tapotement du doigt sur le bureau :
.finger:not(:first-child) {
    animation: tap-upper 1.2s ease-in-out infinite;
    animation-delay: calc((var(--n) - 2) * 0.1s);
}

@keyframes tap-upper {
    0%, 50%, 100% {
        transform: rotate(10deg) scale(var(--scale));
    }

    40% {
        transform: rotate(50deg) scale(var(--scale));
    }
}Enfin, n'oubliez pas de supprimer les lignes auxiliaires.
Fait !
Recommandations associées :
Comment utiliser du CSS pur pour obtenir l'effet d'une paire de ciseaux (code source ci-joint)
Ce qui précède est le contenu détaillé de. pour plus d'informations, suivez d'autres articles connexes sur le site Web de PHP en chinois!