[Avant-propos] : Parce que j'ai récemment utilisé les composants externes de Webpack lorsque je travaillais sur l'API Baidu Map, J'ai découvert que je n'avais utilisé Webpack que pour faire certaines choses avant. Le « travail de finition » après la construction du projet, c'est-à-dire le packaging, sans l'intégrer dans le « processus principal » de développement du projet, n'en fait vraiment pas « le meilleur usage ». Voici donc mon article d'apprentissage d'aujourd'hui : Créez un serveur Webpack à l'aide de webpack-dev-server
Références :
adresse github du webpack-dev-server :
documentation officielle du webpack1http://webpack.github.io/docs/webpack-dev-server.html (Il est recommandé de lire le documentation de 2)
documentation officielle du webpack2 (Il est recommandé de lire ceci)
Aperçu :
1.
2. Explication détaillée des propriétés de configuration de webpack-dev-server
3. -mécanisme du serveur
4. Trois façons de configurer le serveur sous webpack
Révision webpack Knowledge
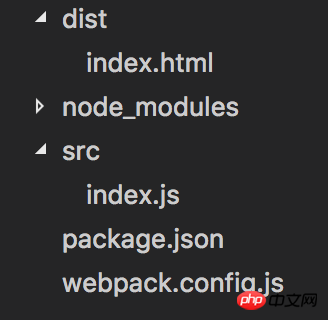
J'ai simplifié la structure des répertoires et elle ressemble à ceci :
Mon webpack.config.js :
var webpack = require('webpack')var path =require('path')
module.exports = {
entry:{
   app:path.join(__dirname,'src','index.js')
},
output:{
   filename:'bundle.js',
   path:path.join(__dirname,'dist')
  }
}
Copier après la connexion
Mon src /index.js :
require('./a.js')
require('./b.js')
console.log('我是index.js')
Copier après la connexion
mon src/a.js :
console.log('我是a.js')Copier après la connexion
Mon src/b.js :
console.log('我是b.js')Copier après la connexion
Mon dist/index.html :
/*其他部分省略*/<body> <script src="./bundle.js?1.1.11"></script></body>
Copier après la connexion
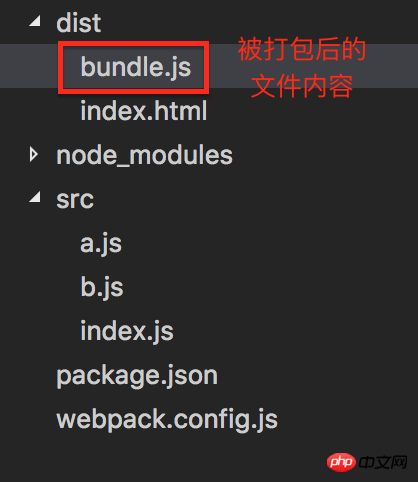
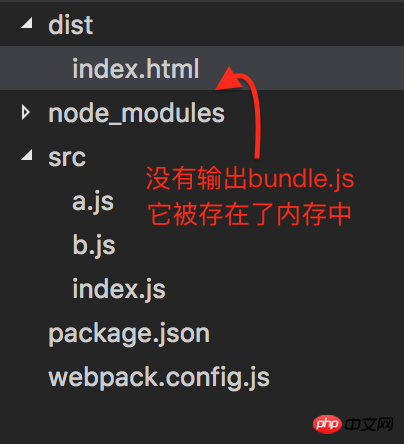
Après avoir exécuté la commande "webpack" dans le terminal, le le répertoire devient :
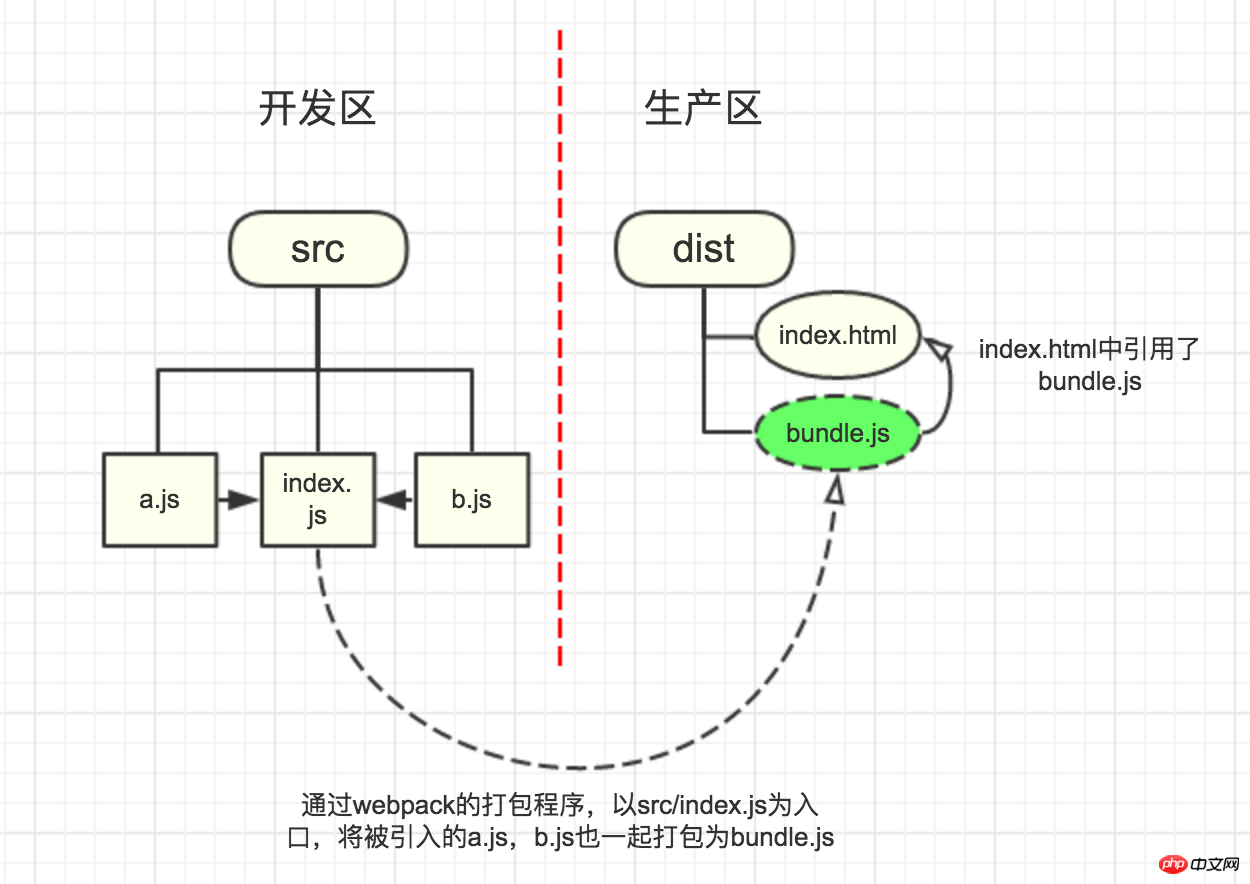
Une image pour revoir le mécanisme du webpack :
OK, commençons à configurer un serveur :
Comment configurer un serveur de la manière la plus simple ?
1. Vous devez installer chaque module
dans le terminal. Entrez dans le répertoire du projet, tapez npm install webpack-dev-server --save-dev et appuyez sur Entrée
2. Exécutez une commande dans le terminal :
node_modules/.bin/webpack-dev-server(网上有的说直接输webpack-dev-server那是错的)
成功!输出的是这一段信息:
然后进入默认的localhost:8080页面:
服务器的根目录就是我们工程的目录
到这里,我们要做的第一步就成功啦!
进入dist后,我们发现报了这样一段错误:
what?没有找到bundle.js?
所以我们要在webpack.config.js里写一下配置:
module.exports = {/*这里省略entry和output,参照上面写的内容*/
  devServer: {
       contentBase: path.join(__dirname, "dist")
   }
}
Copier après la connexion
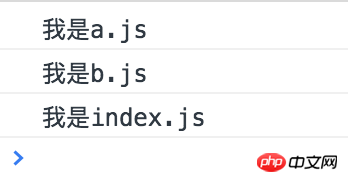
保存,后打开页面看控制台,报错已经消失了!正确打印了被打包的文件内容:
详解webpack-dev-server的配置属性
1.devServer.contentBase
contentBase是我们今天要讲的第一个webpack-dev-server的配置属性,那么,contentBase做了什么事情呢?——它指定了服务器资源的根目录,如果不写入contentBase的值,那么contentBase默认是项目的目录。
在上面例子中产生错误和后来解决错误的原因:
产生错误:因为bundle.js被"放在了"我们的项目根目录里,在dist/html里此时显然不能根据路径找到bundle.js
解决错误:通过配置contentBase: path.join(__dirname, "dist")将bundle.js"放在了"dist目录下,此时bundle.js和dist/index.html位于同一目录下,通过 src="./bundle.js?1.1.11"自然就找到bundle.js了
webpack打包和webpack-dev-server开启服务的区别——
webpack输出真实的文件,而webpack-dev-server输出的文件只存在于内存中,不输出真实的文件!(注意下面两张图的区别)
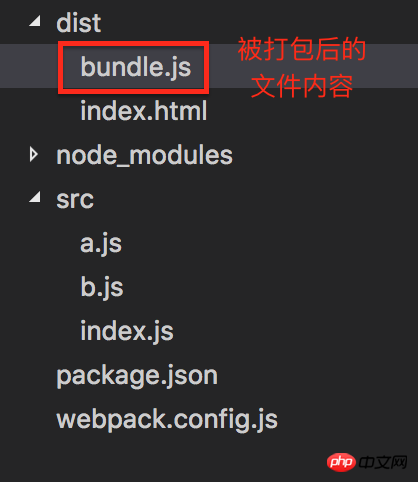
webpack:当我们在终端运行"webpack"后:
webpack-dev-server:当我们在终端运行"node_modules/.bin/webpack-dev-server后:
这也就是我在上面的阐述中将bundle.js?1.1.11"放在了"加上双引号的原因
2.devServer.port
port配置属性指定了开启服务的端口号:
devServer: {
   port:7000}
Copier après la connexion
设置端口号为7000:
运行:node_modules/.bin/webpack-dev-server
这个时候就不是默认的8080的端口了,而是我们设置的7000
3.devServer.host
host设置的是服务器的主机号:
修改配置为:
devServer: {
   contentBase: path.join(__dirname, "dist"),
   port:7000,
   host:'0.0.0.0'}
Copier après la connexion
此时localhost:7000和0.0.0.0:7000都能访问成功
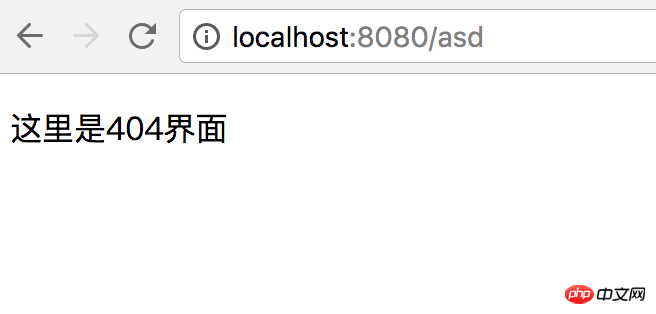
4.devServer.historyApiFallback
在文档里面说的很清楚,这个配置属性是用来应对返回404页面时定向到特定页面用的(the index.html page will likely have to be served in place of any 404 responses)
在dist目录下新增一个HTML页面:
/*剩下的都是很常规的HTML内容,故省略*/<p>这里是404界面</p>
Copier après la connexion
我们把webpack.config.js修改如下:
module.exports = {/*这里省略entry和output,参照上面写的内容*/devServer: {
contentBase: path.join(__dirname, "dist"),
historyApiFallback:{
   rewrites:[
      {from:/./,to:'/404.html'}
   ]
  }
 }
}
Copier après la connexion
打开页面,输入一个不存在的路由地址:
5.devServer.overlay
这个配置属性用来在编译出错的时候,在浏览器页面上显示错误,默认是false,可设置为true
首先我们人为制造一个编译错误:在我们尚未配置babel loader的项目里使用ES6写法:
在src/index.js里写入“const a”
在shell里提示编译错误:
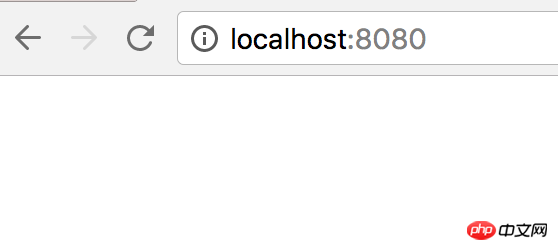
但在浏览器里没有提示:
所以我们把webpack.config.js修改为:
module.exports = {     /*这里省略entry和output,参照上面写的内容*/
   devServer: {
       contentBase: path.join(__dirname, "dist"),
       overlay: true
   }
}
Copier après la connexion
再重新运行node_modules/.bin/webpack-dev-server,浏览器上把错误显示出来了
6.devServer.stats(字符串)
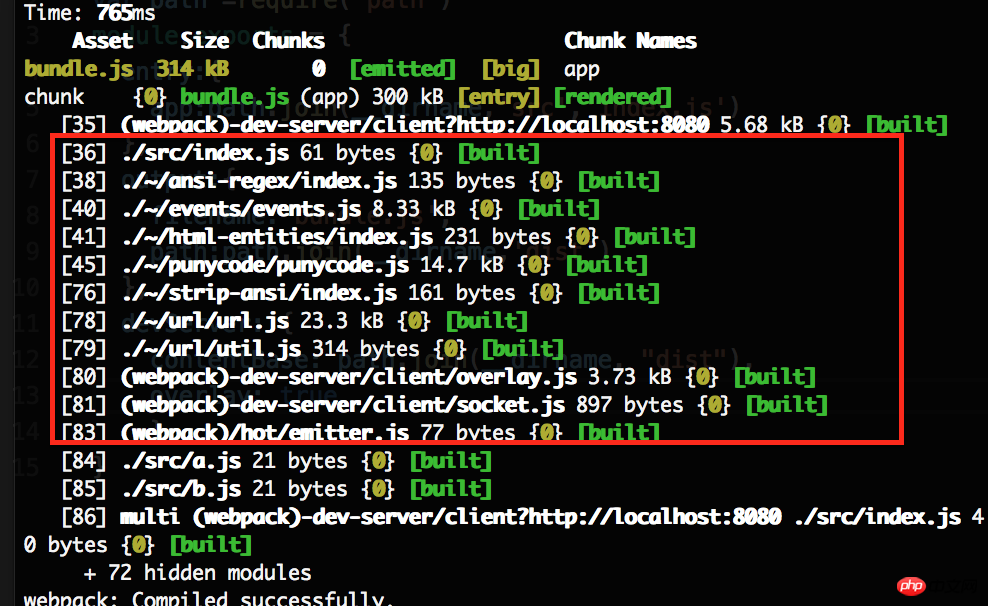
这个配置属性用来控制编译的时候shell上的输出内容,我们没有设置devServer.stats时候编译输出是这样子的:
(其中看起来有许多看似不重要的文件也被打印出来了)
stats: "errors-only"表示只打印错误:
我们把配置改成:
devServer: {
   contentBase: path.join(__dirname, "dist"),
   stats: "errors-only"}
Copier après la connexion
因为只有错误才被打印,所以,大多数信息都略过了
除此之外还有"minimal","normal","verbose",这里不多加赘述
7.devServer.quiet
当这个配置属性和devServer.stats属于同一类型的配置属性
当它被设置为true的时候,控制台只输出第一次编译的信息,当你保存后再次编译的时候不会输出任何内容,包括错误和警告
来做个对比吧:
quiet:false(默认):
第一次编译:
第二次编译(当你保存的时候)

quiet:true
第一次编译同上
第二次编译什么都不输出
【吐槽】这样看的话感觉这个配置好像只有负面作用呢.....
8.devServer.compress
这是一个布尔型的值,当它被设置为true的时候对所有的服务器资源采用gzip压缩
采用gzip压缩的优点和缺点:
优点:对JS,CSS资源的压缩率很高,可以极大得提高文件传输的速率,从而提升web性能
缺点:服务端要对文件进行压缩,而客户端要进行解压,增加了两边的负载
9.devServer.hot和devServer.inline
在这之前,首先要说一下的是webpack-dev-server的自动刷新和模块热替换机制
webpack-dev-server的自动刷新和模块热替换机制
这两个机制是紧紧联系在一起的
从外部角度看——自动刷新
当我们对业务代码做了一些修改然后保存后(command+s),页面会自动刷新,我们所做的修改会直接同步到页面上,而不需要我们刷新页面,或重新开启服务
(The webpack-dev-server supports multiple modes to automatically refresh the page)
从内部角度看——模块热替换
在热替换(HMR)机制里,不是重载整个页面,HMR程序会只加载被更新的那一部分模块,然后将其注入到运行中的APP中
(In Hot Module Replacement, the bundle is notified that a change happened. Rather than a full page reload, a Hot Module Replacement runtime could then load the updated modules and inject them into a running app.)
webpack-dev-server有两种模式可以实现自动刷新和模块热替换机制
1. Iframe mode(默认,无需配置)
页面被嵌入在一个iframe里面,并且在模块变化的时候重载页面
2.inline mode(需配置)添加到bundle.js中
当刷新页面的时候,一个小型的客户端被添加到webpack.config.js的入口文件中
例如在我们的例子中,在使用inline mode的热替换后,相当于入口文件从
entry:{
    app:path.join(__dirname,'src','index.js')
}
Copier après la connexion
变成了:
entry:{
    app:[path.join(__dirname,'src','index.js'),             'webpack-dev-server/client?http://localhost:8080/'  ]
}
Copier après la connexion
从一个入口变成了两个入口,并实现刷新
那怎么才能inline mode模式的刷新呢?
你需要做这些:
1在配置中写入devServer.hot:true和devServer.inline:true
2增加一个插件配置webpack.HotModuleReplacementPlugin()
例如:
var webpack = require('webpack')
module.exports = {   /*省略entry ,output等内容*/
   plugins:[new webpack.HotModuleReplacementPlugin()
    ],
   devServer: {
        inline:true,
        hot:true}
}
Copier après la connexion
打开页面:
如果有上面两行输出则表明你已经配置成功
现在还有一个问题,那就是每次直接输入node_modules/.bin/webpack-dev-server来启动服务器对我们来说简直就是莫大的痛苦,那么怎么对这一过程进行简化呢?
答案:把这个运行脚本写到package.json里就行了!
这里我把我的package.json写成:
{   "name": "webpackTest2",   "dependencies": {},   "devDependencies": {},   "scripts": {       "start": "node_modules/.bin/webpack-dev-server" }
}
Copier après la connexion
在终端运行npm start:
运行成功!
配置服务的三种方式:
1在webpack.config.js输出对象中的devServer属性中写配置(也就是我们上述所有例子的做法)
2写在package.json中,写在node 命令对应的脚本中,例如我们可以写成:
"scripts": {
"start": "node_modules/.bin/webpack-dev-server --port 8000 --inline true "
}
(但这显然并不是一个值得推荐的方式)
3使用纯node的API实现,下面是一个官方给的例子
var config = require("./webpack.config.js?1.1.11");
config.entry.app.unshift("webpack-dev-server/client?http://localhost:8080/");var compiler = webpack(config);var server = new WebpackDevServer(compiler, {       /*我们写入配置的地方*/});
server.listen(8080);
Copier après la connexion
Ce qui précède est le contenu détaillé de. pour plus d'informations, suivez d'autres articles connexes sur le site Web de PHP en chinois!

