前言:建立一个网站系统,往往包含多个子网站,例如PC官网,移动端官网,后台管理,数据源自一个相同的数据库,整个架构上,从ThinkPHP来看,可以大体理解为Model(M)是一样的,Controller(C)包含共用API部分和不共用部分,View则是完全不共用的,这里在整个初始架构的时候,我们可以主要从以下几个方面去考虑:
配置共用的数据库、扩展Application里面的模块、自定义视图文件夹、子域名部署、路由简化....
具体操作如下:
1、准备ThinkPHP环境、数据库
a、下载官网ThinkPHP3.2完整版源码,解压命名为testWeb放置到www目录下,访问http://192.168.1.122/testWeb/,可以看到:
 说明部署没问题的。
b、准备一个测试的数据库books,新建book表(id,title,price),准备好测试数据;

c、配置数据库,参考ThinkPHP配置加载规则,可以采用惯例配置(ThinkPHP/Conf/convention.php),结合应用配置(Application/Common/Conf/config.php)、模块配置(Application/当前模块名/Conf/config.php),
这里我采用的是数据库配置在应用配置上:
<span style="color: #008080"> 1</span>     <span style="color: #008000">//</span><span style="color: #008000">数据库配置信息</span>
<span style="color: #008080"> 2</span>     'DB_TYPE'   => 'mysql', <span style="color: #008000">//</span><span style="color: #008000"> 数据库类型</span>
<span style="color: #008080"> 3</span>     'DB_HOST'   => 'localhost', <span style="color: #008000">//</span><span style="color: #008000"> 服务器地址localhost</span>
<span style="color: #008080"> 4</span>     'DB_NAME'   => 'books', <span style="color: #008000">//</span><span style="color: #008000"> 数据库名</span>
<span style="color: #008080"> 5</span>     'DB_USER'   => 'root', <span style="color: #008000">//</span><span style="color: #008000"> 用户名</span>
<span style="color: #008080"> 6</span>     'DB_PWD'    => '', <span style="color: #008000">//</span><span style="color: #008000"> 密码</span>
<span style="color: #008080"> 7</span>     'DB_PORT'   => 3306, <span style="color: #008000">//</span><span style="color: #008000"> 端口</span>
<span style="color: #008080"> 8</span>     'DB_PREFIX' => '', <span style="color: #008000">//</span><span style="color: #008000"> 数据库表前缀</span>
<span style="color: #008080"> 9</span>     'DB_CHARSET'=> 'utf8', <span style="color: #008000">//</span><span style="color: #008000"> 字符集</span>
<span style="color: #008080">10</span>     'DB_DEBUG'  =>  <span style="color: #0000ff">TRUE</span>, <span style="color: #008000">//</span><span style="color: #008000"> 数据库调试模式 开启后可以记录SQL日志 3.2.3新增<br></span>
接着,在默认Index控制器里面,添加一个操作(action):
<span style="color: #008080">1</span>     <span style="color: #0000ff">public</span> <span style="color: #0000ff">function</span> get_book(<span style="color: #800080">$id</span><span style="color: #000000">){
</span><span style="color: #008080">2</span>         <span style="color: #800080">$param</span>['id'] = I('get.id'<span style="color: #000000">);
</span><span style="color: #008080">3</span>         <span style="color: #800080">$model</span> = M('book')->where(<span style="color: #800080">$param</span>)-><span style="color: #000000">find();
</span><span style="color: #008080">4</span>         <span style="color: #800080">$this</span>->ajaxReturn(<span style="color: #800080">$model</span><span style="color: #000000">);
</span><span style="color: #008080">5</span> }访问:http://192.168.1.122/testWeb/index.php/Home/Index/get_book?id=1,就可以去到json数据,说明到此为止数据库连接和访问时正常的:

2、扩展Application应用目录里面的模块
a、快速拷贝当前的Home模块,重命名为H5模块并修改相应控制器里面的名空间为:namespace H5\Controller,
访问:http://192.168.1.122/testWeb/index.php/H5/Index/get_book?id=1,这时成功返回数据,说明当前H5模块是可以的;同理我们可以复
制一个Admin模块。
3、自定义视图文件夹
a、视图概念:ThinkPHP是基于MVC结构设计的一种PHP框架,如果是简单的数据库操作,往往可以省略模块里面的Model,仅仅使用Controller就可以完成CURD操作,而视图也是其中一个很重要的功能。ThinkPHP中的视图主要指模板文件和模板引擎:模板文件可以简单理解为搭建积木玩具中的基本“小原件”,这“小原件”可能是不同形状,每种形状的“小原件”可能在搭建的过程中使用了一个或者多个;模板引擎,则是搭建积木玩具中的“凹凸”卡扣,形成一种规则将“小原件”组合起来。
b、视图使用:新增Home模块-Index控制器-book操作来获取所有书籍,并在Home模块的View文件夹下,新建Index文件夹-新建book.html
<span style="color: #008080">1</span> <span style="color: #0000ff">public</span> <span style="color: #0000ff">function</span><span style="color: #000000"> book(){
</span><span style="color: #008080">2</span>     <span style="color: #800080">$models</span> = M('book')-><span style="color: #000000">select();
</span><span style="color: #008080">3</span>     <span style="color: #800080">$this</span>->assign('books',<span style="color: #800080">$models</span><span style="color: #000000">);
</span><span style="color: #008080">4</span>     <span style="color: #800080">$this</span>-><span style="color: #000000">display();
</span><span style="color: #008080">5</span> }模板文件:
<span style="color: #008080">1</span> <span style="color: #0000ff"><span style="color: #800000">body</span><span style="color: #0000ff">></span>
<span style="color: #008080">2</span>     <span style="color: #0000ff"><span style="color: #800000">volist </span><span style="color: #ff0000">name</span><span style="color: #0000ff">="books"</span><span style="color: #ff0000"> id</span><span style="color: #0000ff">="vo"</span><span style="color: #0000ff">></span>
<span style="color: #008080">3</span>         <span style="color: #0000ff"><span style="color: #800000">p</span><span style="color: #0000ff">></span>序号:{$vo.id}<span style="color: #0000ff"></span><span style="color: #800000">p</span><span style="color: #0000ff">></span>
<span style="color: #008080">4</span>         <span style="color: #0000ff"><span style="color: #800000">p</span><span style="color: #0000ff">></span>书名:{$vo.title}<span style="color: #0000ff"></span><span style="color: #800000">p</span><span style="color: #0000ff">></span>
<span style="color: #008080">5</span>         <span style="color: #0000ff"><span style="color: #800000">p </span><span style="color: #ff0000">style</span><span style="color: #0000ff">="color: #FF0000"</span><span style="color: #0000ff">></span>价格:{$vo.price}<span style="color: #0000ff"></span><span style="color: #800000">p</span><span style="color: #0000ff">></span>
<span style="color: #008080">6</span>     <span style="color: #0000ff"></span><span style="color: #800000">volist</span><span style="color: #0000ff">></span>
<span style="color: #008080">7</span> <span style="color: #0000ff"></span><span style="color: #800000">body</span><span style="color: #0000ff">></span></span></span></span></span></span>c、 访问:http://192.168.1.122/testWeb/index.php/Home/Index/book,此时可以看到页面:
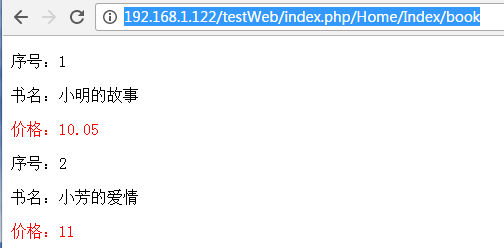
此时,说明这个视图使用是正确的,但是同时也有一些不好的地方,如果模板文件多起来的时候,就不利于模板修改编辑(目录层次太深了),可以在模块配置中,定义当前模块默认的视图目录(Application/Home/Conf/config.php):
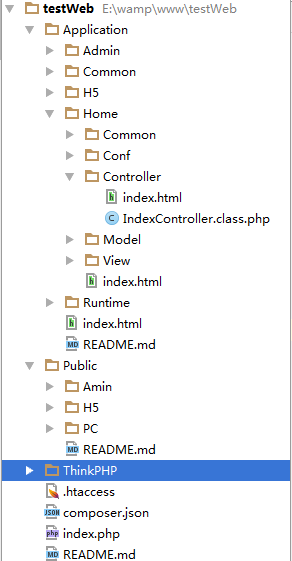
<code class="hljs bash"><span class="hljs-string"><span class="hljs-string"> <span class="cnblogs_code"><span style="color: #008080">define</span>('TMPL_PATH','./Public/PC/'); </span><br></span></span></code>类似定义H5、admin模块的视图目录,最终得到的目录组织,到此,就可以大概有几个不同的子网站的初步架构了。而对于网站的分类:二级菜单、三级菜单就可以分别对应控制器(Controller)和操作(action),根据视图模板构造动态的页面:
4、子域名部署,关于子域名的解析可以参考我之前的文章网站部署一级域名、二级域名、子域名
a、主要修改一些相关配置:
<span style="color: #008080"> 1</span> <span style="color: #0000ff"><span style="color: #800000">VirtualHost </span><span style="color: #ff0000">*:80</span><span style="color: #0000ff">></span>
<span style="color: #008080"> 2</span> <span style="color: #000000">    DocumentRoot "E:/wamp/www/testWeb/"
</span><span style="color: #008080"> 3</span> <span style="color: #000000">    ServerName  chqtest.com
</span><span style="color: #008080"> 4</span> <span style="color: #000000">    ServerAlias m.chqtest.com
</span><span style="color: #008080"> 5</span>     <span style="color: #0000ff"><span style="color: #800000">Directory </span><span style="color: #ff0000">"E:/wamp/www/testWeb/"</span><span style="color: #0000ff">></span>
<span style="color: #008080"> 6</span> <span style="color: #000000">    Allow from all
</span><span style="color: #008080"> 7</span>     <span style="color: #0000ff"></span><span style="color: #800000">Directory</span><span style="color: #0000ff">></span>
<span style="color: #008080"> 8</span>     <span style="color: #0000ff"><span style="color: #800000">IfModule </span><span style="color: #ff0000">dir_module</span><span style="color: #0000ff">></span>
<span style="color: #008080"> 9</span> <span style="color: #000000">       DirectoryIndex  mobile.php index.html index.htm default.php default.htm default.html
</span><span style="color: #008080">10</span>     <span style="color: #0000ff"></span><span style="color: #800000">IfModule</span><span style="color: #0000ff">></span>
<span style="color: #008080">11</span> <span style="color: #0000ff"></span><span style="color: #800000">VirtualHost</span><span style="color: #0000ff">></span>
<span style="color: #008080">12</span>
<span style="color: #008080">13</span> <span style="color: #0000ff"><span style="color: #800000">VirtualHost </span><span style="color: #ff0000">*:80</span><span style="color: #0000ff">></span>
<span style="color: #008080">14</span> <span style="color: #000000">    DocumentRoot "E:/wamp/www/testWeb/"
</span><span style="color: #008080">15</span> <span style="color: #000000">    ServerName  chqtest.com
</span><span style="color: #008080">16</span> <span style="color: #000000">    ServerAlias www.chqtest.com
</span><span style="color: #008080">17</span>     <span style="color: #0000ff"><span style="color: #800000">Directory </span><span style="color: #ff0000">"E:/wamp/www/testWeb/"</span><span style="color: #0000ff">></span>
<span style="color: #008080">18</span> <span style="color: #000000">    Allow from all
</span><span style="color: #008080">19</span>     <span style="color: #0000ff"></span><span style="color: #800000">Directory</span><span style="color: #0000ff">></span>
<span style="color: #008080">20</span>     <span style="color: #0000ff"><span style="color: #800000">IfModule </span><span style="color: #ff0000">dir_module</span><span style="color: #0000ff">></span>
<span style="color: #008080">21</span> <span style="color: #000000">       DirectoryIndex  index.php index.html index.htm default.php default.htm default.html
</span><span style="color: #008080">22</span>     <span style="color: #0000ff"></span><span style="color: #800000">IfModule</span><span style="color: #0000ff">></span>
<span style="color: #008080">23</span> <span style="color: #0000ff"></span><span style="color: #800000">VirtualHost</span><span style="color: #0000ff">></span>
<span style="color: #008080">24</span>
<span style="color: #008080">25</span> <span style="color: #0000ff"><span style="color: #800000">VirtualHost </span><span style="color: #ff0000">*:80</span><span style="color: #0000ff">></span>
<span style="color: #008080">26</span> <span style="color: #000000">    DocumentRoot "E:/wamp/www/testWeb/"
</span><span style="color: #008080">27</span> <span style="color: #000000">    ServerName  chqtest.com
</span><span style="color: #008080">28</span> <span style="color: #000000">    ServerAlias admin.chqtest.com
</span><span style="color: #008080">29</span>     <span style="color: #0000ff"><span style="color: #800000">Directory </span><span style="color: #ff0000">"E:/wamp/www/testWeb/"</span><span style="color: #0000ff">></span>
<span style="color: #008080">30</span> <span style="color: #000000">    Allow from all
</span><span style="color: #008080">31</span>     <span style="color: #0000ff"></span><span style="color: #800000">Directory</span><span style="color: #0000ff">></span>
<span style="color: #008080">32</span>     <span style="color: #0000ff"><span style="color: #800000">IfModule </span><span style="color: #ff0000">dir_module</span><span style="color: #0000ff">></span>
<span style="color: #008080">33</span> <span style="color: #000000">       DirectoryIndex  index.php index.html index.htm default.php default.htm default.html
</span><span style="color: #008080">34</span>     <span style="color: #0000ff"></span><span style="color: #800000">IfModule</span><span style="color: #0000ff">></span>
<span style="color: #008080">35</span> <span style="color: #0000ff"></span><span style="color: #800000">VirtualHost</span><span style="color: #0000ff">></span></span></span></span></span></span></span></span></span></span>
此时,也就是说,有不同子域名(二级网站别名)www.chqtest.com m.chqtest.com admin.chqtest.com都可以直接访问到www/testWeb目录下,如http://www.chqtest.com/index.php/Home/Index/book,
http://m.chqtest.com/index.php/Home/Index/book都是一样的,只是访问到Home模块下的书籍页面(改Home为H5也都指向手机端页面);
b、那么如果要根据不同的子域名,直接绑定到不同的模块怎么办?参考ThinkPHP的域名部署,也就是在惯用配置下补充一些信息:
<span style="color: #008080"> 1</span>     'APP_SUB_DOMAIN_DEPLOY' =>  <span style="color: #0000ff">true</span>,   <span style="color: #008000">//</span><span style="color: #008000"> 是否开启子域名部署
</span><span style="color: #008080"> 2</span> <span style="color: #008000">    //完整域名部署</span>
<span style="color: #008080"> 3</span>     'APP_SUB_DOMAIN_RULES'    =>    <span style="color: #0000ff">array</span>( <span style="color: #008000">//</span><span style="color: #008000"> 子域名部署规则</span>
<span style="color: #008080"> 4</span>         'www.chqtest.com'  => 'Home',   <span style="color: #008000">//</span><span style="color: #008000"> www.chqtest.com域名指向Home模块</span>
<span style="color: #008080"> 5</span>         'm.chqtest.com'   => 'H5',
<span style="color: #008080"> 6</span>         'admin.chqtest.com' => 'Admin',
<span style="color: #008080"> 7</span>     ),
<span style="color: #008080"> 8</span>     'APP_DOMAIN_SUFFIX'     =>  '', <span style="color: #008000">//</span><span style="color: #008000"> 域名后缀 如果是com.cn net.cn 之类的后缀必须设置    </span>
<span style="color: #008080"> 9</span>     'ACTION_SUFFIX'         =>  '', <span style="color: #008000">//</span><span style="color: #008000"> 操作方法后缀</span>
<span style="color: #008080">10</span>     'MULTI_MODULE'          =>  <span style="color: #0000ff">true</span>, <span style="color: #008000">//</span><span style="color: #008000"> 是否允许多模块 如果为false 则必须设置 DEFAULT_MODULE</span>
<span style="color: #008080">11</span>     'MODULE_DENY_LIST'      =>  <span style="color: #0000ff">array</span>('Common','Runtime'),
<span style="color: #008080">12</span> 'MODULE_ALLOW_LIST' => <span style="color: #0000ff">array</span>('Home','H5','Admin'), <span style="color: #008000">//</span><span style="color: #008000"> 允许访问的模块列表</span>再次访问http://www.chqtest.com/index.php/Home/Index/book,http://m.chqtest.com/index.php/Home/Index/book,会发现有以下错误:
 这是因为绑定子域名部署之后,index.php入口文件定位到Application应用目录之前,就已经根据不同的子域名,直接进入相应的目录里面了,这时Home就会被判断要查找的控制器,显然当前控制器只有Index,所以,重新访问:http://www.chqtest.com/index.php/Index/book,http://m.chqtest.com/index.php/Index/book,http://admin.chqtest.com/index.php/Index/book,是不是就都分别访问到相应模块下的操作并返回视图呢:
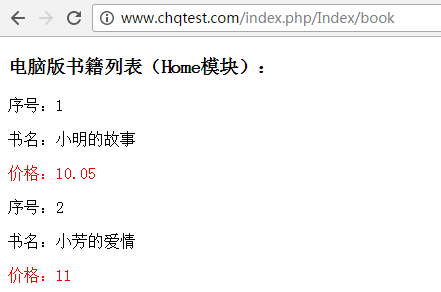
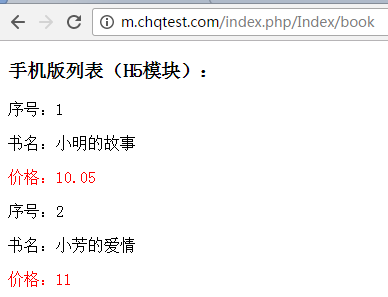
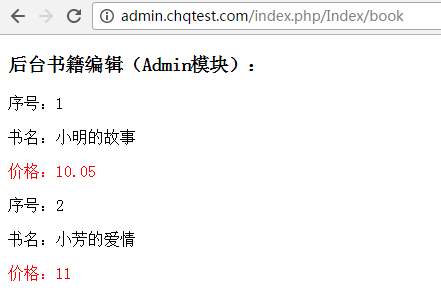
这时,基本就可以搭建了一个大体的网站架构就进一步完善了些,从http://192.168.1.122/testWeb/index.php/H5/Index/book访问手机端书籍页面,到http://m.chqtest.com/index.php/Index/book是不是可以省略了一级资源目录和模块名了呢,
整个结构也清晰了很多。下一篇,将继续说说ThinkPHP关于路由优化,PC、H5网站相互切换的技巧,有兴趣的可以留意下,关于这次例子可以参考Demo
 Que faire si la connexion win8wifi n'est pas disponible
 Analyse comparative de iqooneo8 et iqooneo9
 Comment utiliser la fonction fit en Python
 Récupération de données sur disque SSD
 Changer la couleur d'arrière-plan du mot en blanc
 Google Earth ne parvient pas à se connecter à la solution serveur
 Quelles sont les raisons pour lesquelles un téléphone portable a un numéro vide ?
 CSS au-delà de l'affichage...