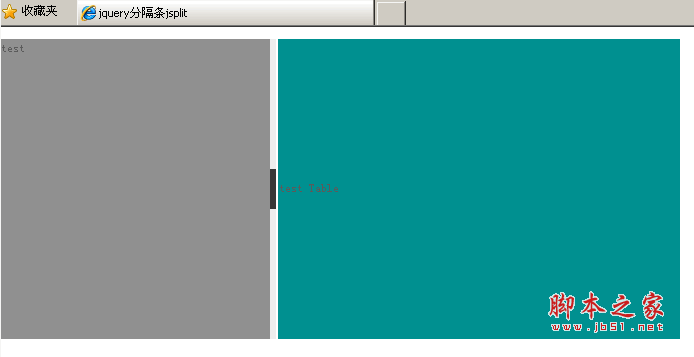
jQuery.noConflict();
jQuery.fn.extend({
jsplit: function (j) {
return this.each(function () {
j = j || {};
j.Btn = j.Btn || {};
j.Btn.oBg = j.Btn.oBg || {};
j.Btn.cBg = j.Btn.cBg || {};
var jun = { MaxW: "600px"
, MinW: "260px"
, FloatD: "left"
, IsClose: false
, BgUrl: ""
, Bg: "#fff"
, Btn: { btn: true
, oBg: { Out: "#333", Hover: "orange" }
, cBg: { Out: "#333", Hover: "orange"}
}
, Fn: function () { }
}
j.MaxW = parseInt(j.MaxW) || parseInt(jun.MaxW);
j.MinW = parseInt(j.MinW) || parseInt(jun.MinW);
j.FloatD = j.FloatD || jun.FloatD;
j.IsClose = j.IsClose != undefined ? j.IsClose : jun.IsClose;
j.BgUrl = j.BgUrl || jun.BgUrl;
j.Bg = j.Bg || jun.Bg;
j.Btn.btn = j.Btn.btn != undefined ? j.Btn.btn : jun.Btn.btn;
j.Btn.oBg.Out = j.Btn.oBg.Out || jun.Btn.oBg.Out;
j.Btn.oBg.Hover = j.Btn.oBg.Hover || jun.Btn.oBg.Hover;
j.Btn.cBg.Out = j.Btn.cBg.Out || jun.Btn.cBg.Out;
j.Btn.cBg.Hover = j.Btn.cBg.Hover || jun.Btn.cBg.Hover;
j.Fn = j.Fn || jun.Fn;
var antiD = j.FloatD == "left" ? "right" : "left";
if (j.MinW > j.MaxW) {
var amax = j.MaxW;
j.MaxW = j.MinW;
j.MinW = amax;
};
var _self = this;
var Close = false;
jQuery(_self).css({ position: "relative", float: j.FloatD, overflow: "hidden", padding: "0px" });
jQuery(_self).wrapInner("
");
jQuery(_self).children(".jsplit-c").append("
");
var dw = jQuery(_self).width();
var jsplitc = jQuery(_self).children(".jsplit-c");
var jsplite = jsplitc.children(".jsplit-e");
var jsplith = jsplite.children(".jsplit-e-handle");
if (j.Btn.btn == false) { jsplith.css({ display: "none" }) };
if (jQuery.browser.msie) { document.execCommand("BackgroundImageCache", false, true); }
if (dw > j.MaxW) { jQuery(_self).css({ width: j.MaxW }); }
if (dw jsplite.css({ background: j.Bg, "background-image": j.BgUrl, opacity: 0 })
if (j.IsClose != false) {
jsplith.css({ background: j.Btn.cBg.Out, "background-image": j.BgUrl })
_selfclose();
} else {
jsplith.css({ background: j.Btn.oBg.Out, "background-image": j.BgUrl })
}
jsplith.hover(function () {
if (Close == false) {
jQuery(this).css({ background: j.Btn.oBg.Hover, "background-image": j.BgUrl })
} else { jQuery(this).css({ background: j.Btn.cBg.Hover, "background-image": j.BgUrl }) }
}, function () {
if (Close == false) {
jQuery(this).css({ background: j.Btn.oBg.Out, "background-image": j.BgUrl })
} else { jQuery(this).css({ background: j.Btn.cBg.Out, "background-image": j.BgUrl }) }
})
jQuery(_self).hover(function () { if (Close == false) jsplite.stop().animate({ opacity: 0.85 }, 200) }, function () { if (Close == false) jsplite.stop().animate({ opacity: 0 }, 2000) })
jsplite.mousedown(function (e) {
j['Fn'] && j['Fn'].call(_self);
var screenX = e.screenX, w = jQuery(_self).width();
jQuery(document).mousemove(function (e2) {
curW = j.FloatD == "left" ? w + (e2.screenX - screenX) : w - (e2.screenX - screenX);
if (curW >= j.MaxW) { curW = j.MaxW; };
if (curW jQuery(_self).css({ width: curW });
dw = curW;
});
jQuery(document).mouseup(function () {
jQuery(document).unbind();
});
if (Close == true) {
jQuery(this).css({ cursor: "e-resize", opacity: 0.8 });
jQuery(_self).animate({ width: dw }, 200);
Close = false;
};
return false;
});
jsplite.dblclick(function () {
if (Close == false) {
_selfclose();
};
return false;
});
jsplith.click(function () {
if (Close == false) {
_selfclose();
};
return false;
});
function _selfclose() {
jsplite.css({ cursor: "pointer", opacity: 1 });
jsplith.css({ background: j.Btn.cBg.Out, "background-image": j.BgUrl });
jQuery(_self).animate({ width: "6px" }, 400);
Close = true;
}
});
}
});
1. 增加对JQuery和刚刚生成的jsplit.js文件的引用。
2. 为要被拖动大小的DIV或TD定义ID。
3. 增加Javascript调用Split。


 Comment changer la couleur du pinceau PS
 Quels sont les cycles de vie de vue3
 Comment acheter du Bitcoin
 Analyse comparative de iqooneo8 et iqooneo9
 La différence et le lien entre le langage C et C++
 Comment résoudre les erreurs rencontrées dans GeForce Experience
 Comment ouvrir le format TIF sous Windows
 L'ordinateur indique que msvcr110.dll est manquant et comment le résoudre