
Have you ever wanted to capture a screenshot of an entire web page quickly and easily? Google Chrome provides a simple way to easily get the content you need, whether for work, education, or personal purposes. In this guide, PHP editor Yuzai will introduce in detail the operation process of taking screenshots of the entire webpage on Google Chrome to help you easily solve this problem. Continue reading below to learn how to seamlessly capture screenshots of entire web pages using Google Chrome.
Steps to install the Google screenshot plug-in:
We first click on the icon in the upper right corner and select [Extensions] under [Tools].
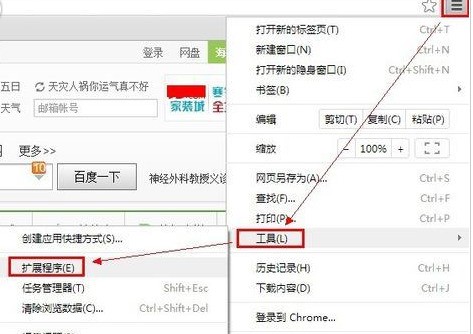
After entering, click [Get More Extensions] at the bottom.

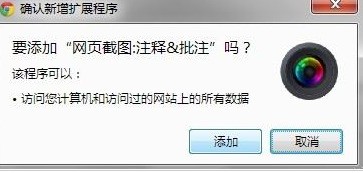
Then enter [Screenshot] in the search box, find the screenshot tool in the picture, and click [Free] to install it.

The following dialog box will pop up, click Install.
After successful installation, there will be an icon on the far right of the browser, as shown in the figure.

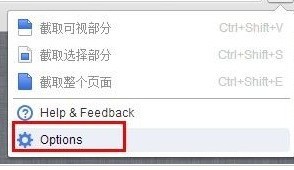
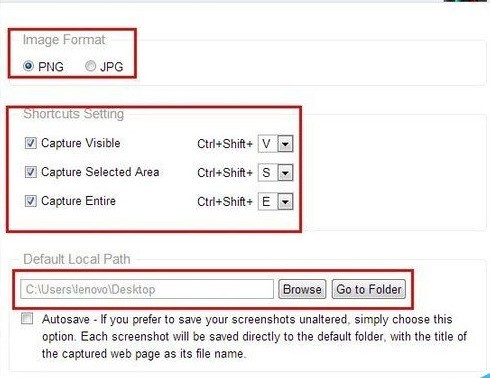
Before taking a screenshot, let’s set up the screenshot format, shortcut keys, and image save location. That’s it. Now you can start taking screenshots.
google screenshot
Click the icon first, and you will see three options: intercept the visible area, intercept the entire web page, intercept the selected part, and click the corresponding Just choose.
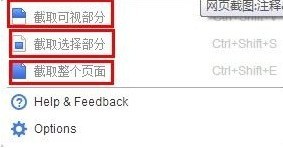
The following functional navigation bar will pop up. You can add text, circle key points, blur, etc. After it comes out, click Save. The three screenshots are the same.
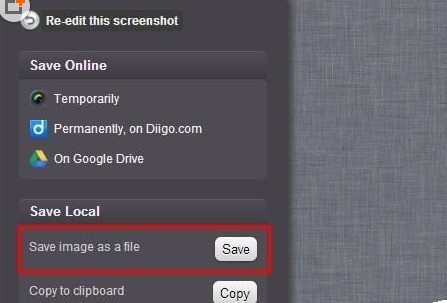
Then, enter this page, see [save] on the right, which means save, click it, and then you can choose the save location, thus completing the entire screenshot process.
Notes
You need to pay attention when intercepting the selected area. Click and drag the cross mark to take a screenshot.
Capture the visible area, which means only taking a screenshot of the area that can be seen by the current browser.
The above is the detailed content of The operation process of taking a screenshot of the entire webpage in Google Chrome. For more information, please follow other related articles on the PHP Chinese website!
 Solution to Google Chrome not working
 How to use the convert conversion function
 What is a MYSQL stored procedure?
 HTML image code collection
 gt540
gt540
 What directory search engines are there?
 Taobao password-free payment
 How to solve the problem of no internet access when the computer is connected to wifi


