
Having trouble drawing a circle in AutoCAD 2014? Don't worry, PHP editor Shinichi provides you with a detailed guide to drawing circles. This tutorial walks through the process of drawing a donut using AutoCAD 2014 commands, from creating a basic circle to setting the width and center of the circle. By reading the following content, you will master the techniques of drawing circles in AutoCAD 2014 and easily solve your drawing problems.
Step one: First open the AutoCAD2014 software, click the plus sign, and select acad3D.dwt from [Select Template] (as shown in the picture).
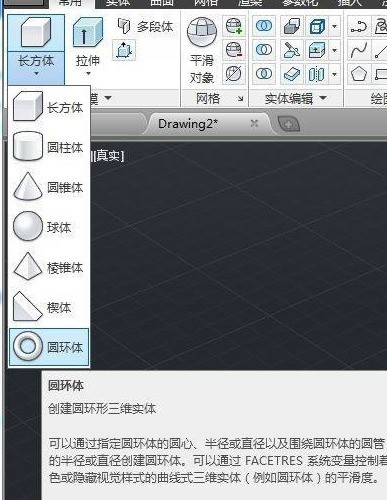
Step 2: Select the [Common]>>[Modeling]>>[Torus] option in the menu bar (as shown in the picture).
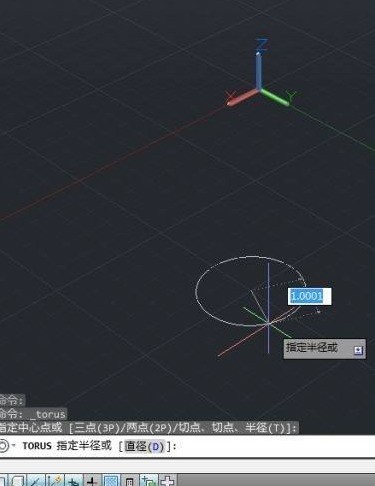
Step 3: Click the left mouse button in the drawing area to specify the position of the center point of the circle (as shown in the picture).

Step 4: Then drag the mouse to specify the radius of the circle (as shown in the picture).
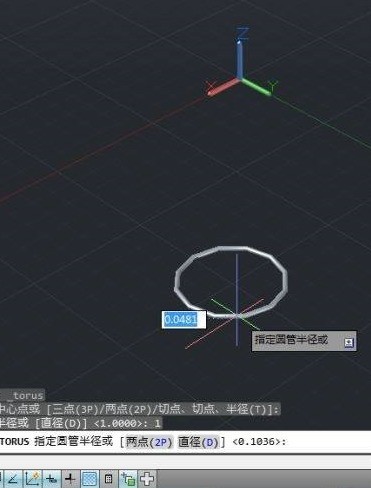
Step 5: Finally, move the cursor or enter a value directly to specify the radius of the circular tube (as shown in the picture).
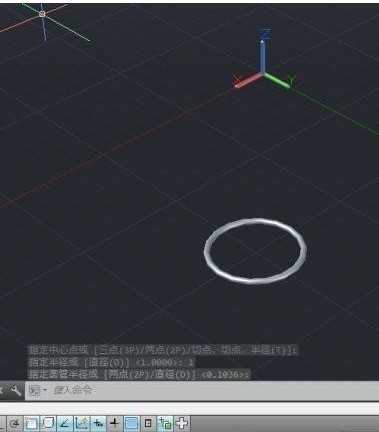
Step 6: After specifying the radius of the circular tube, click the left mouse button to complete the drawing of the ring (as shown in the picture).
The above is the detailed content of How to draw a circle in AutoCAD2014_How to draw a circle in AutoCAD2014. For more information, please follow other related articles on the PHP Chinese website!
 Association rules apriori algorithm
 How to use dict function in Python
 How to restore friends after being blocked on TikTok
 The difference between master and host
 Yiou Exchange app official website download address
 How to make ppt pictures appear one by one
 What does screen recording mean?
 Minimum configuration requirements for win10 system


