
How to set the last page of a Word file to display on half an A4 page? When this happens, you need to separate the last page from the page layout. PHP editor Youzi will introduce how to operate in detail and teach you step by step to achieve the effect of displaying half an A4 paper on the last page. Read on below to learn the steps and how to set it up.
Open the word document. You can see that the last page of the document is displayed vertically on A4 paper.

Click [File]-[Options]-[Show]-check [Show all formatting marks]. This step is to make it easier to see the symbols that need to be set later. Return to the document and you can see that [Edit Mark] is selected.
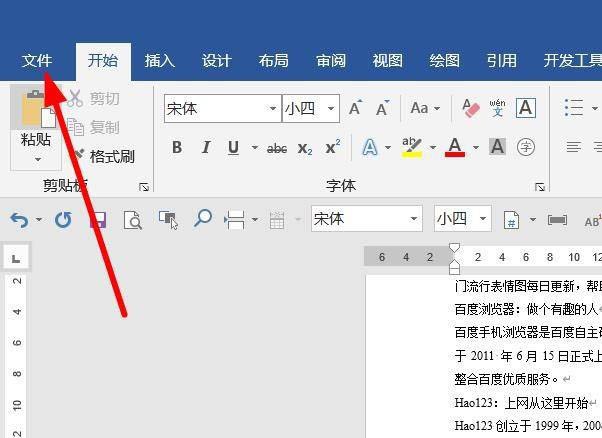
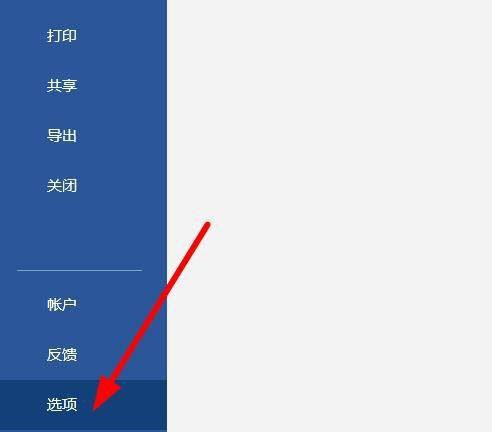
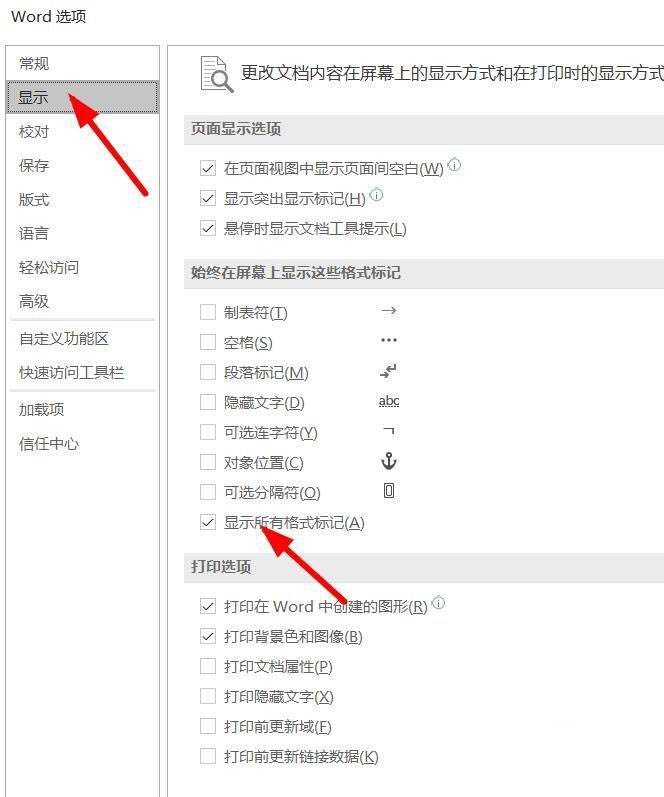

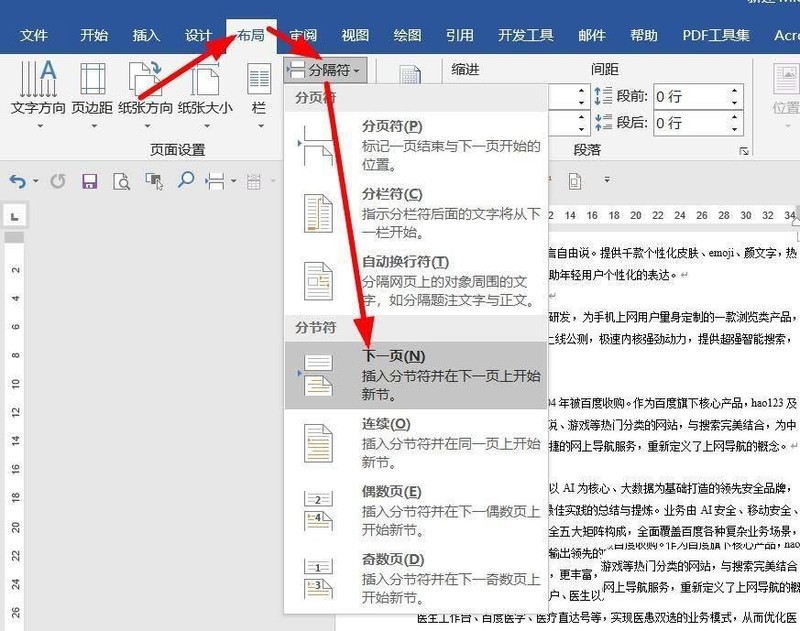
Position the mouse at the end of the second to last page, click [Layout] - [Separator] - [Section Break Next Page 】. You can see the section break symbol.
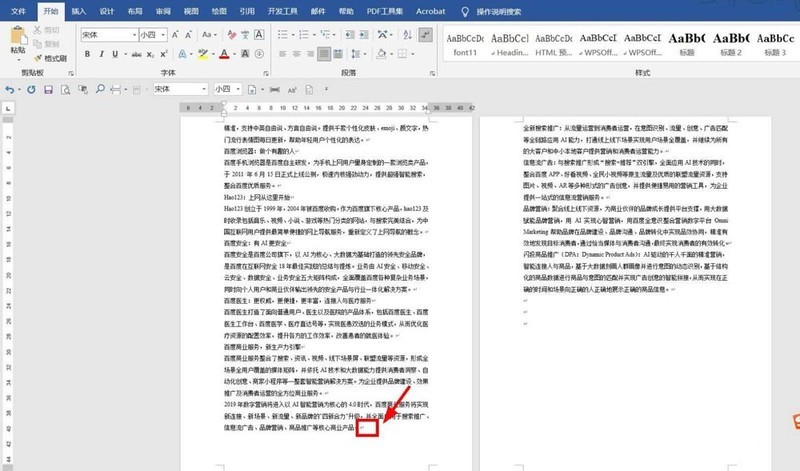
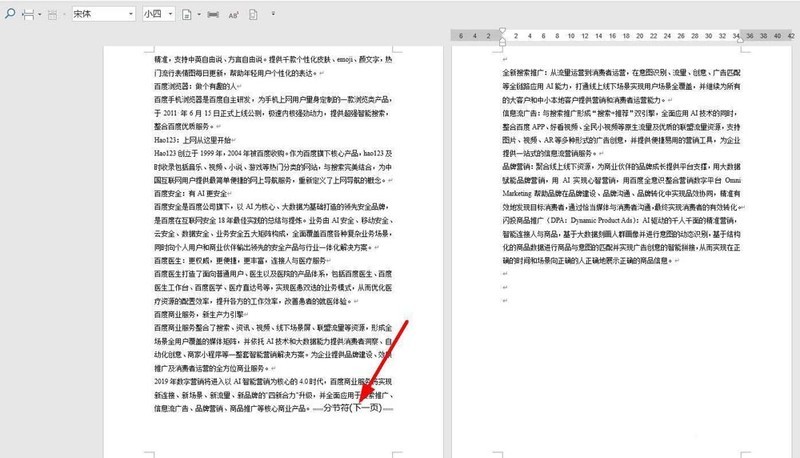
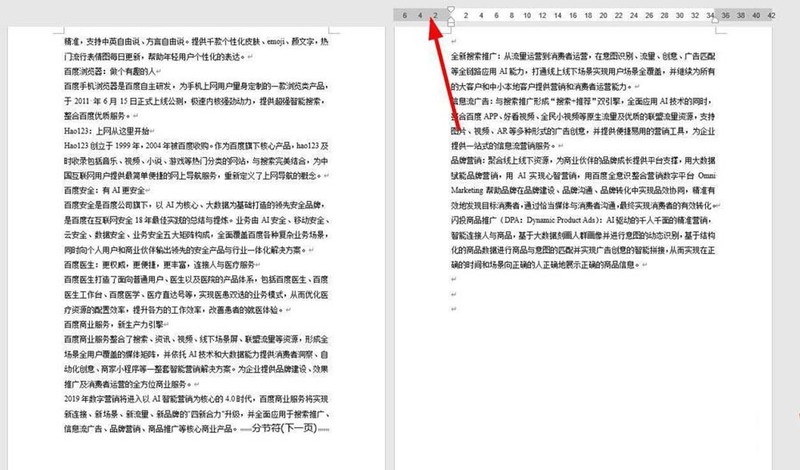
#Then on the last page, double-click the blank space of the ruler. Call up the [Page Setup] window. Click [Paper].

Select [A5] paper and select Apply to [This Section].
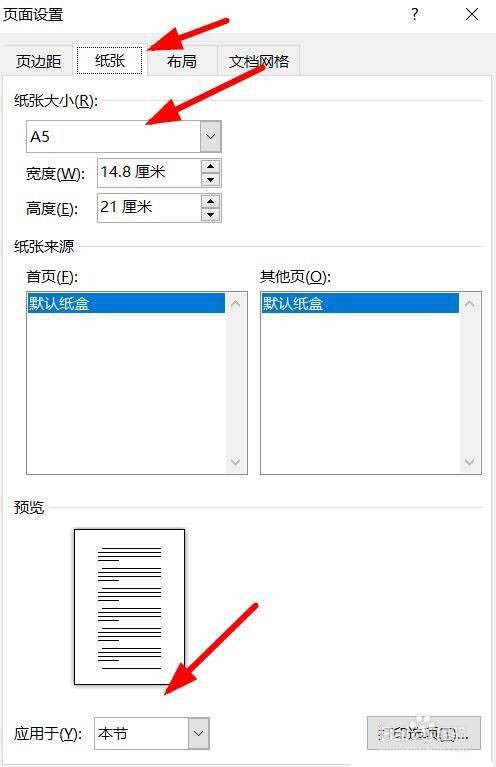
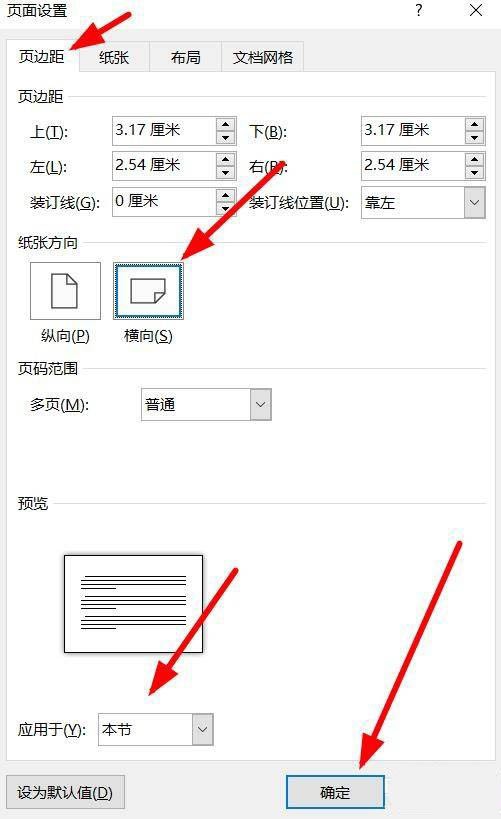
Then click [Margins] and click the paper orientation to [Landscape]. Set to apply to [this section]. Click [OK].
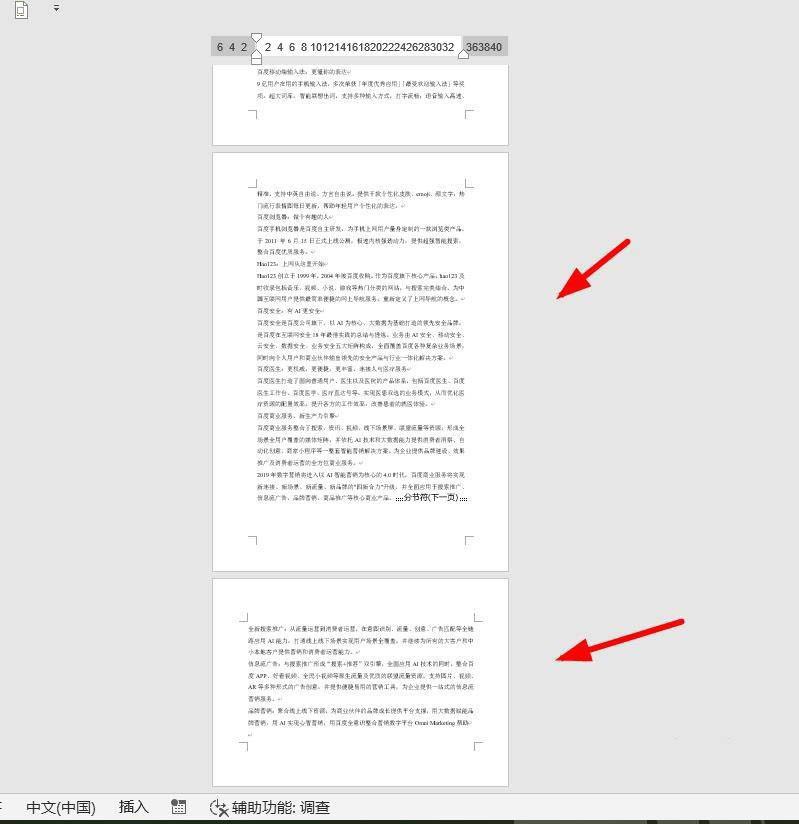
Return to the document and you can see that the last page of the document is displayed as half a page of A4 paper.
The above is the detailed content of How to set the display of half A4 paper on the last page of word file_Tutorial on setting the display of half A4 paper on the last page of word file. For more information, please follow other related articles on the PHP Chinese website!


