
For Win11 users, setting advanced sharing permissions on files is crucial because it can help refine your control over file access. Are you struggling with how to achieve this? PHP editor Youzi has now prepared a detailed guide for you, which will show you step by step the complete process of setting advanced file sharing permissions in Win11. Read on to make your file sharing more secure and efficient!
1. "Win R" shortcut key to open the run, enter "compmgmt.msc", and press Enter to open.
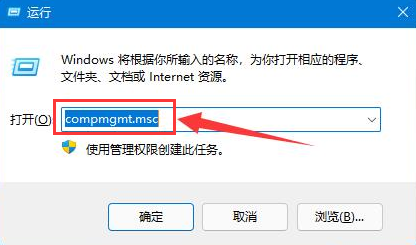
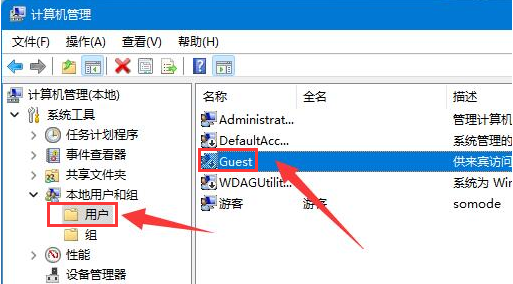
#2. In the window interface that opens, click the "User" option in "Local Users and Groups" on the left, and then click "Guest" on the right.
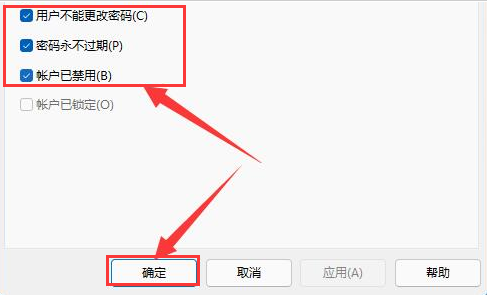
#3. Then check all three options in the picture below and click "OK".
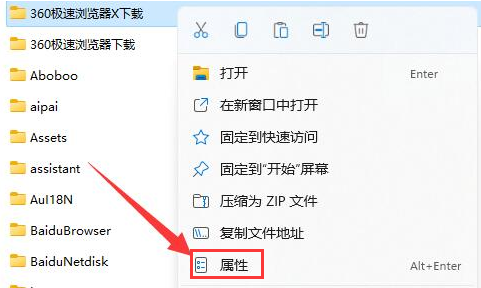
#4. Then find the file you want to share, right-click and select "Properties" in the option list to open it.
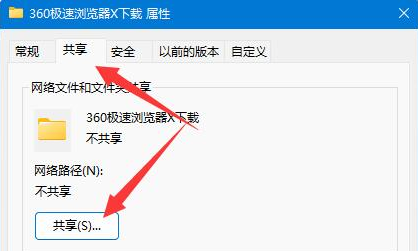
#5. In the window interface that opens, click the "Share" tab in the top, and then click the "Share" button in the bottom.
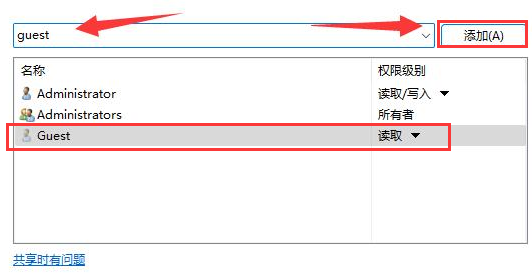
#6. Then enter "guest" in the input box above, click the "Add" button on the right, and change "Permissions" to "Read/Write" ".
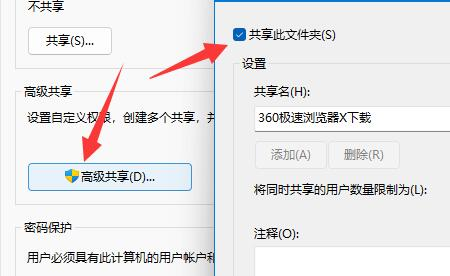
#7. Finally, click the "Advanced Sharing" button and check the "Share this folder" box in the new interface.
The above is the detailed content of How to set advanced file sharing permissions in Win11. For more information, please follow other related articles on the PHP Chinese website!
 There is no WLAN option in win11
 How to skip online activation in win11
 Win11 skips the tutorial to log in to Microsoft account
 How to open win11 control panel
 Introduction to win11 screenshot shortcut keys
 Windows 11 my computer transfer to the desktop tutorial
 Solution to the problem of downloading software and installing it in win11
 How to skip network connection during win11 installation


