php editor Apple will introduce to you the detailed methods on how to add two page numbers to a WPS paper and how to set two page numbers in WPS. WPS paper is an essential tool for academic writing and has its own unique needs for adding different styles of page numbers. Through the interpretation of this article, you will learn how to add different styles of page numbers in WPS documents to meet the requirements of different academic standards and improve the quality of the paper.
1. Open wps, click [Insert] and select the page number.

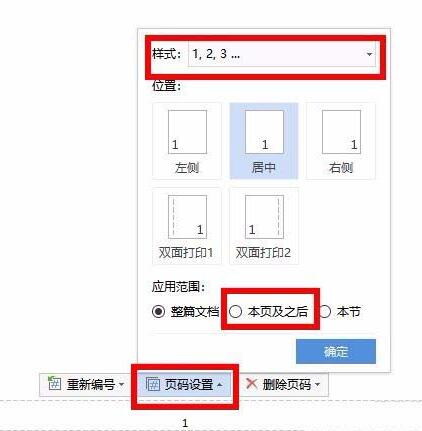
2. Click the page number [1, 2, 3] at the bottom of the page. [Page Number Settings] will appear. Select the page number style, position, and starting page (this page and this page) as required. page).

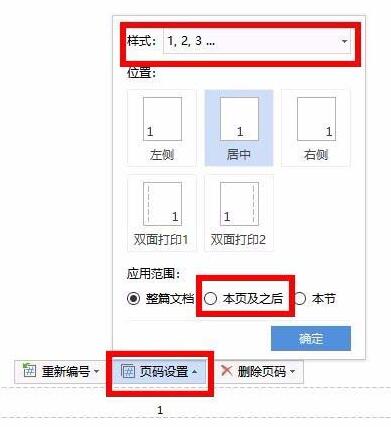
3. Click to open the lower end of the page where the second page number will be inserted. Open [Page Number Settings] and select the page number style, position, and starting page (this page and this page) as required. page).

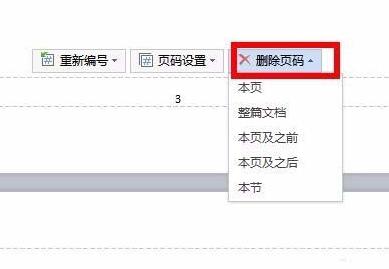
4. If you need to delete the page number of a certain page, select it according to the situation.

The above is the detailed content of How to add two page numbers to a WPS paper - Detailed method of setting two page numbers in WPS. For more information, please follow other related articles on the PHP Chinese website!
 Word page number starts from the third page as 1 tutorial
 wps replacement shortcut keys
 How to clear the WPS cloud document space when it is full?
 How to set page numbers in word
 What is the difference between j2ee and springboot
 absolutelayout
 How to convert excel to vcf
 How to use subplot in matlab


